Leather-Upholstered Arm-Chair
posts, rails, inch, seat, piece, front and glue
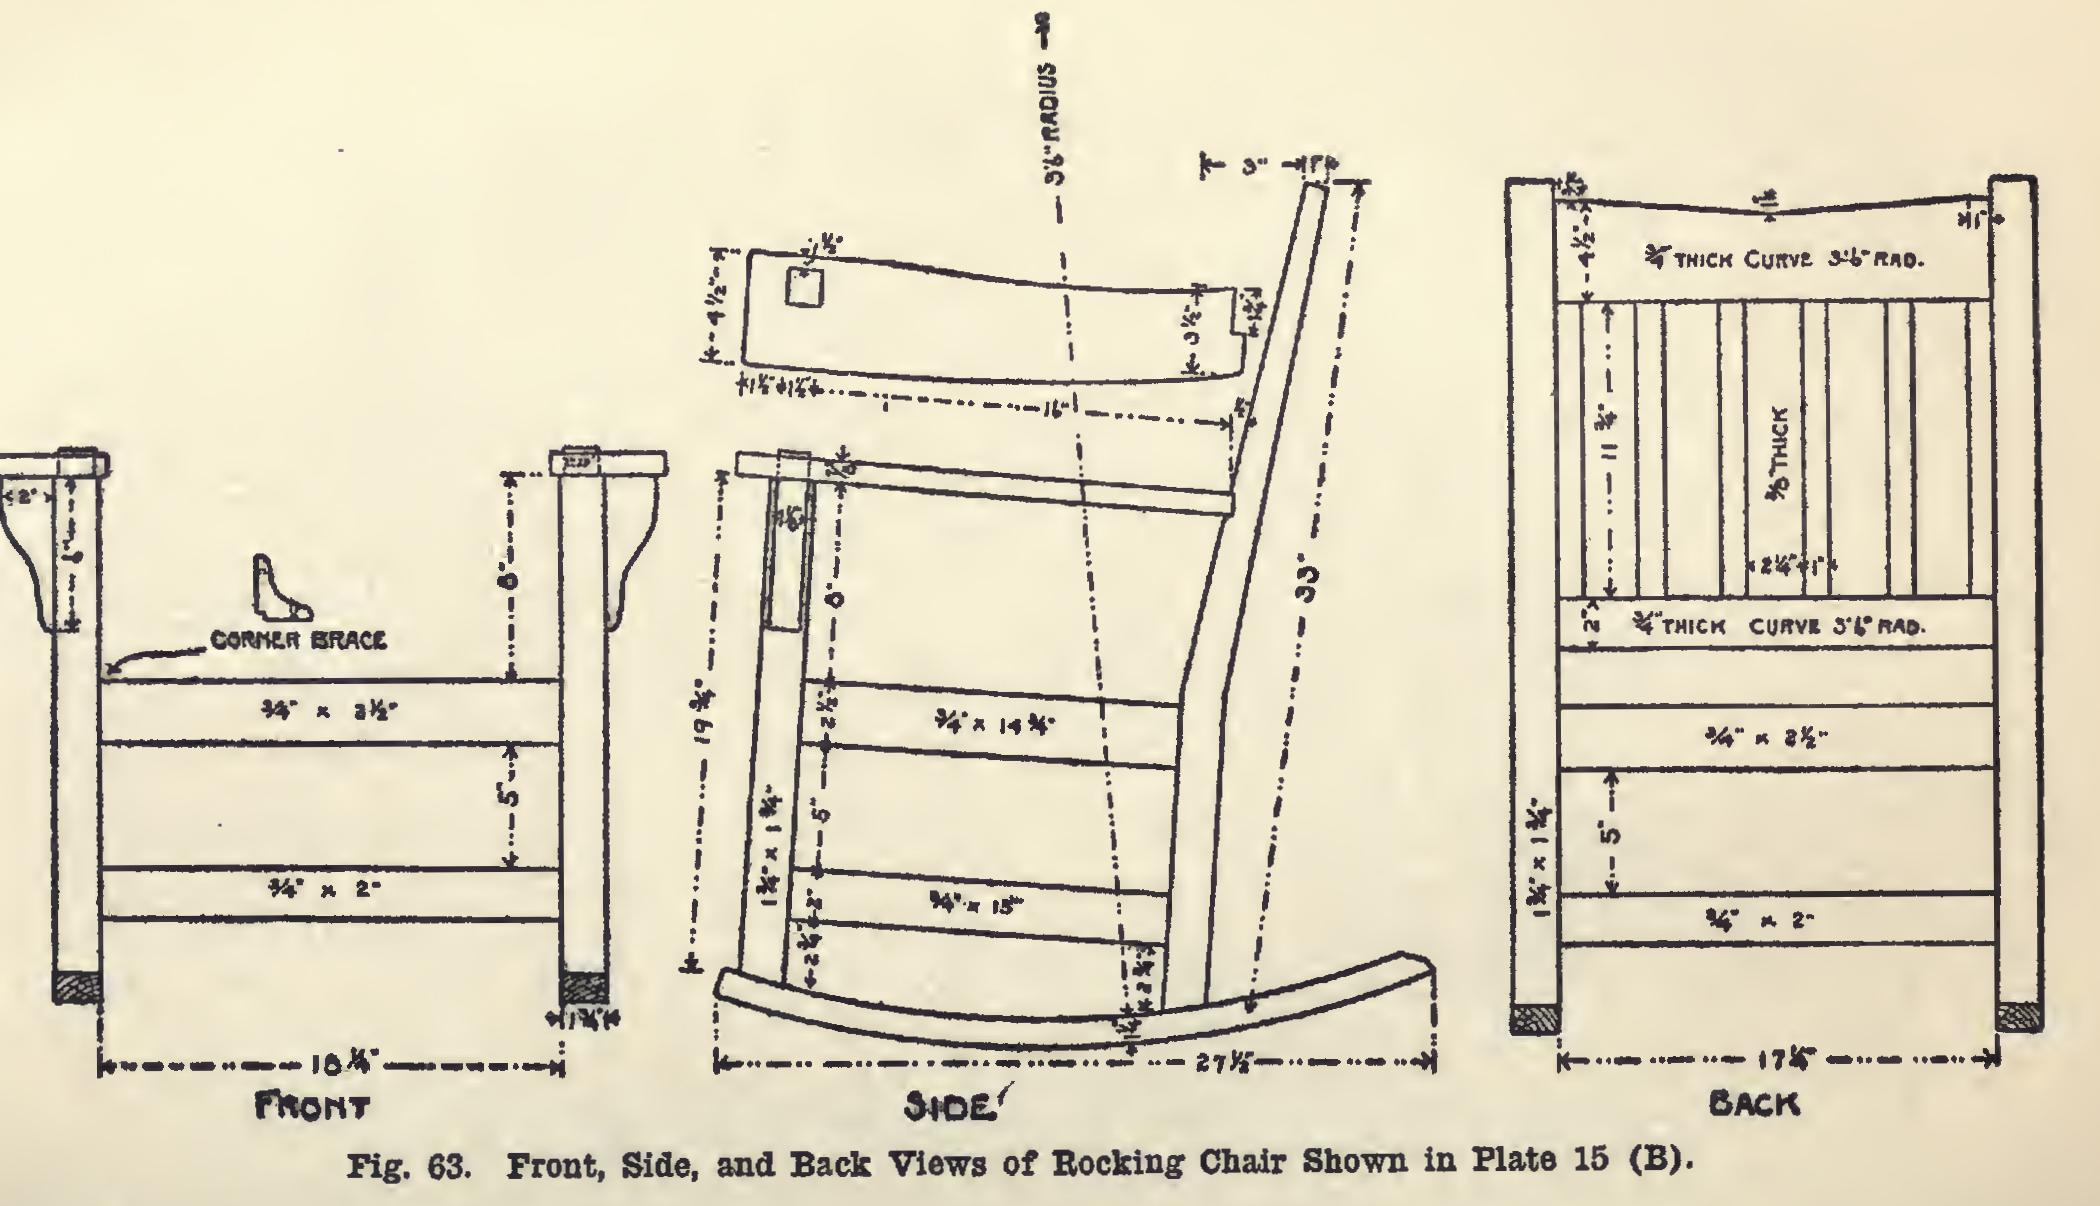
LEATHER-UPHOLSTERED ARM-CHAIR The illustrated in Plate 15 (A) and detailed in Fig. 62, is of very substantial design and construction. It is a companion piece to the mission rocker (Plate 15, B).
We give all the important dimensions, so that the amateur as well as the experienced fur niture designer may not be placed at a disad vantage when he begins to work. Nothing is more exasperating and discouraging to a worker than to find that some important dimension has been omitted, so that he must hazard a guess as to what it ought to be. Experience has probably shown him that a variation of an inch, or often times even a fraction of an inch, means a change in the appearance of a proportion for a design, generally for the worse, inasmuch as the original designer has usually given considerable study to his proportions. He would much prefer to have this uncertainty removed by seeing sure figures for the parts. We have aimed to accom modate him.
Order the pieces mill-planed and sand papered on four surfaces to the sizes specified in the accompanying list. Plain-sawed red oak will finish nicely, and is very appropriate for a mission design and finish. Quarter-sawed white oak makes a rich appearance.
In the accompanying stock bill for the chair, width and thickness are specified exact, except for rear posts; but to the lengths, enough surplus has been added to allow for squaring the ends.

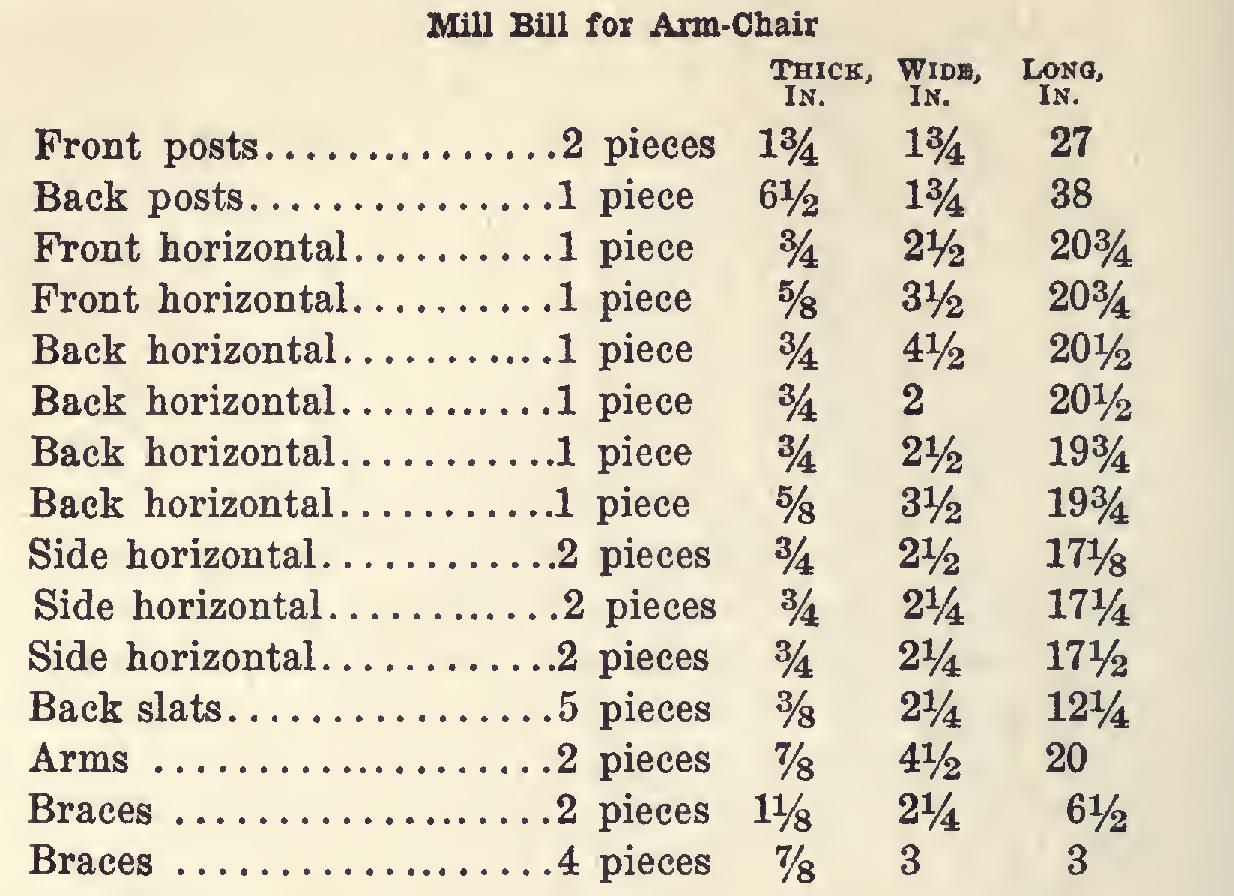
Begin work on the posts first. The front posts should have one end of each squared, after which they can be cut to exact length. It will be noticed that there is a tenon on the upper end of each, which is to extend slightly above the top surface of the arm, to which it is to be pinned from the inside with a wooden dowel.
The rear posts, according to the stock bill, are specified the exact width. By exercising forethought, both may be got from the piece ordered.
The tops and bottoms of these posts should have their edges slightly chamfered, to prevent their slivering.
The shape of the arm is a little out of the ordinary, but the drawing indicates quite clearly what it is to be. It is fastened to the rear post by means of dowels and glue, after the other parts have been put together.
Next prepare the curved parts of the back. These parts are worked to size, after which they are placed in a box and thoroughly steamed.
If nothing better is at hand, nail four boards together and close one end, leaving room for the end of a rubber hose to enter. Place the boards in the box, stuff rags in the other end, and con nect the hose with the spout of a boiling teakettle.
When the wood is pliable, take out the pieces, and clamp them to a curved form previously prepared, which shall have a surface curve of 3 feet 6 inches radius. While these are "set ting," go ahead with the laying-out of the mor tises and tenons of posts and rails. If the rockers are to be shaped by steaming, the stock bill for that part should be lessened. accordingly.
Inasmuch as the width of the front exceeds that of the back by one inch, allowance must be made for "slant," either in the tenons of the side rails or in their mortises.
It will also be noted that the top side rail is inch shorter than bottom side rail, which means that the shoulders of the tenon entering the back post must be laid off with bevel and not try-square.
Put the back and front together; and when the glue on them has dried, put the side rails in place, and then the arms.
The frame is stiffened by fastening with screws four braces to the inside of the seat, one at each post.
The brackets under the arms are to be dow eled and glued fast to posts and arms.
The surplus glue should now be scraped off, and any irregularities scraped and sanded smooth.
The chair is now ready for whatever finish is to be applied.
The seat for this chair is made as follows: First stretch over and around the seat rails, and tack on their under side, a canvas. On this, cross-weave, and fasten underneath, upholster er's webbing. On this, place a stuffing of hair or elastic felt. A piece of muslin draws this in place, and on top of the muslin comes the final covering of Spanish leather.
Along the side of the rails and near the bot tom a row of ornamental-headed nails will give an added touch of permanency.