Pierced Ornamentation
edge, shown, lines, top, lay, line and piece
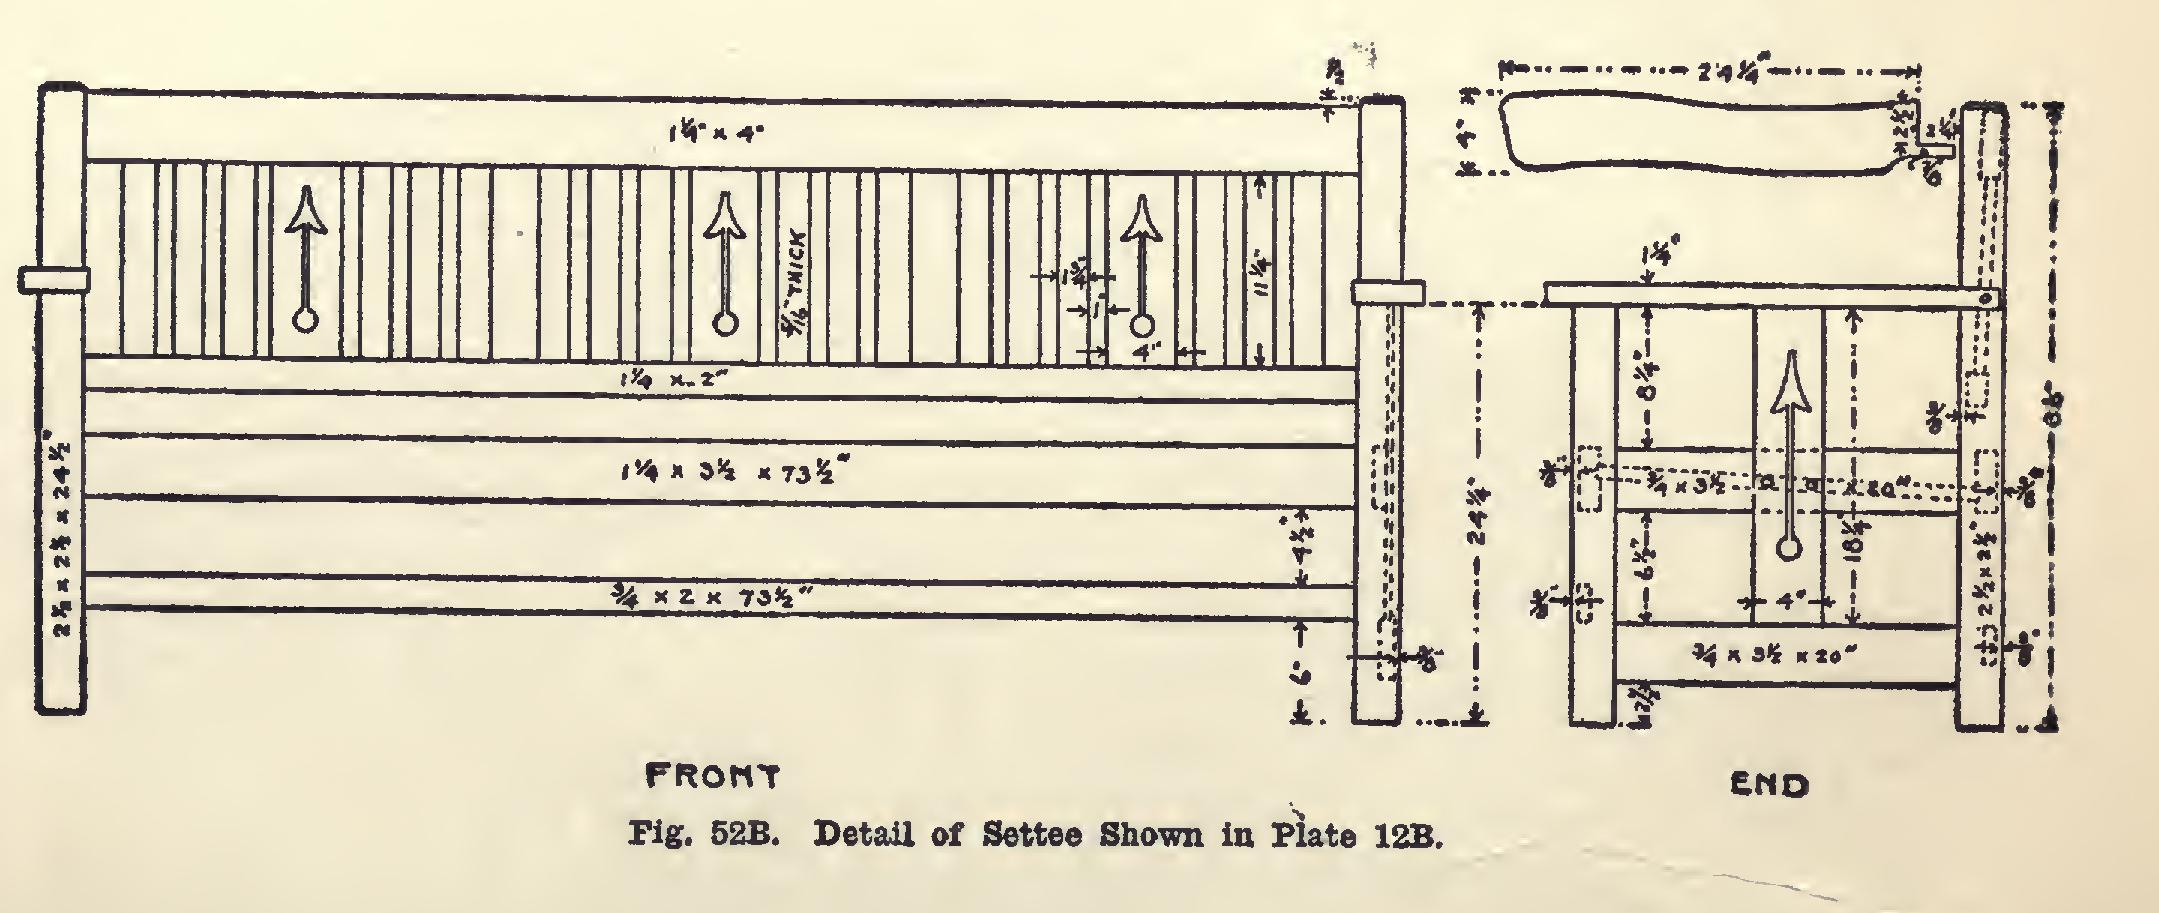
PIERCED ORNAMENTATION The two pieces of furniture illustrated in Plates 12 A and 12 B and detailed in Figs. 52 A and 52 B, are a little different from most of those heretofore described, in that they possess pierced ornamentation. This kind of decoration is very effective when properly designed and appropri ately used. There is ever a danger that it may develop into mere meaningless "scroll work" such as we used to find, and do occasionally find even to-day, upon our factory productions—mere ornamentation having no integral part in the design of the piece of furniture, and oftentimes with nothing to commend it in the way of good lines or individual attractiveness. This same extreme we have all observed in the meaningless filigree work which covered the porches and gables of the houses of some fifteen years ago.
However, if such a style of ornamentation is simple and appropriate, it will frequently serve a good purpose in lightening the effect of a piece of furniture which otherwise might appear heavy, clumsy, and uninteresting.
To make the tabouret, the following pieces are needed. Secure a well-seasoned white oak, quarter-sawed, and have the pieces mill-planed and smoothly sandpapered upon the two broad surfaces.

With the sweep-arc lay out the circular top. A moulding plane will be needed to shape the edge as shown. If such a plane is not to be had, the edge may be finished rounding with the spokeshave or plane, or it may be left square to the surface.
The shelf is rather odd in shape, but is not difficult to lay out. As easy a way to do this as any is to joint one of the edges of the board straight and square; measure off in the middle of this edge seven and three-quarters inches. From the extremities of this line, using the bevel set to 60 degrees, lay two lines as shown in Fig. 52 A. Measure up these lines from the edge of the board five and three-eighths inches each. Through these points, lay off lines at 60 degrees again, but reversed in their direction. Along these, measure seven and three-quarters inches, and draw the last line. The edges to which the legs are secured are to be shaped ac cording to the plan. Make a full-sized scale
drawing, and set the bevel from these lines.
To get the angle of 60 degrees on the bevel, square a line across a board at right angles to a straight edge. Measure along the edge from this line two units, and, placing the beam of the bevel against the edge, adjust the blade until there are four units on the blade, the first and last of which rest upon the line and the edge of the board respectively.
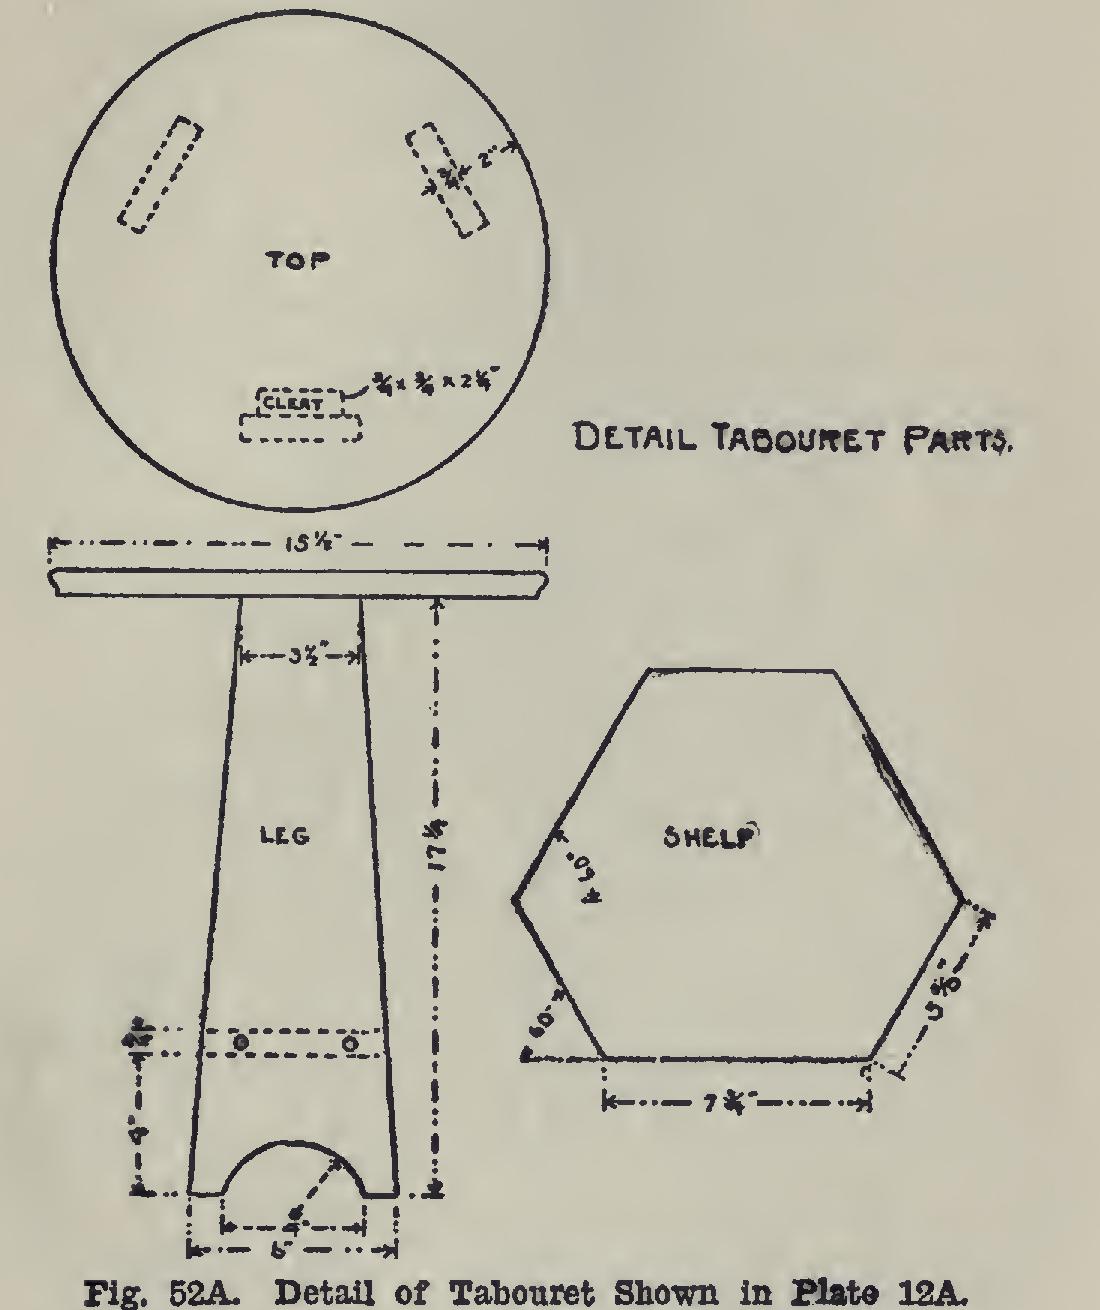
The legs, as shown, are narrower at the top than at the bottom. Make and use a joint-edge until the two ends have been properly squared, then lay out and cut the slopes of the sides. For the curve at the bottom, use about a two-inch radius, but drop its center one-half an inch below the lower end of the leg so that the curve may not show as a complete half-circle.
The decoration shown in the photograph will require a pattern. Draw one-half freehand, full size, on a piece of paper; fold over, placing a piece of double-surfaced carbon paper between the parts; and complete the design. Transfer this to the wood, and bore and saw out the shapes.
The cleats are to be shaped so as to fit the angle made by the sloping legs and the top. Plane a little off the corner which is not adjacent to top or leg.
It will be found convenient to stain and fill the parts before they are put together.
Common screws are used for making the fast enings. In the cleats, holes are bored and coun tersunk, two in each leg and two up into the top in each cleat. For the lower part, holes are bored large enough to receive the entire head of the screw to a depth of one-quarter of an inch. Round plugs are glued and inserted in these holes after the screws are placed. These plugs project slightly and have their ends slightly rounded.
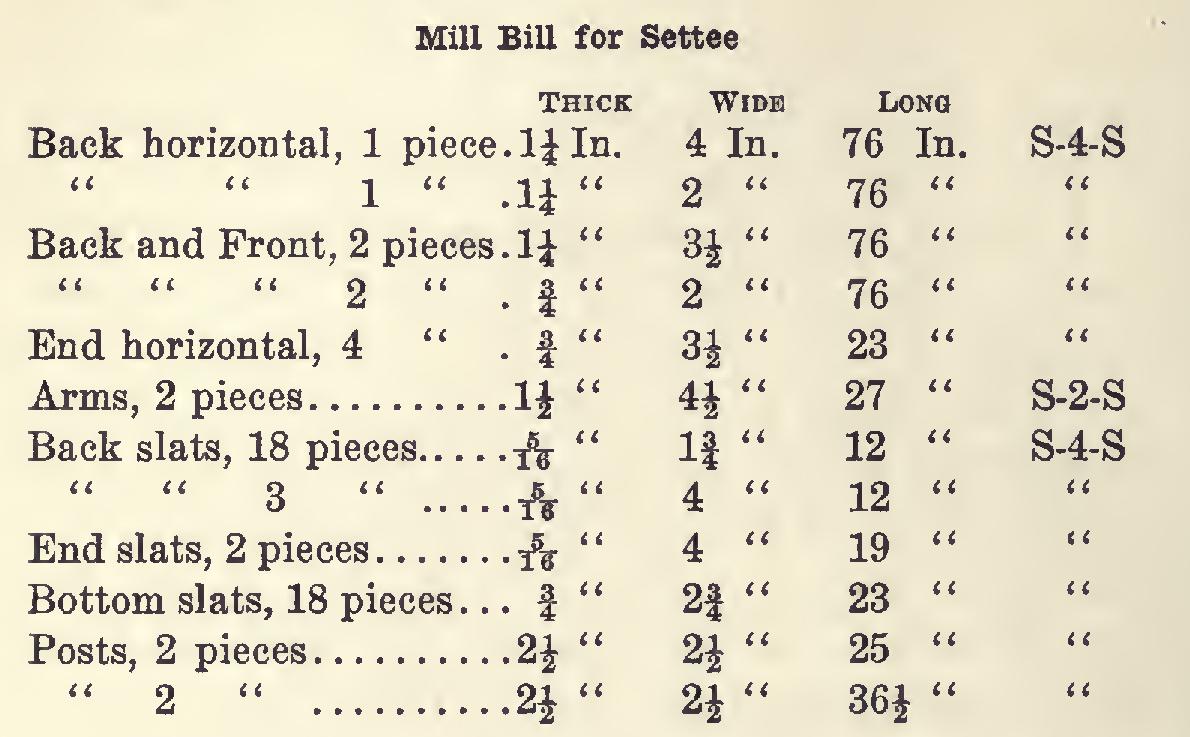
: The settee shown in Plate 12 B is of the maxi mum length, but may, of course, be made shorter if desired. As in the tabouret, use well-seasoned quarter-sawed white oak. Some of the pieces will be specified for mill-planing on two sides, but most of them should be got planed and sanded on four surfaces. Where the edges are to be shaped, as in the arms, nothing is gained by having the edges planed.