A Piano Bench
inches, line, fourteen, piece, lines, simple and design
A PIANO BENCH A favorite piece of woodwork with most ama teur craftsmen is the piano bench. Not that they desire it for their own use, necessarily; but there seems to be a demand on the part of the ones at home, which the ambitious amateur seeks to meet.
At first thought, it seems an easy thing to design such a piece of furniture. It must needs be of a certain height, length, and width; and, if these conditions were all, it would be a prob lem easily solved.
A piano bench should be simple in its con struction, yet it must not be so simple that one might mistake it for the wash-bench. A sug gestion of a wash-bench in a music room or a parlor would hardly be agreeable. The piano bench must be so well constructed and finished that it may "hold its own" with the piano which it is to serve.

The design shown in Plate 10 (A), a work bag drawing of which is given in Fig. 42, is extremely simple in its construction; yet the keyed tenon, together with the unusual lapping of the sides on the top, instead of the top over the sides, is interesting enough to keep one from thinking of wash-benches. This bench is made of heavy oak, and finished so that the beauty of the grain shows to the best advantage. The structural lines are simple, and the general ap pearance such that solidity with great strength is suggested.
The dimensions here given may be varied to suit the individual, though the proportions will be found quite satisfactory if no change is made.
Secure, if possible, a plank of oak, mill dressed to one and one-eighth inches, having a width of fully fourteen inches and a length of six feet.
If a plank of the required width cannot be obtained, then the width must be got by dowel ing two pieces together. A description of how this can be done will be found in the section telling how to make a mission table.
Saw this plank into three pieces—one, so that it can be squared up with a length of twenty-six inches; and two pieces, each with a length of twenty-one inches.
With the smoothing plane and steel scraper, smooth the broad surfaces. Square each piece in the usual way—one to fourteen inches by twenty-six inches, the others to fourteen inches by twenty-one inches each.
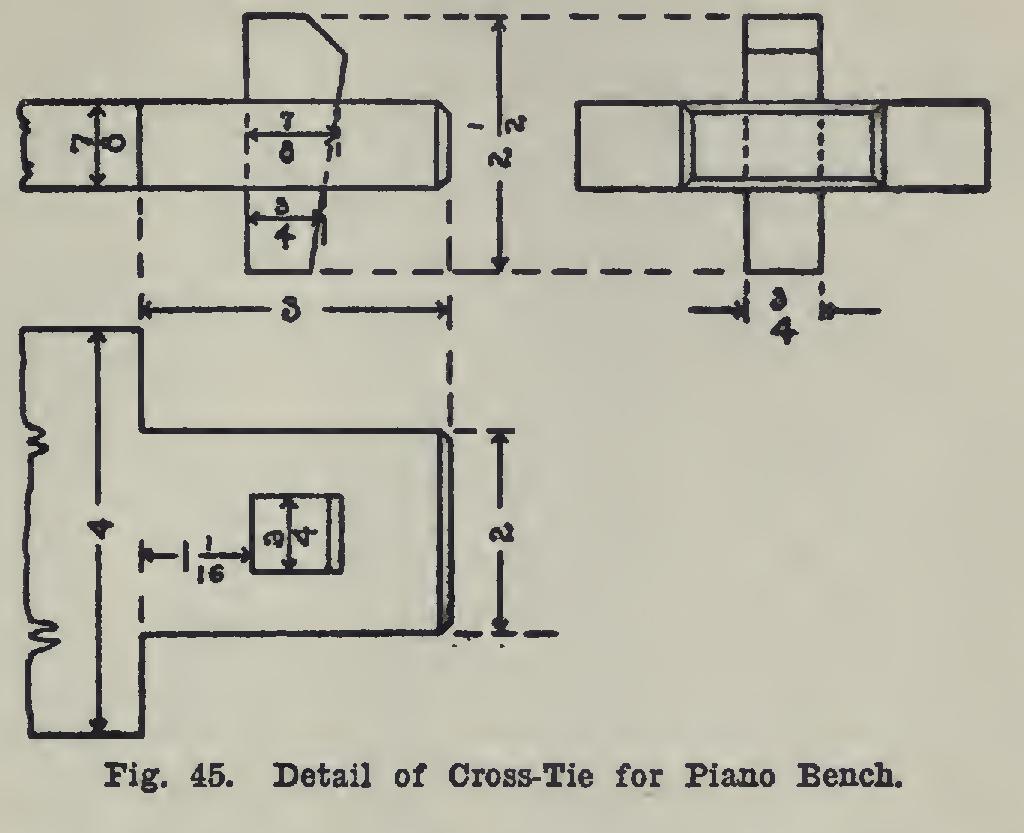
For the cross-tie, secure a piece of seven eighths-inch oak, and, after smoothing the sur faces, square it to four by thirty-two inches.
For the keys, surface a piece of three-quar ter-inch oak. Plane one edge square to the working face, and straight; and make it about six inches long by one and one-quarter inches wide.
Prepare the top of the bench by carefully squaring it to fourteen inches by twenty-six inches. Set the pencil gauge to three-eighths of an inch; and mark upon what is to become the top surface, keeping the gauge-block against the edges only. Also gauge on the edges, keep ing the gauge-block against the top surface. With the plane and scraper, round these two corners to the gauge-lines.
The design for the lower ends of the legs, as shown in Fig. 42, is simple, of pleasing form, and is especially well suited for this particular place; it allows the mortise for the keyed tenon to be brought near the bottom of the leg.
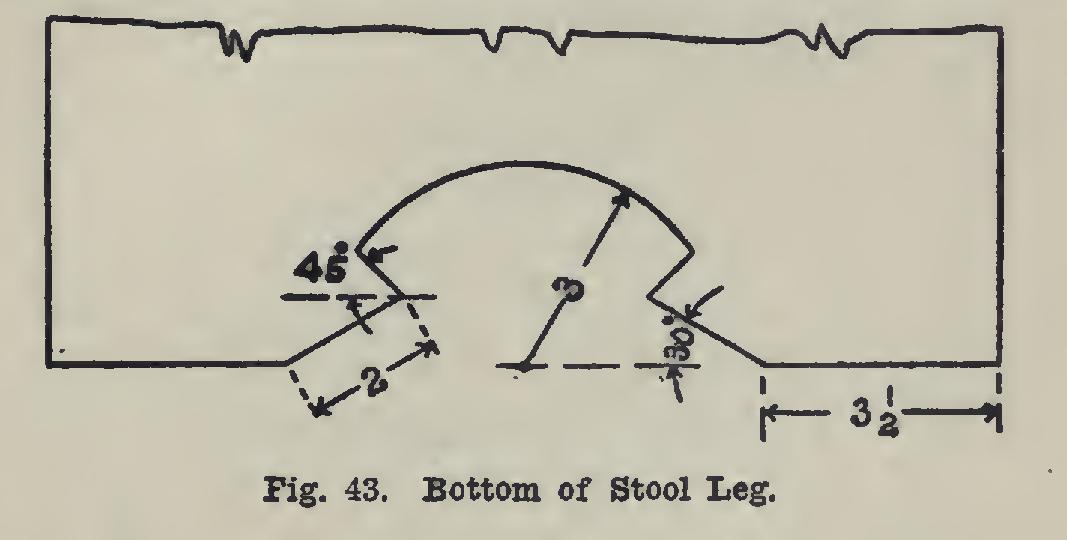
It is made by means of the dividers and the thirty- and forty-five-degree triangles. A good way would be to make a templet, or pattern, of stiff paper. Draw a straight line fourteen inches long to represent the bottom of the leg, Fig. 43. Mark points upon this line three and one-half inches from each end, and draw lines through these points at thirty degrees to the base. Measure two inches from the base line along each of these lines; and through the points thus located, draw lines at forty-five degrees to the horizontal base line. Mark the middle of the base line, seven inches from either end; and with the dividers set to three inches between the points, describe an arc of a circle to meet the lines last drawn.
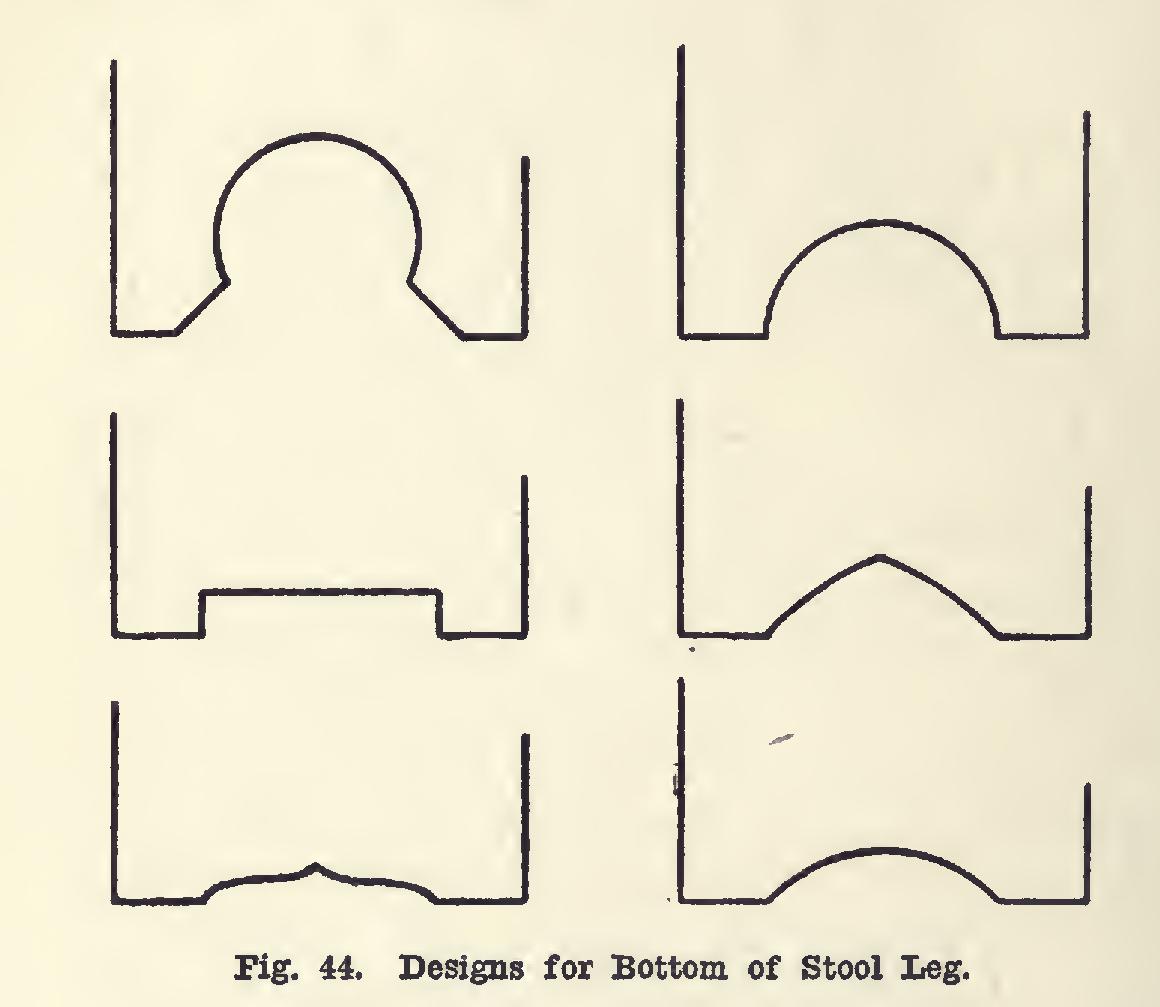
Fig. 44 shows a variety of suggestions for designs. Most of them can be drawn by mechanical means. Those that cannot are to be made by drawing one-half of the design free hand, and, after folding the paper along a center line, tracing the first half of the design upon the second half of the paper; or by cutting the two parts at once while in the folded condition. Cut the curves, after they have been laid out upon the wood, with the turning saw, and finish with the rasp and scraper.