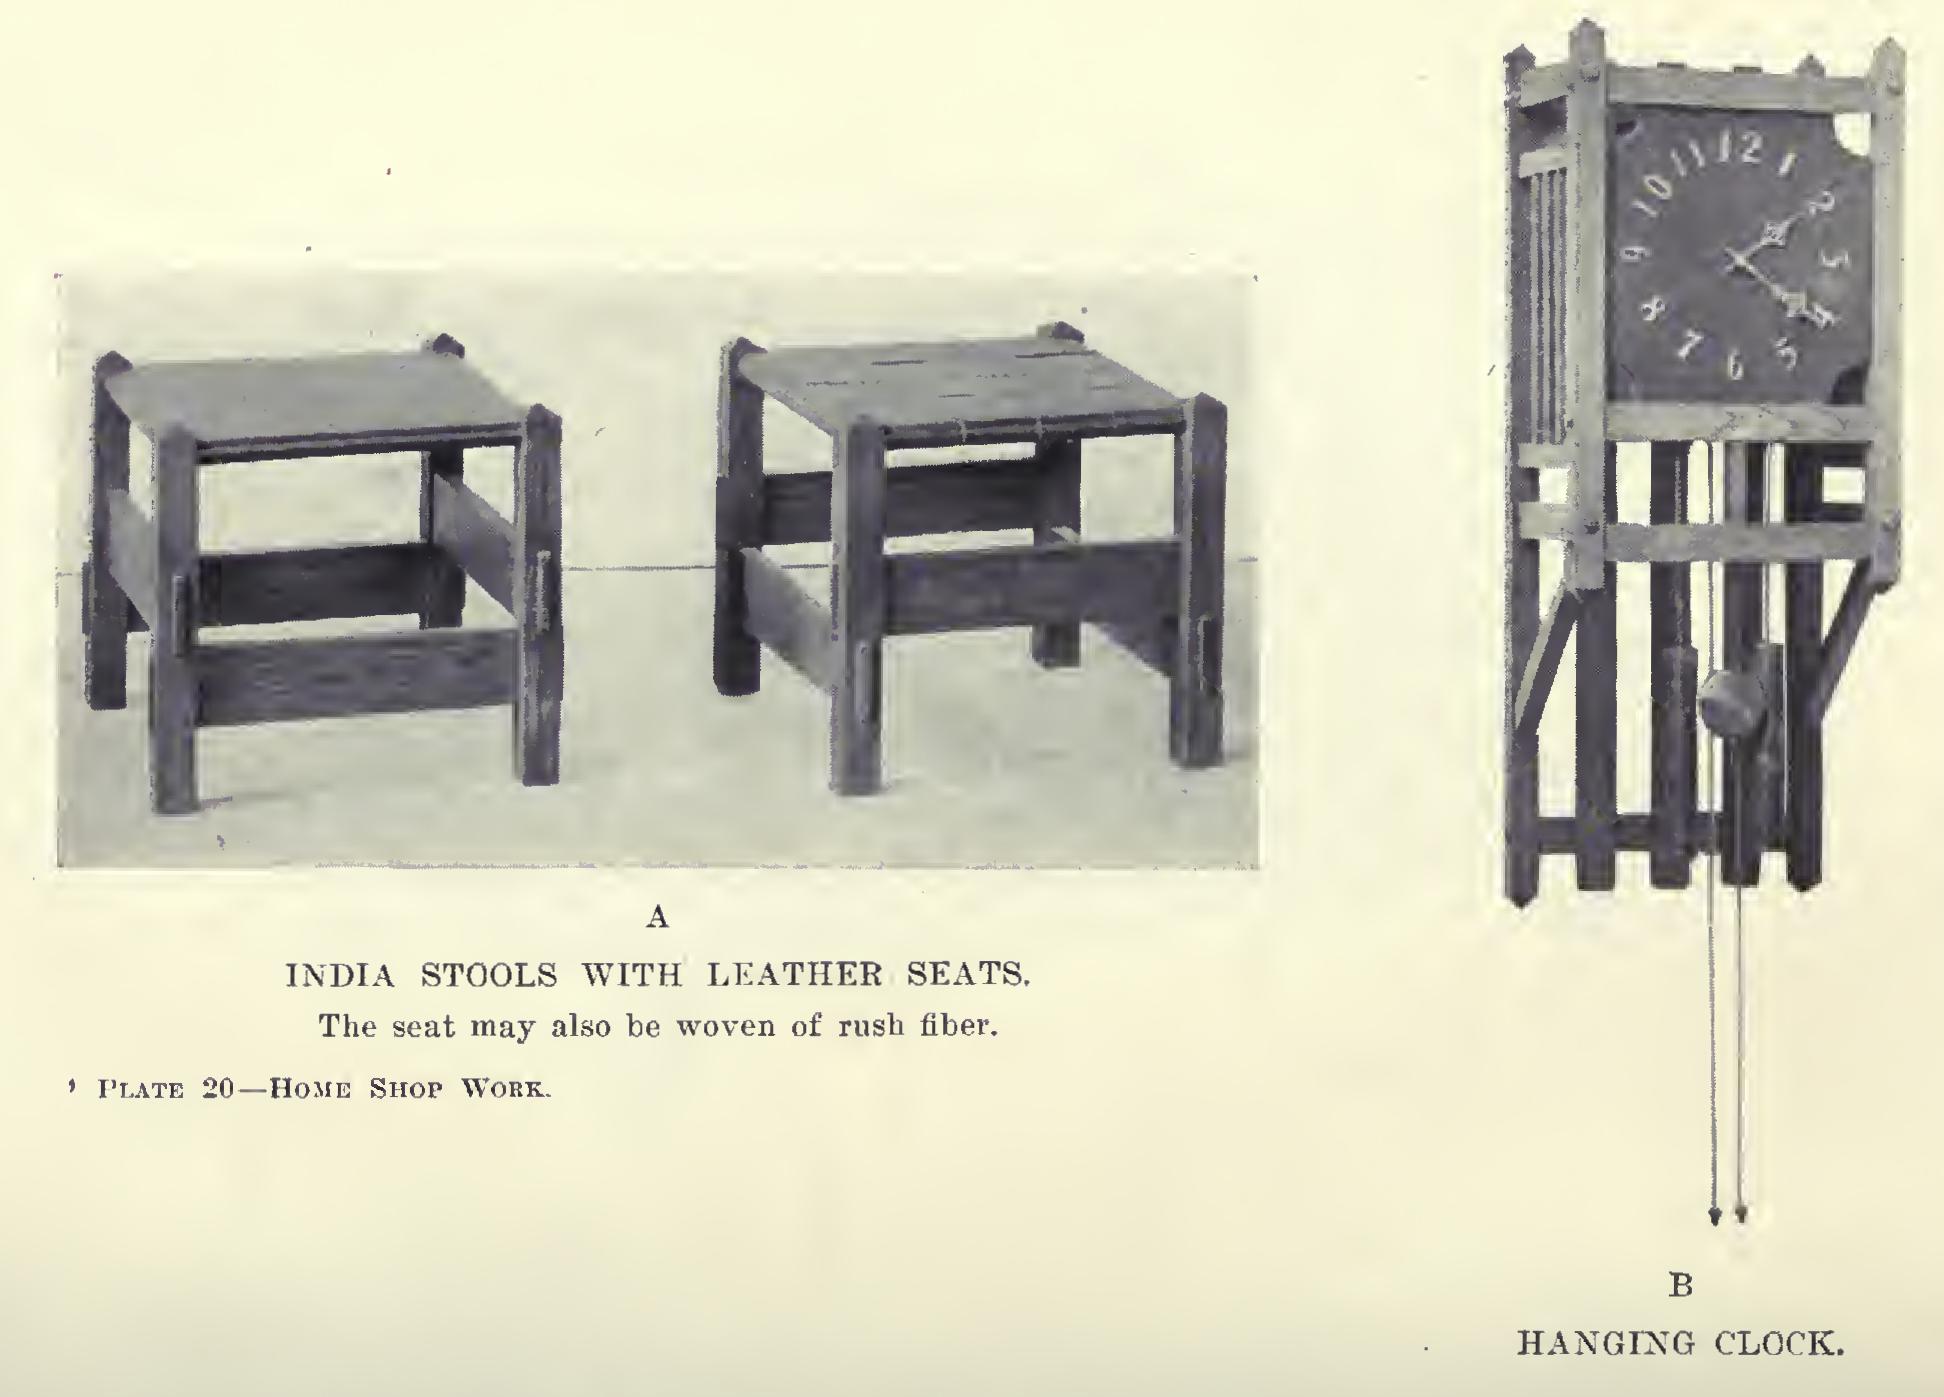
An India Stool
inches, mortise, leg, square, gauge, mortises and lines
AN INDIA STOOL The India stool (Plate 20, A) has been found simple enough in its construction for any boy of fair ability to make easily. It contains a through tenon and mortise.
For the legs (Fig. 95), get a pice of stock 17 inches long by 8 inches wide, preferably oak, of sufficient thickness to dress to an inch and three quarters. Plane one surface just enough to get it smooth and level. Joint up one edge so that it shall be straight and square to the surface just planed. Set the gauge to one and three-quar ters inches, and gauge from this jointed edge. Rip, off this piece, allowing a little margin for smoothing up. Mark the two planed surfaces XX, one for working face, and the other for joint-edge. Plane to the gauge-mark just made. Without changing the setting of the gauge, mark so as to have the piece of the same thickness as width, gauging, of course, from an XX side. Plane the unsmoothed surface to the gauge-line. Repeat until the four legs have been got out.

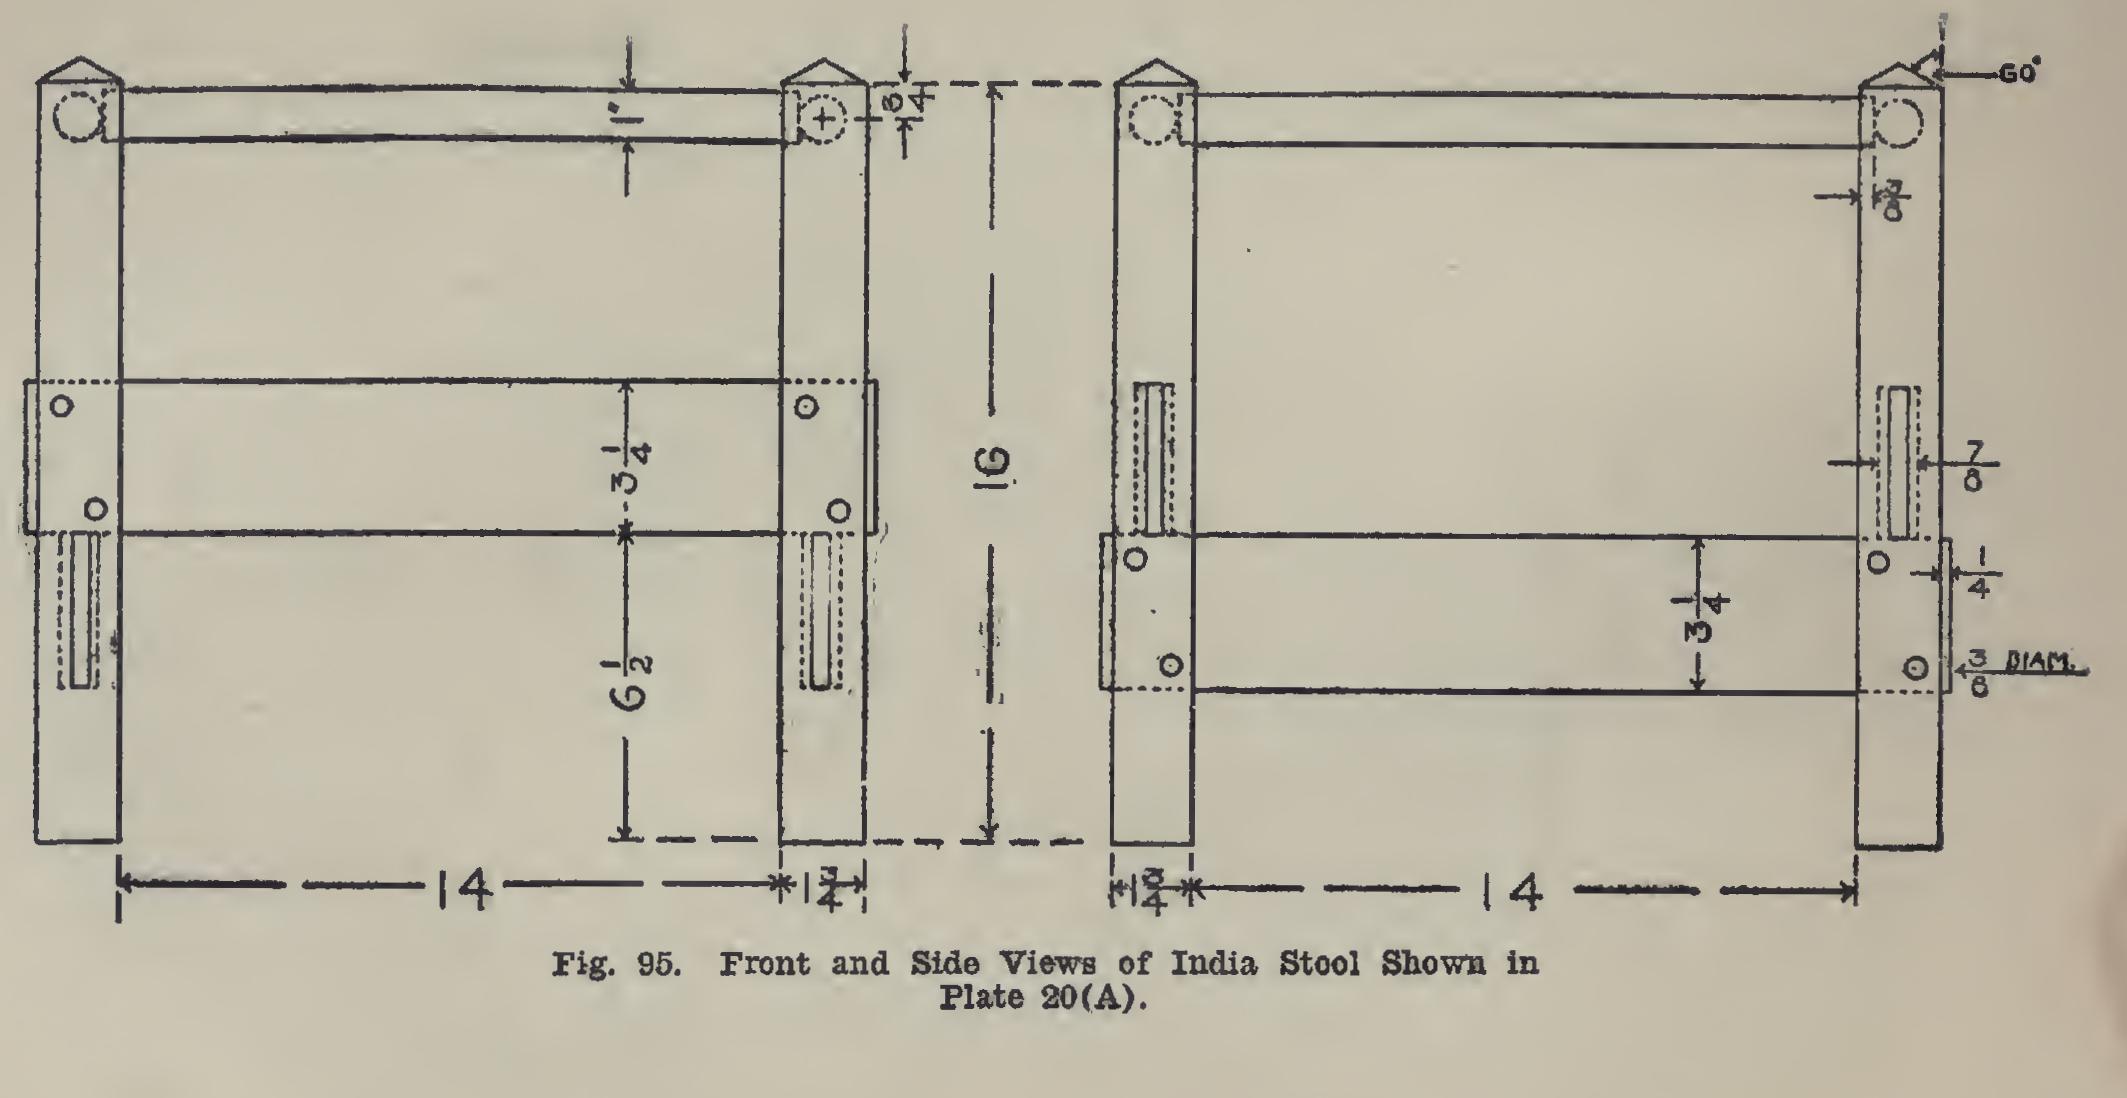
Now square up one end of each leg, remem bering to keep the beam of the try-square against each of the two XX sides. Measure from this end 16 inches; and with pencil and try square, place a line around the four smoothed sides at this point. Set the bevel—or bevel square, as it is sometimes called—so that its blade shall make an angle of sixty degrees with the handle (Fig. 96).
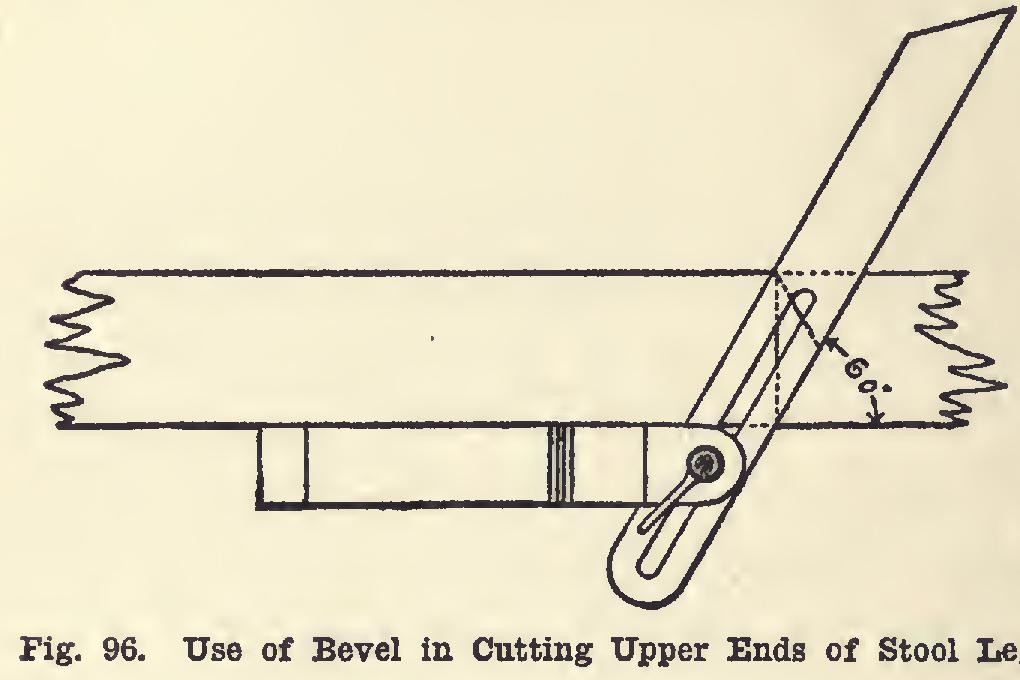
Place the bevel along the sides of the leg so as to lay off lines as shown in Fig. 96. Place similar lines on the side opposite the one just marked. Saw along and plane carefully to these lines. This leaves the top of the leg like a house roof with two gables. Now locate the middle of the ridge, and connect this point with each of the four corners, drawing the lines on the slop ing surfaces. Cut to these lines, and the top will then slope from each of the four sides to a point. The bevel can be used to test the slope while planing.
Square up the four rails from stock that will dress to a thickness of seven-eighths of an inch. They should each be three and one-quarter inches wide by eighteen inches long. If stock dressed to seven-eighths of an inch at the mill is used, the mill-marks should be planed, the plane bit being set very shallow.
One-inch dowel rods are to be used for the top rails. They are to be cut to fourteen and three-quarters inches in length.
Too great care cannot be taken in the laying out of the mortises. The positions which the legs are to occupy relative to one another must be kept constantly in mind. Stand the legs up right so that the XX surfaces shall face out ward, and place pencil marks approximately where the mortises are to be cut.
Lay the legs side by side on the bench, and even the ends by means of the square. Measure from the bottom of one of the legs six and one half inches, and square a sharp pencil line across the four pieces. With try-square and pencil, carry this line entirely around each leg.
Now measure up three and one-quarter inches from this mark, to locate the upper ends of the higher mortises; and, on an adjacent side, measure down the same distance to locate the lower ends of the lower mortises. Since the mortises are to extend entirely through the leg, these lines must be laid off on the opposite sides also.
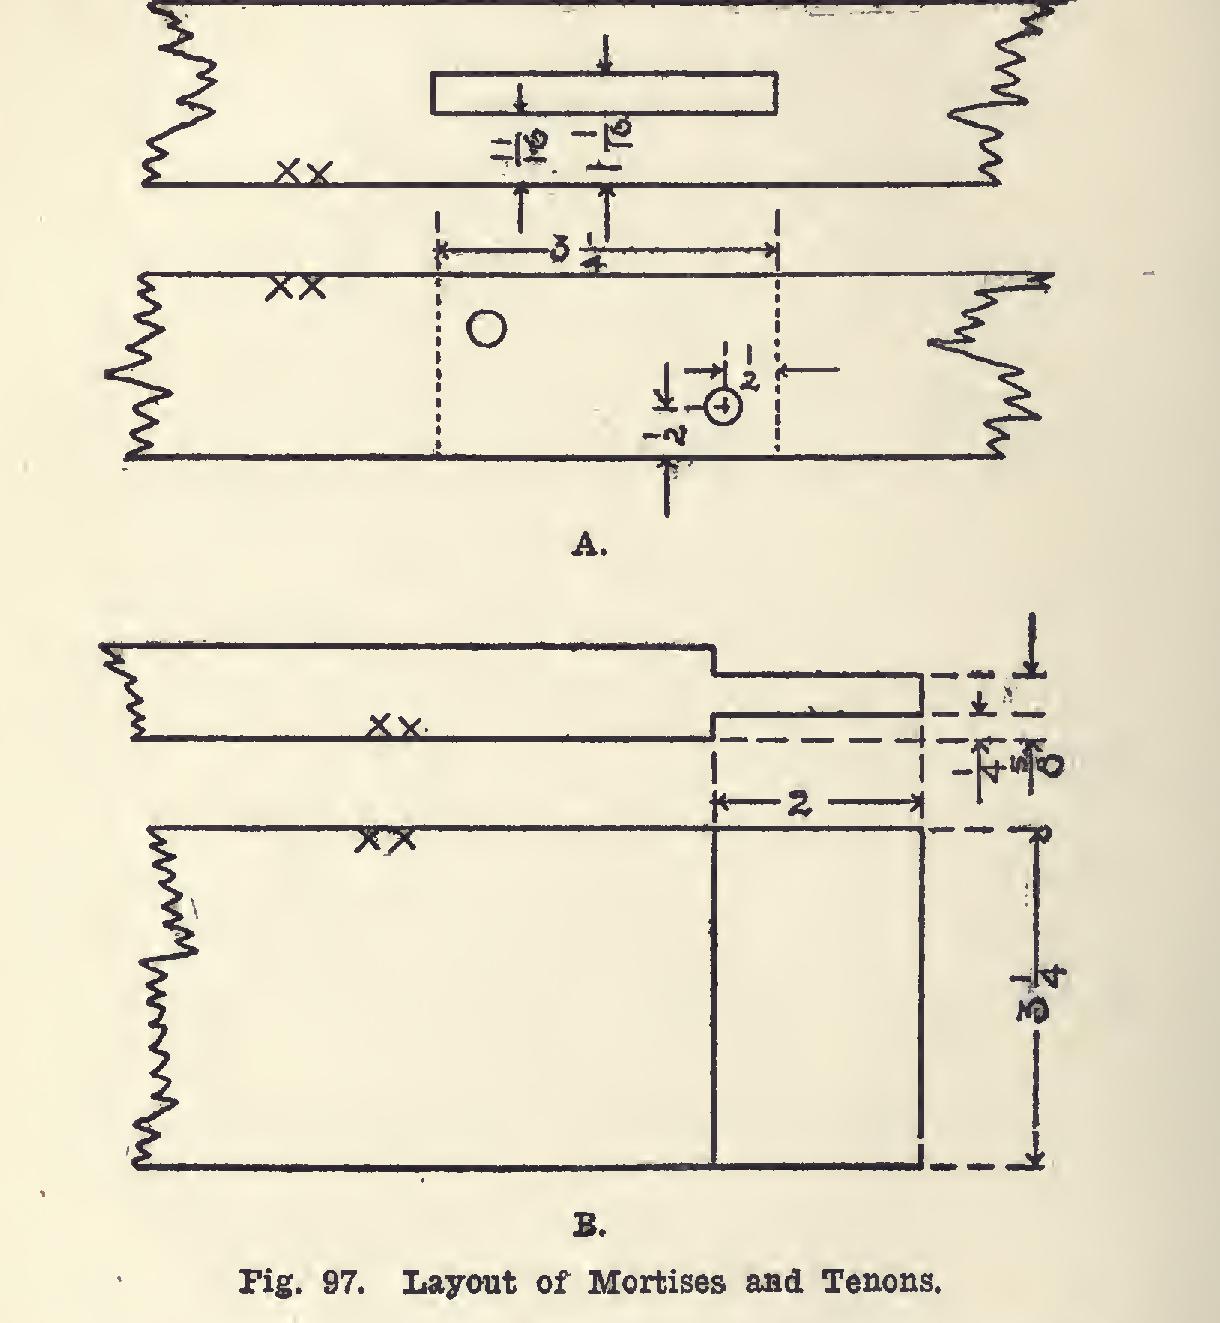
To locate the sides of the mortise (Fig.97, A), set the gauge to eleven-sixteenths of an inch, and gauge, being careful not to allow the gauge marks to cross the pencil marks at the ends of the mortise. All gauging must be done from the XX surfaces. Remember that the mortises on the same leg are at right angles to each other, or are on adjacent sides, and that one passes through just below the other. The second side is located similarly, the gauge being set to one and one-sixteenth inches.
As the mortise is small, it will be better to do no boring, but to select a chisel just the width of the mortise, and, beginning at the middle of the mortise, work out to each end. Cut half-way through the leg, then turn it over, and cut through from the other side. No trimming of the sides of the mortise is necessary; but care must be taken to stand at the end of the mortise while cutting, so as to be able to sight the chisel plumb with reference to the sides.