Library Table of Mission Design
inches, shelf, boards, squared, top and square
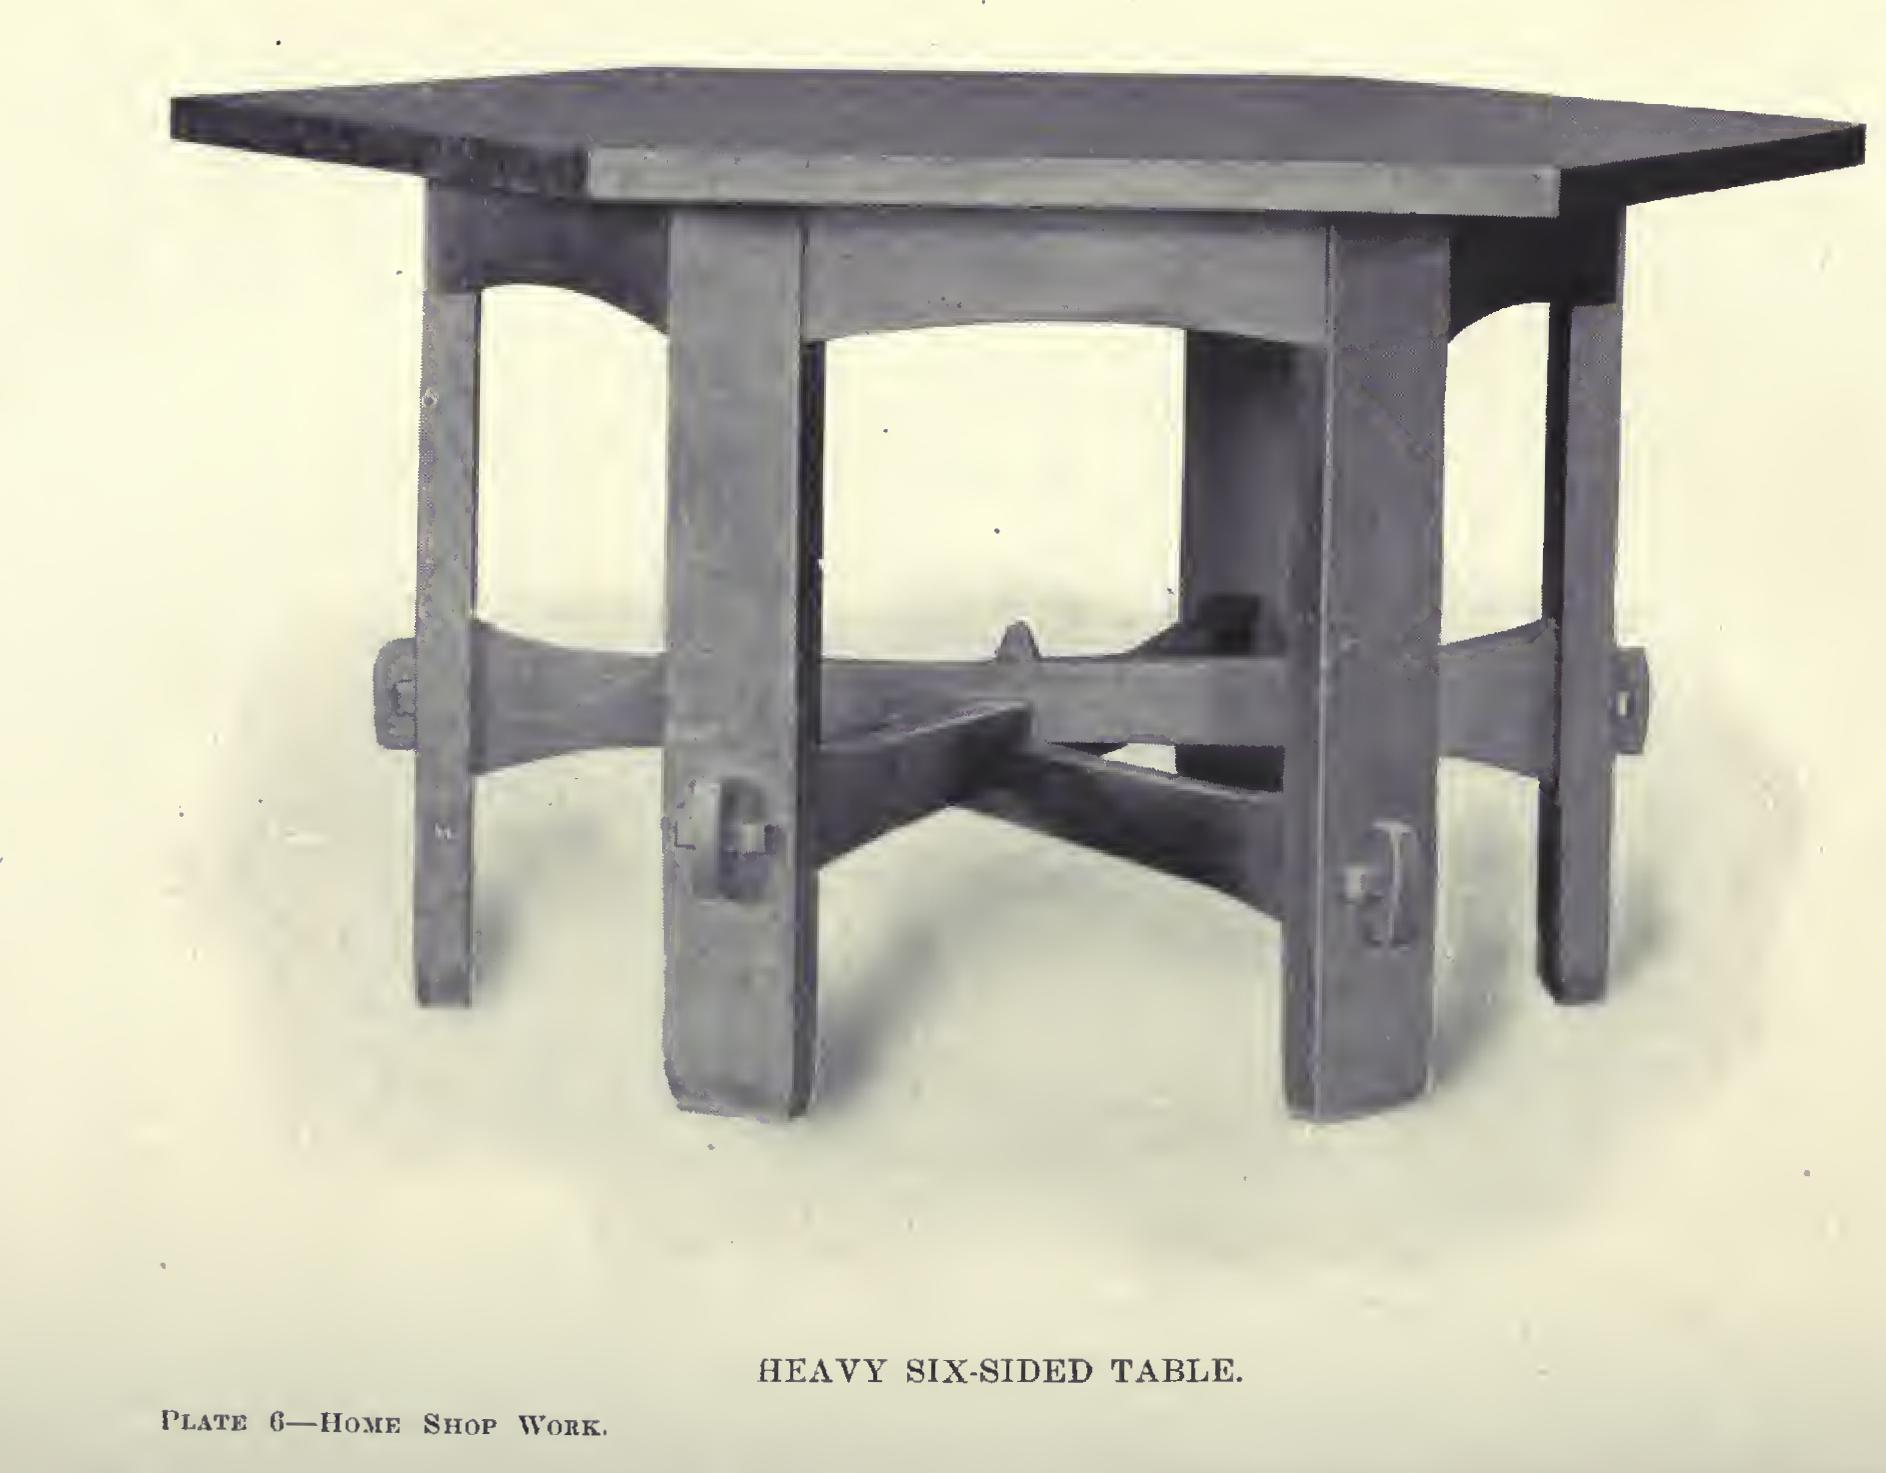
LIBRARY TABLE OF MISSION DESIGN In Plate 5 (B) is illustrated a good example of the heavier mission furniture of very pleas ing proportions. It contains, in addition to the common mortise and tenon previously de scribed, the keyed tenon. Fig. 20 is a diagram giving side and end views, with dimensions. Nothing but well-seasoned stock should be used if satisfactory results are expected.

Four legs, each thirty inches long by three and three-quarter inches square should first be got out. Square up these pieces in the usual way, being careful to have the working face level as well as straight. If there should be warp or wind in the working face, all the other sides will be similarly affected, since they are squared either directly or indirectly to this face. Any warp in the legs will tend to throw the framework out of shape when the parts are assembled. The winding sticks should be used frequently in testing the working face.
Next, plane up the side-rails. These two pieces should each be squared up to a length of thirty-six and one-half inches, and a width of six inches, with a thickness of seven-eighths of an inch.
The two end rails are to be squared up to twenty-five inches by six inches by seven eighths of an inch.
The lower rails into which the shelf enters its tenons, are to be squared to twenty-six inches by three and three-qu4rters inches by one and one-eighth inches.
In all cases where tenons are to be cut on the ends of the pieces which are to be squared up, end planing can be avoided by marking square across and sawing exactly to the line.
The making of the top and shelf will require skill. For the top, proceed as follows: Select good, clear boards, and cut them to a length of about four feet. Saw enough so that the sum of their widths, when they have had their edges jointed and glued together, shall make thirty six or thirty-seven inches. They should be of sufficient thickness to dress to one and one eighth inches after they have been doweled and glued.
Joint up their edges straight and square. Only one edge of each of the outside boards need be jointed. Test to see that they fit by placing the edges one against another.
Clamp these pieces in the vise in pairs, as shown in Fig. 21; and, with the try-square and a sharp pencil, mark across the two edges at places about eighteen inches apart. Set the gauge so that it will mark the middle of each piece; and cross-gauge each of these lines, gaug ing from the surfaces which are to make the upper surface of the top. At the intersection of the pencil and gauge lines, bore three-eighths inch holes to a depth of one inch.
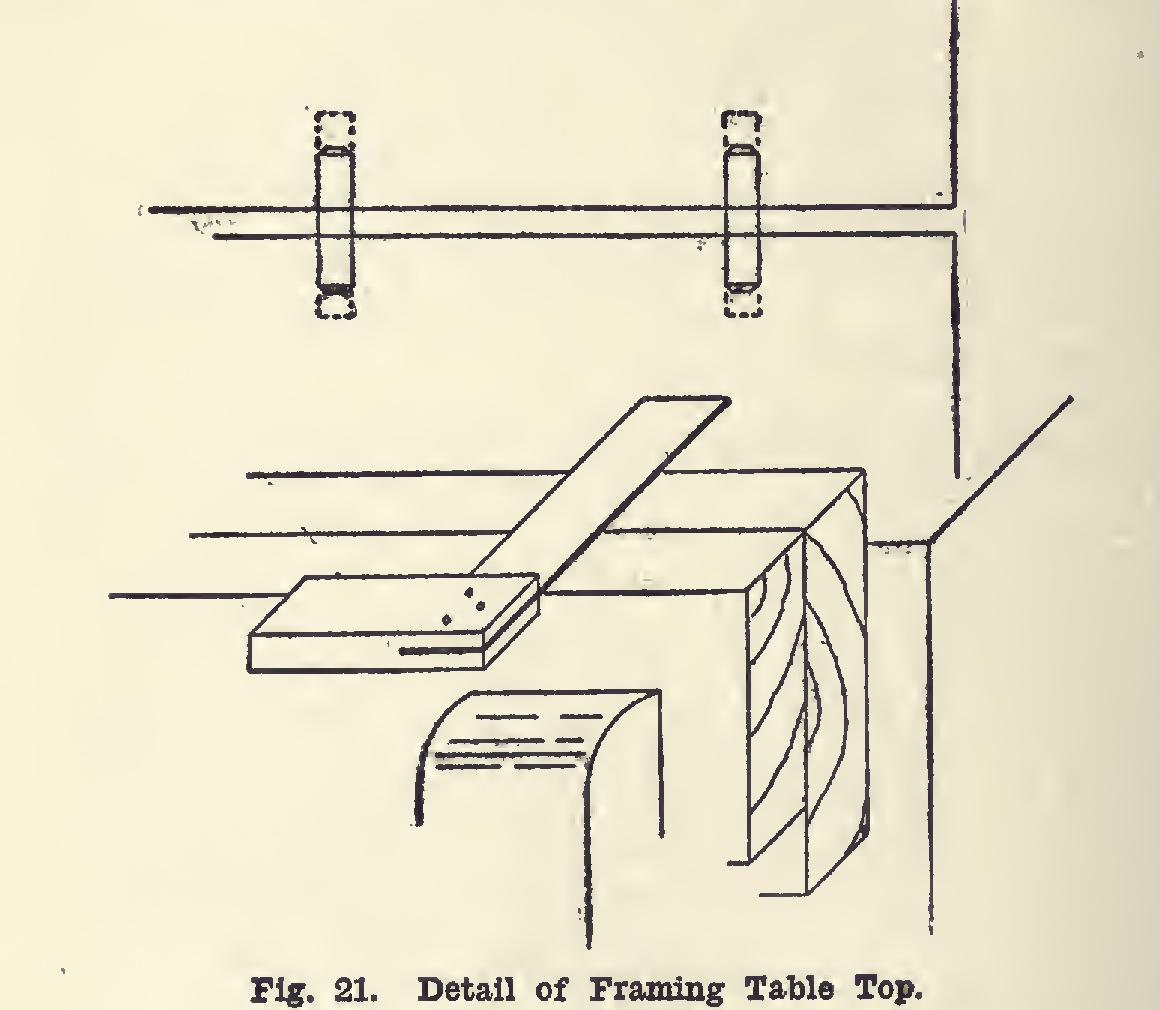
Cut off enough dowels, and, placing a touch of glue on one end of each, drive them into the holes (Fig. 21). After having glued the edges of the boards, cabinet-makers' clamps should be used to clamp the whole together. If the boards show a tendency to buckle while in the clamps, it may be necessary to fasten a stout piece across the grain on each side, by means of the hand clamps.
Prepared cold glues are quite common now adays, and answer fairly well. If, however, hot glue can be had, use it.
The shelf of the table is similarly prepared, but is to be made of stock which will dress to three-quarters of an inch. In cutting the shelf boards, allowance must be made in the length for the keyed tenons. They should be cut roughly of almost the same length as those of the top. The sum of their widths should ap proximate two feet in the rough.
After the glue has hardened, surface or plane smooth, and level both sides of both top and shelf. This will require considerable patience. The reason for not planing the boards before gluing them together, is because of the impos sibility of doweling them so as to make the sur faces match with sufficient accuracy.
Square up the top to forty-seven inches by thirty-five and one-half inches. The shelf may then be squared to forty-four and three-eighths inches by twenty-two inches.