Two Tabourets
inches, line, top, circle, leg, plane and one-half
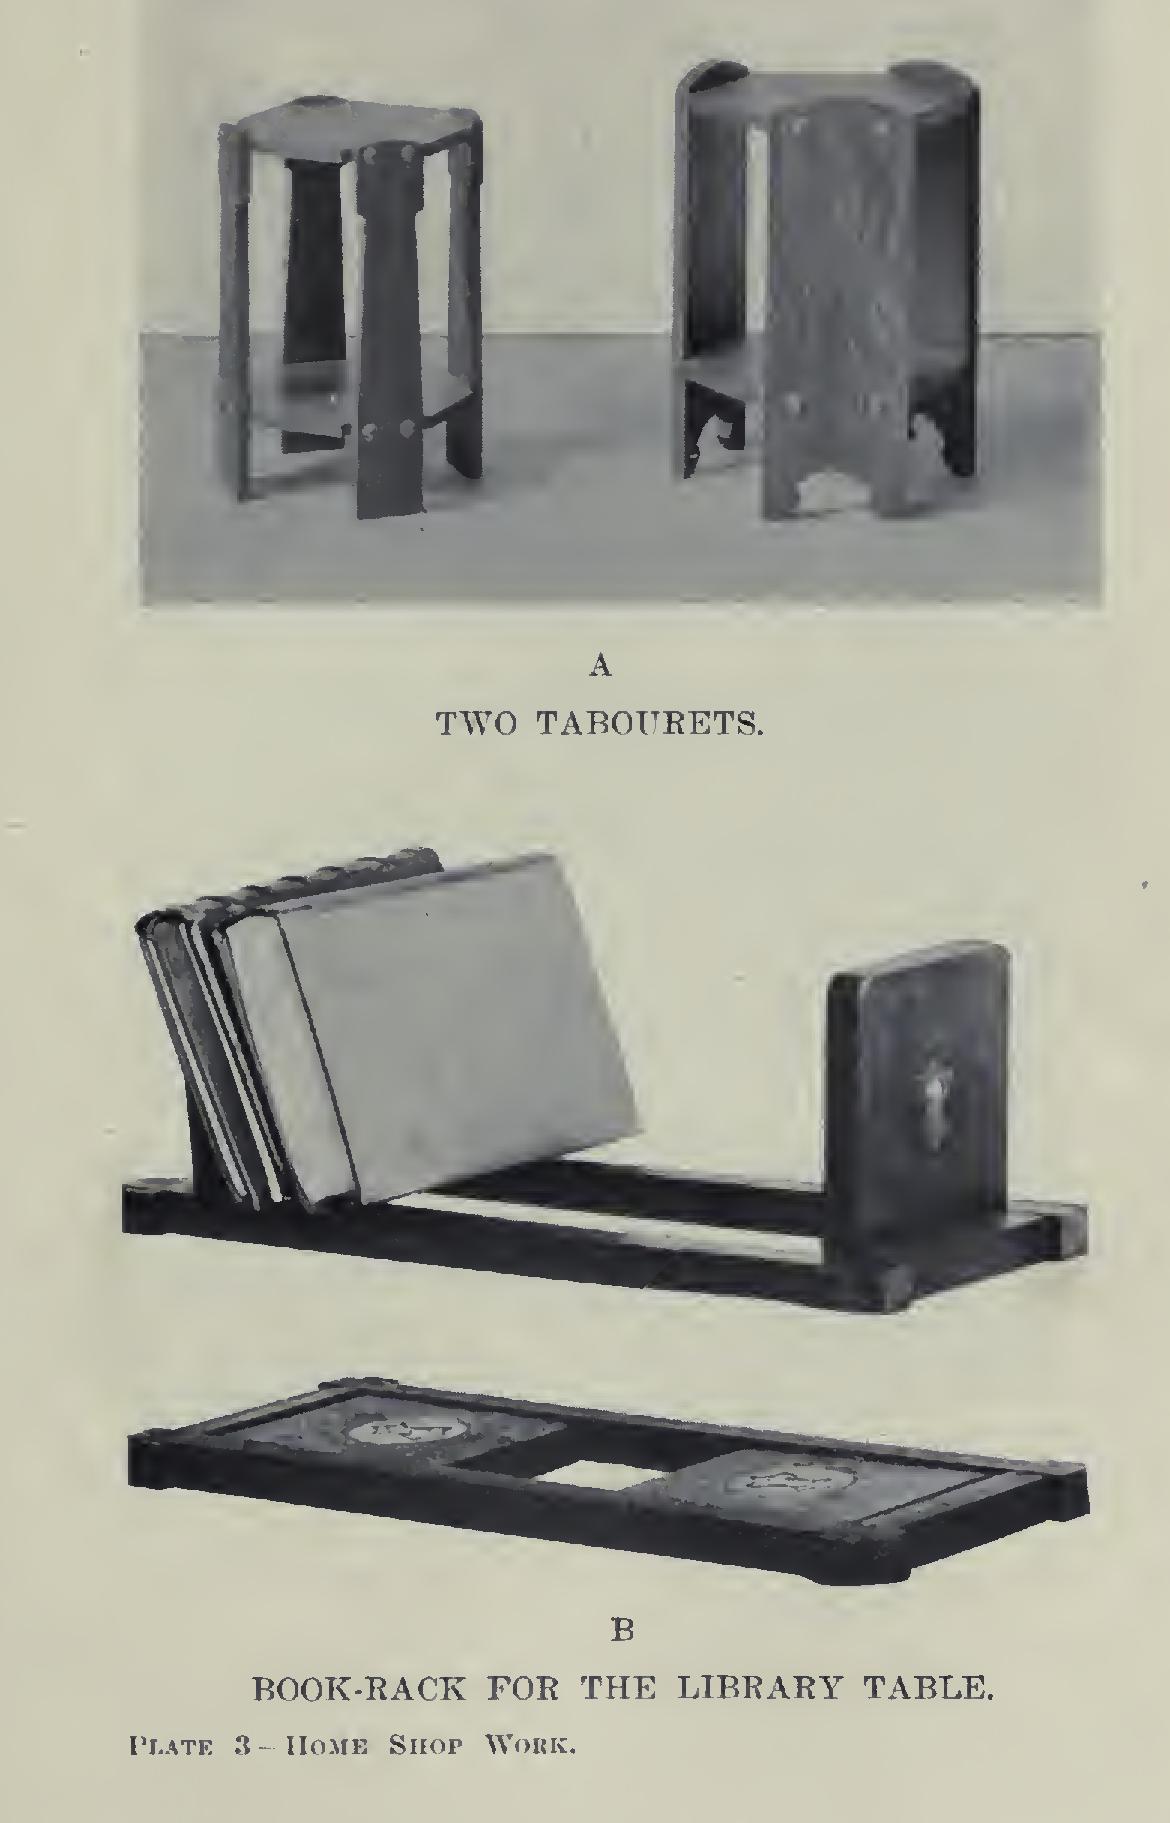
TWO TABOURETS An extremely simple piece of furniture con struction is that of the tabourets shown in Plate 3 (A). There are two styles, one of eight sides with four legs, and one of six sides with three legs. The square butt joint fastened by means of lag screws is used on each one.
For the hexagonal, or six-sided tabouret (Fig. 7), two pieces, each twelve and one-half inches in width by fourteen and one-half inches in length, well planed to three-quarters of an inch in thickness, will be needed, out of which to make the top and the shelf. Oak will answer nicely. Plane the surface, and scrape them with the steel scraper until they are smooth.

The legs will require three pieces of three quarter-inch mill-planed oak, seven and one-half inches wide by twenty and one-half inches long. Plane off the marks, using the smooth plane set very shallow.
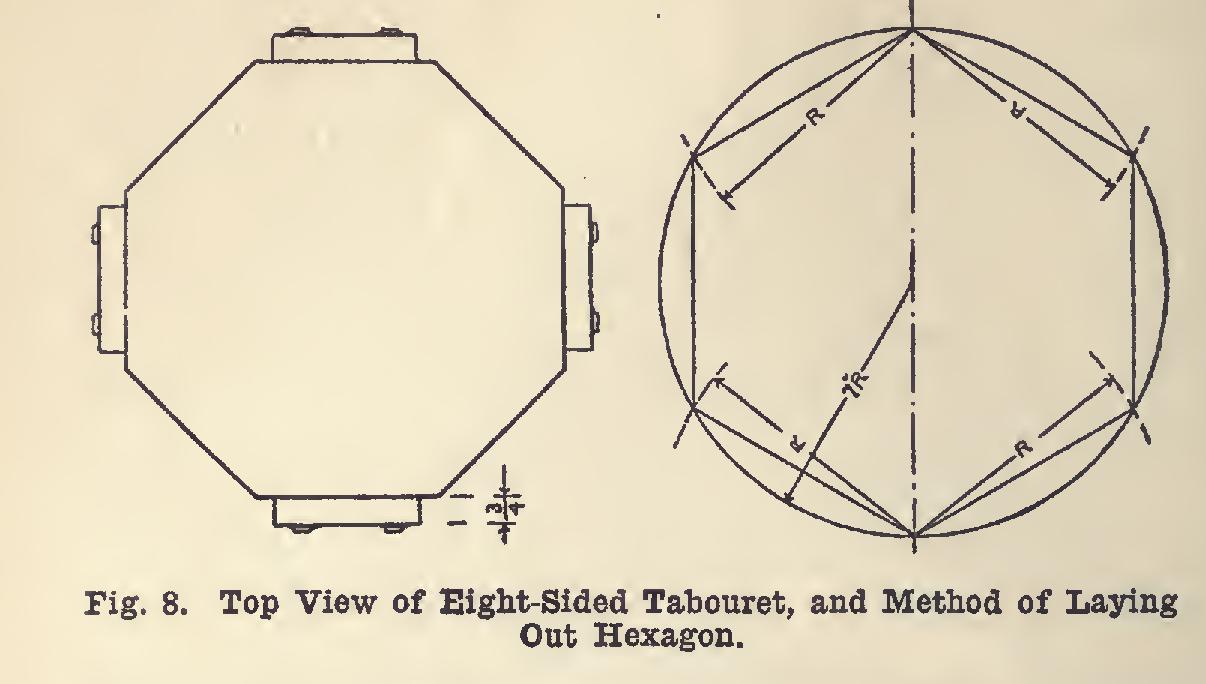
Fig. 8 shows the manner of constructing the hexagon. Unless the top and shelf are alike, there will be trouble when the legs are attached. The greatest care, therefore, should be taken in laying out the hexagons, as the slightest varia tion in placing the dividing points will make sides of different lengths.
Find the center of the board by drawing the diagonals—that is, the lines from corner to op posite corner. The point of crossing of the lines gives the center. Set the dividers to seven inches between the points, and describe a circle using the center of the board as the center of the circle.
It will be founq impossible to get the entire circle on the board, the board being but twelve and one-half inches wide, while the circle has a diameter of fourteen inches. This will make no difference.
Draw a line parallel to the edge of the board passing through the center. Using the seven inch radius, set one point of the dividers suc cessively, at the points at which this line cuts the circle; and cut the circle on each side of the straight line, 8. Connect the six points of the circle, and the hexagon is completed.
To test the accuracy of the construction, take the dividers, and see if the sides of the hexagon are of equal length and each equal to the radius of the circle.
Saw close to the lines, and plane the edges smooth and square. In both planing and saw ing, watch to see that the tools are not worked against the grain of the wood. Where the edge to be planed is at an angle to the grain, plane in the general direction of the grain.
Prepare the legs by straightening and squar ing up one edge of each; then gauge to seven inches, and plane the remaining edges.
The top end is rounded. Find the middle of the leg, drawing a light pencil line along it about eight inches from the top. Set the dividers to an eight-inch radius, and, with one point almost touching the top of the leg and the other on the center line, describe an arc of a circle.
The bottom of the leg is laid out by measur ing from the highest point of the arc at the top of the leg twenty inches, squaring across with try-square and pencil. Saw off along this line, and plane smooth and square.
The holes at the bottom of the legs through which the lag-screws enter are laid off by meas uring from the bottom five and three-eighths inches and squaring a light pencil line across. On this line, measure one and one-half inches from each edge. The intersections give the cen ters of the holes.
For those at the top of the leg, measure one and three-eighths inches from the top of the curve, and square a light line across. Measure from each edge along this line one and one-half inches. Bore the holes with a one-quarter-inch bit.
Sandpaper all the pieces well, and give them a coat of filler.
If a dark finish is desired, it will be neces sary to stain the wood, allowing it to dry thor oughly, before applying the filler. It is much easier to stain and fill the wood before the pieces are fastened together, and the result is more satisfactory.
In assembling the parts, place a leg in posi tion with reference to the top, and mark through the holes with a divider point. Take away the leg, and, with ruler, measure so as to locate the hole in the middle of the edge of the top. Bore these holes with a three-sixteenths-inch bit to a depth of about two inches.