Umbrella Stand for the Hall
square, inches, inch, stock, lines, pieces and seven-eighths
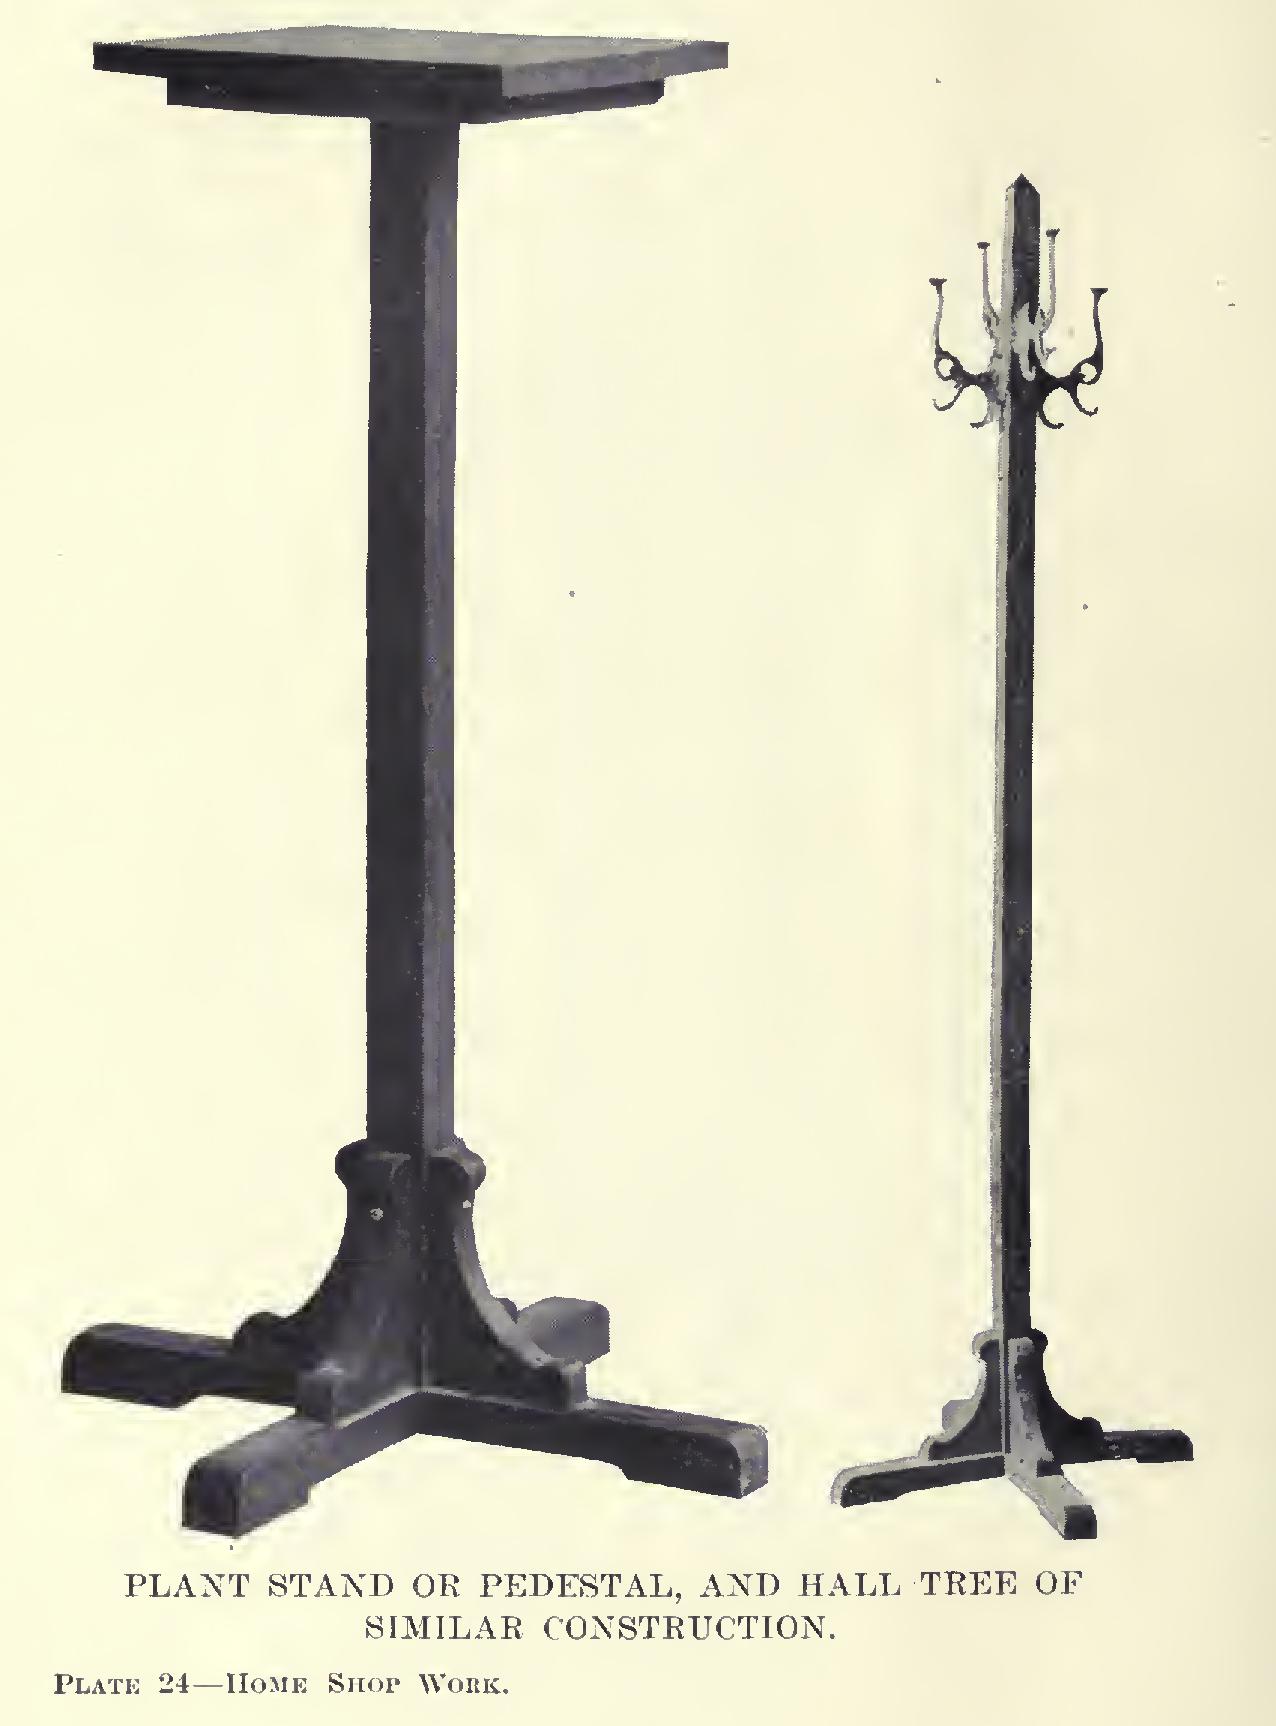
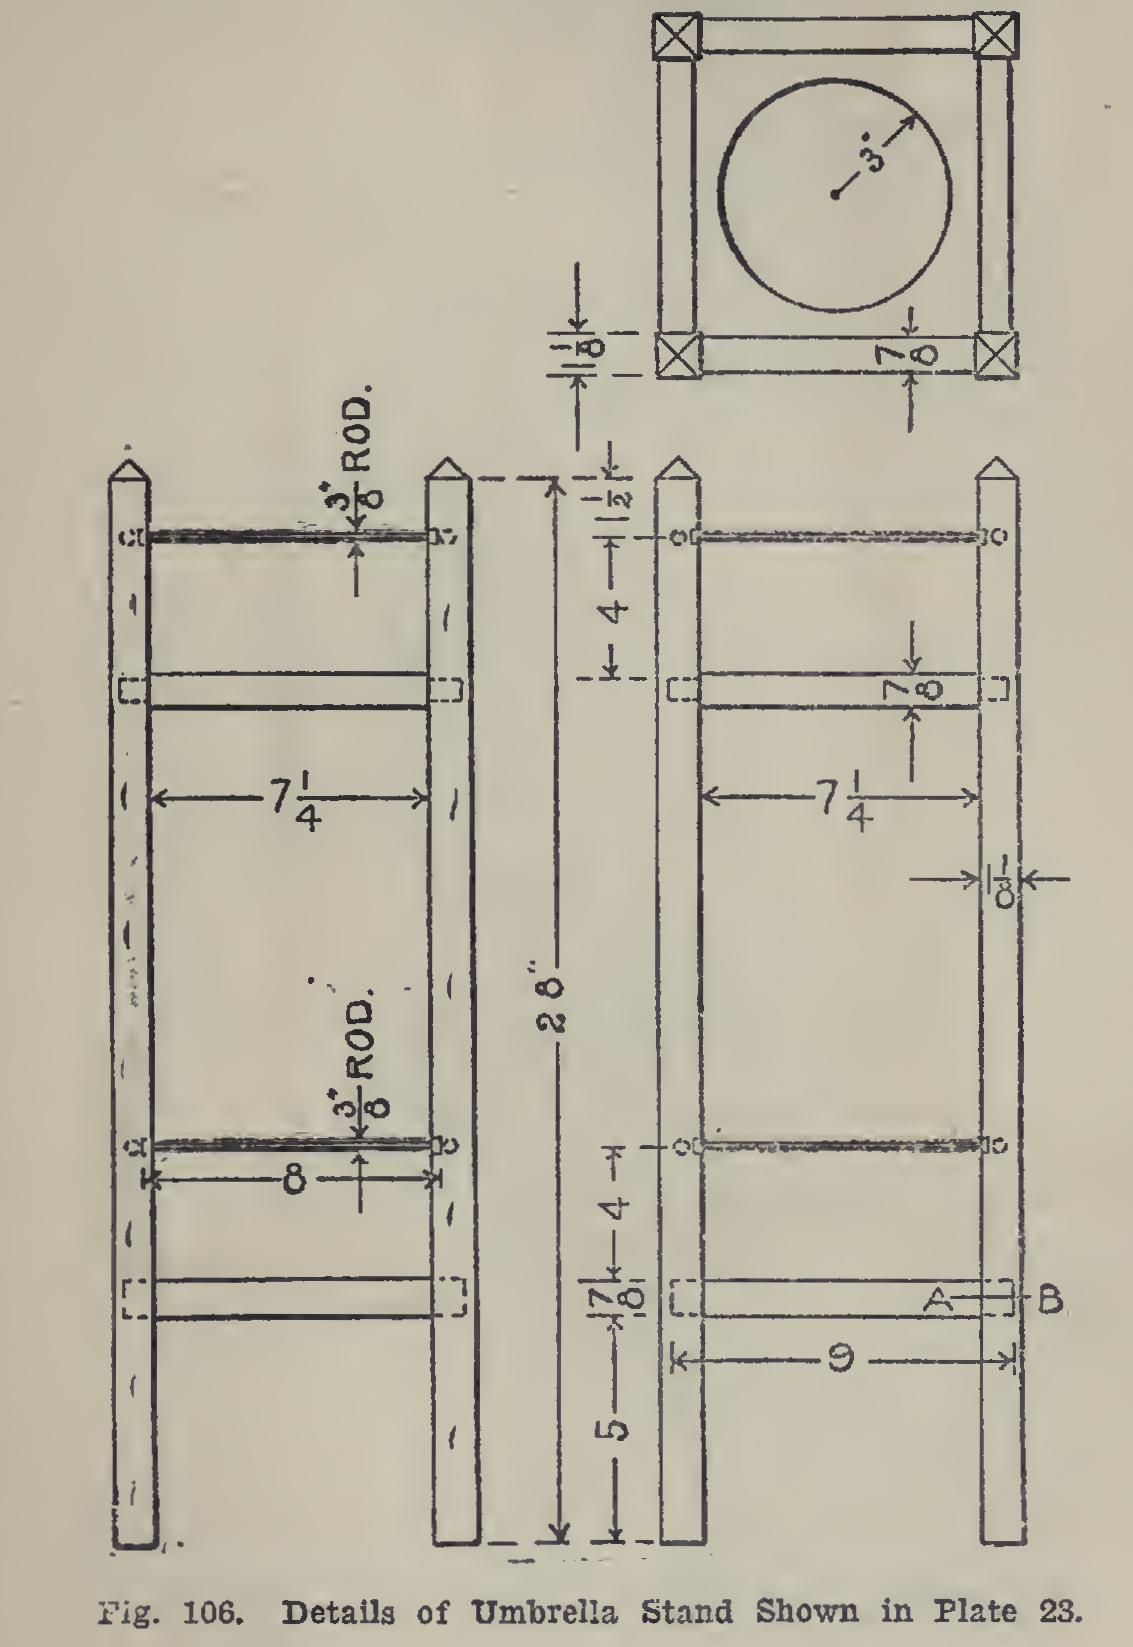
UMBRELLA STAND FOR THE HALL The umbrella stand shown in Plate 23 and in Fig. 106 makes a good companion piece for the hall clock and hall tree. It is of simple de sign, comparatively easy to make, and, with the copper drip-pan, provides a very satisfactory place for keeping umbrellas.
For the posts, square up in the usual way four pieces of stock so that they shall be when finished one and one-eighth inches square, and of a length sufficient to make 28 inches, not including the bevels at the top ends.
A good way is to get a board dressed on two sides to a thickness of one and one-eighth inches. It will be slightly thicker than this, so that the smoothing plane can be set very shallow and the mill marks planed off without reducing the thickness below what is wanted, if care is exer cised. Next, joint one edge, making it straight, and square to the working face which has pre viously been selected and marked. Set the gauge to one and one-eighth inches, and gauge, keeping the block against the edge just planed. Rip parallel to this gauge-line, allowing a small margin for planing. Plane carefully to the gauge-line, testing the edge with the try-square frequently while planing, to make sure that it will be square when the line has been reached. This operation can be repeated until the four pieces have been obtained.
Square the end of each post, then measure off twenty-eight inches, and slope the remaining end to an angle of forty-five degrees.

Rather than make a measurement of each of these lengths separately, a better way would be to square up the four sides and one end of each; then, placing them side by side, with the planed ends made even and squared to the side of one of them by means of the try-square, measure the length, and square across the four at once.
Before finishing the posts, get out the stock for the remaining pieces.
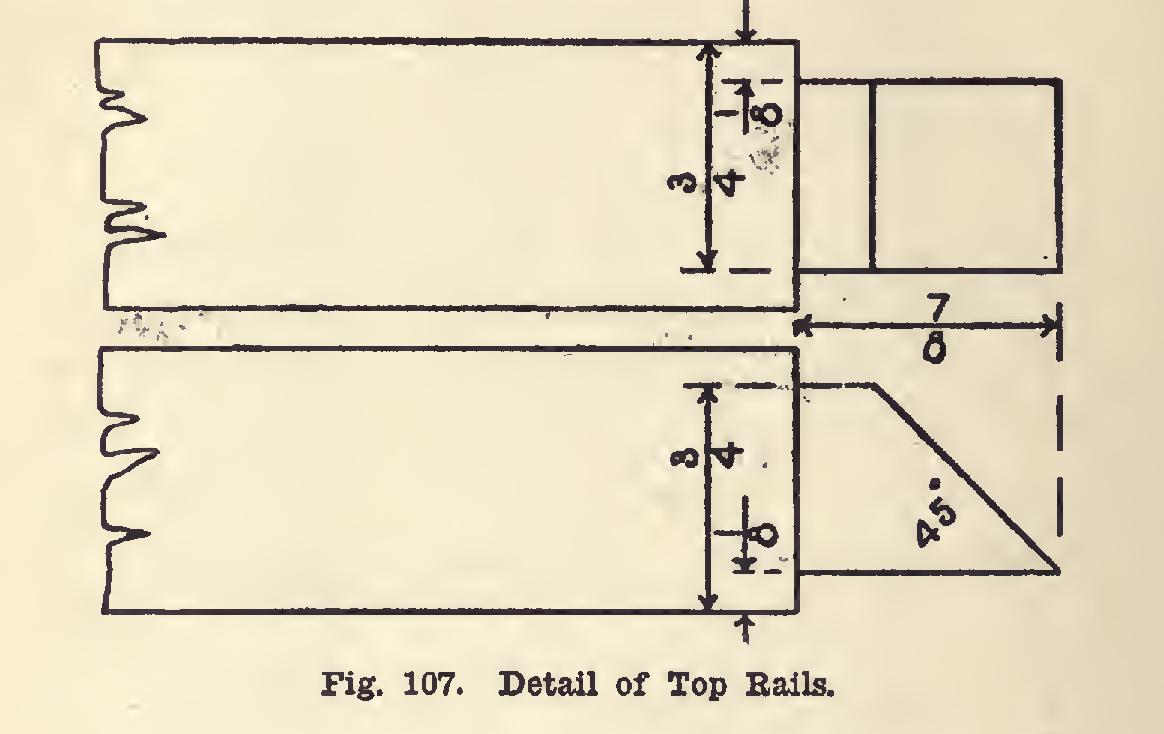
Proceeding in the same manner as with the posts, get out four rails for around the top of the stand. Use stock seven-eighths of an inch thick, and make the pieces seven-eighths of an inch square. Cut them to a length of nine inches. As these ends are to have mitered tenons on them (Fig. 107), they need not be planed at all, but merely sawed to the line.
For the shelf which supports the drip-pan, square up a piece of seven-eighths-inch stock so that its surfaces shall be free of mill marks and shall measure nine inches by nine inches by seven-eighths of an inch.
Secure a stick of dowel rod of three-eighths of an inch diameter—a slightly larger or smaller size would do—and cut it into eight lengths of eight inches each.
This prepares all the stock necessary. The shelf for the drip-pan (Fig. 108) may next be completed. With the try-square and a sharp pointed pencil, square lines three-fourths of an inch, measured from the corner, in each direc tion. Prepare each of the corners in this way. Saw carefully to these lines, using the chisel to trim them true, if necessary. Draw the diag onals, or the lines which extend from corner to opposite corner, so as to locate the center of the board. Set the dividers to a distance of three inches between the points, and describe a circle. It would be better to draw the diagonals before the corners of the board are cut, to insure locat ing them properly.
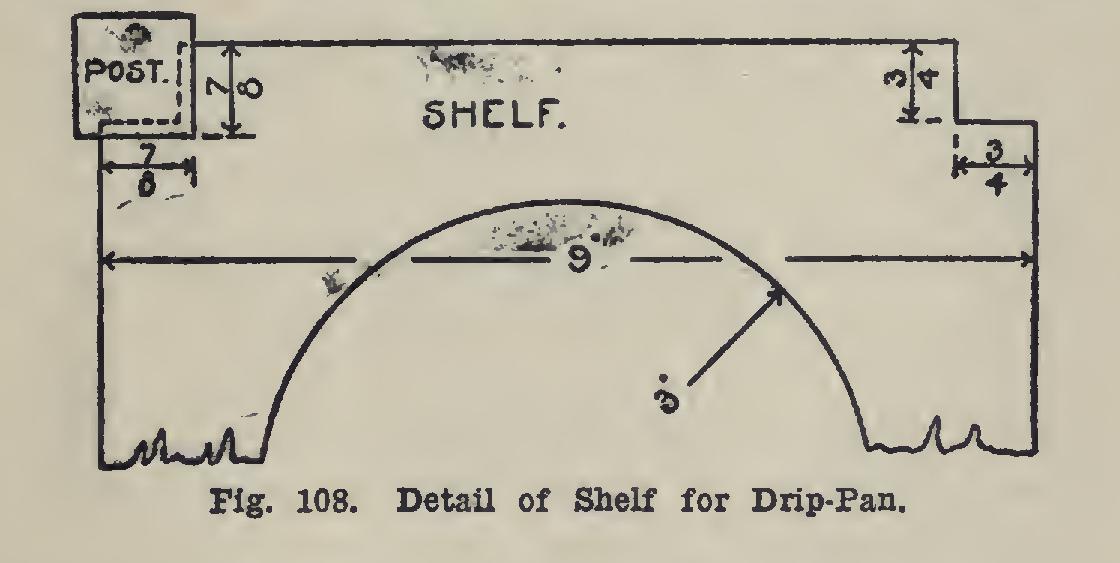
Bore a hole within this circle of a size suffi dent to allow the blade of the turning saw to enter. In this case, what is known as a key hole saw will be better. The turning saw can be used, however, by taking the saw blade loose at one end, and inserting it through the hole, then fastening it again. Smooth the circle after sawing, with scraper.
Since cutting such a large hole weakens the board quite materially, small cleats on the under side, running across the grain, may be fastened to good advantage.
Next, lay out the tenons which are to be made on the ends of the rails. Place the four rails side by side, getting the ends even and square to the sides. Measure from the evened ends seven-eighths of an inch, then seven and one-fourth inches from this line, and square lines across the faces at these points. There should remain seven-eighths of an inch from this line to the end of the piece. Square these lines en tirely around each of the pieces, keeping the try-square handle against the working face and joint-edge respectively while so doing.