Method of Shingling
roof, shingle, nail, fig, lines, makes, courses and crack
METHOD OF SHINGLING.
There is an unwritten law that all carpenters know how to shingle—much better than they really do. Our observation has been that shing ling is one of the most important matters in house construction. In the early days a house consisted of practically nothing but a roof to keep the rain out. And even to-day, no matter how well the foundation and floors are made, or how plumb and beautiful the walls are, or how well decorated on the inside, or how nice the roof was framed by one skilled in roof framing, or how well it was sheathed, it is practically worthless unless it is well shingled. There is no place like the roof for a carpenter to show his mechanical skill, for any one that can saw to a line and drive a nail can lay a floor, put on siding and put up inside finish.
We wish to impress on the mind of the young mechanic; that no matter what part of the trade he is working at, it is of some importance, and there is always an opportunity to learn something.
Some old mechanics that have had twice as much experience in house building say nail as high as possible. They say the higher in the shingle you nail the more air will get to all parts of the shingle and it will last longer, which is undoubtedly true. Another with possibly even more experience will say nail just as low as possible and have the nail covered with the next course, and gives for his reason that high winds and heavy rain and snow storms will not drive in.
Some mechanics think there is nothing like a six-inch shingle for a roof, and point to what a nice roof is made of slate all of the same size. It is all right for slate, but in the opinion of some all wrong for wood shingles, for if one cracks, and near the center as they generally do, it makes a crack three courses long, and should a few more crack there are bound to be had leaks in the roof.
Fig. 160 shows three courses of shingles being laid on the roof to three chalk lines, and you will notice that not a single joint comes over another, not even from the first to the fourth courses, so if one should split right at another joint it only makes a crack less than two-thirds the length of a shingle. By driving the nails one a little above the other they are not as liable to crack as if they were right opposite each other.

Fig. 161 is an end view and shows that not only is there practically three courses on all parts of a roof, but a good part of the fourth should be there also.
Fig. 162 shows an old-fashioned way, and when we got so high we had to get a new rest for our feet we nailed brackets on the roof with tenpenny nails, and put a plank on them. Fig. 163 shows a more
modern way and how it is done. It is now the most common way, and does not make a leak, as the tenpenny nails would, although sometimes a shingle nail makes a hole. To avoid that, drive the shingle nail below where the nails were driven in the roof when you take it down, and it makes the holes break joints.
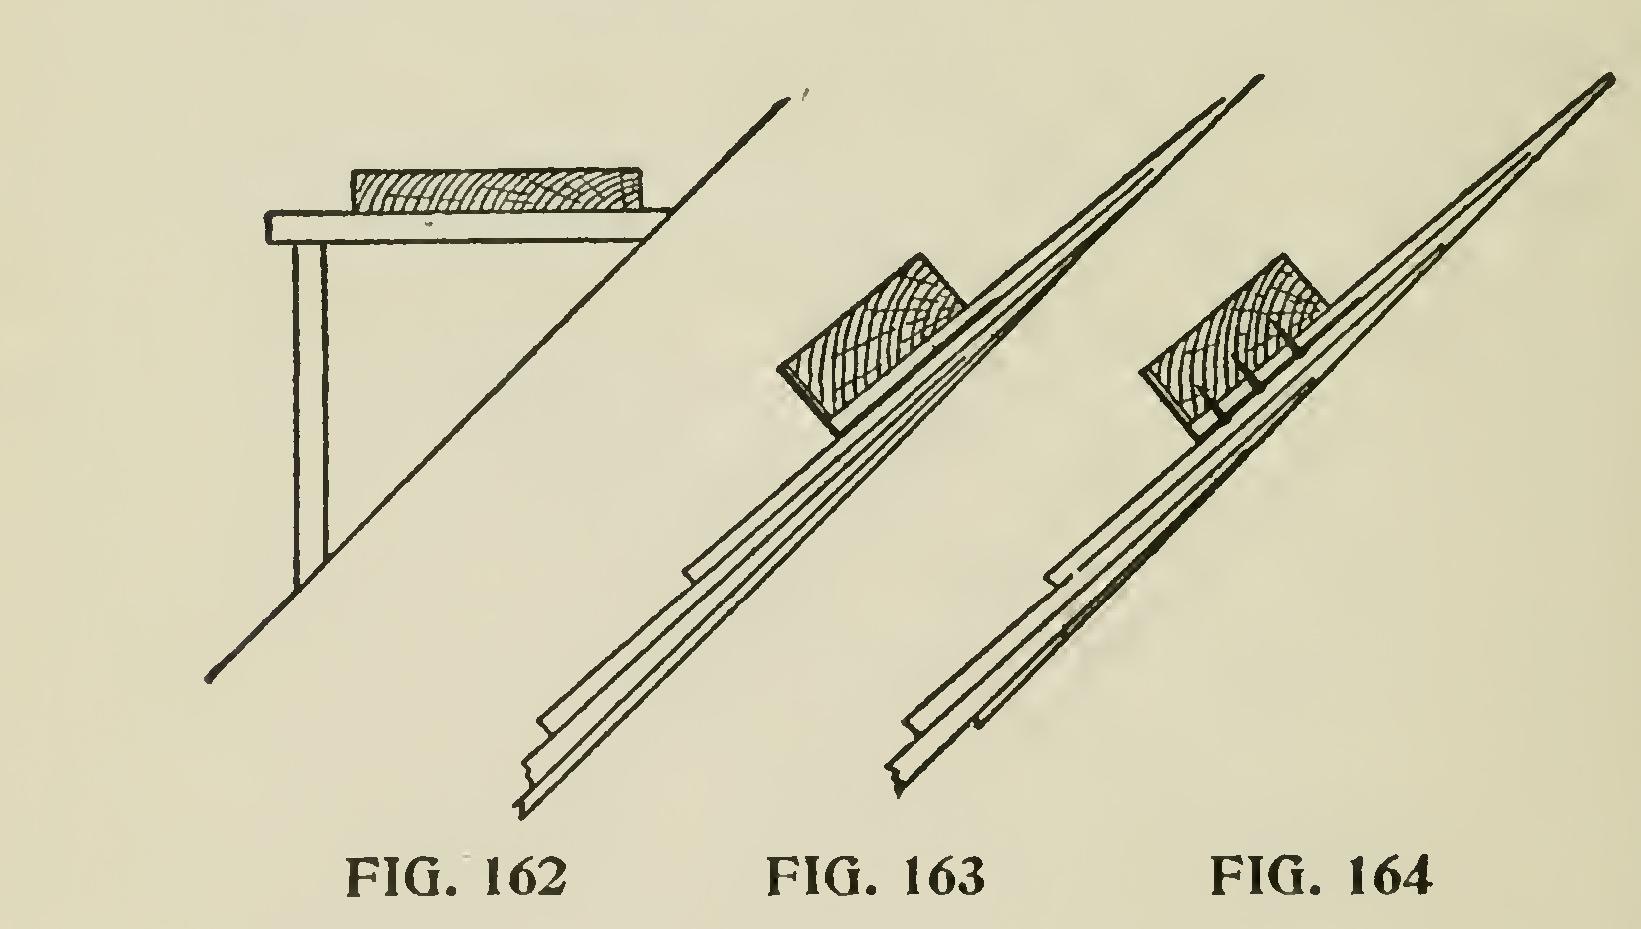
Some carpenters to avoid the danger of leak just mentioned, put the shingle on tip end up, shingle it in, and then saw it off when the scaffold is taken down. Others shingle over it and drive it out with a hand ax.
Fig. 164 shows a very simple iron bracket, which has many good points, but there is nothing quite as handy and cheap as the shingle.
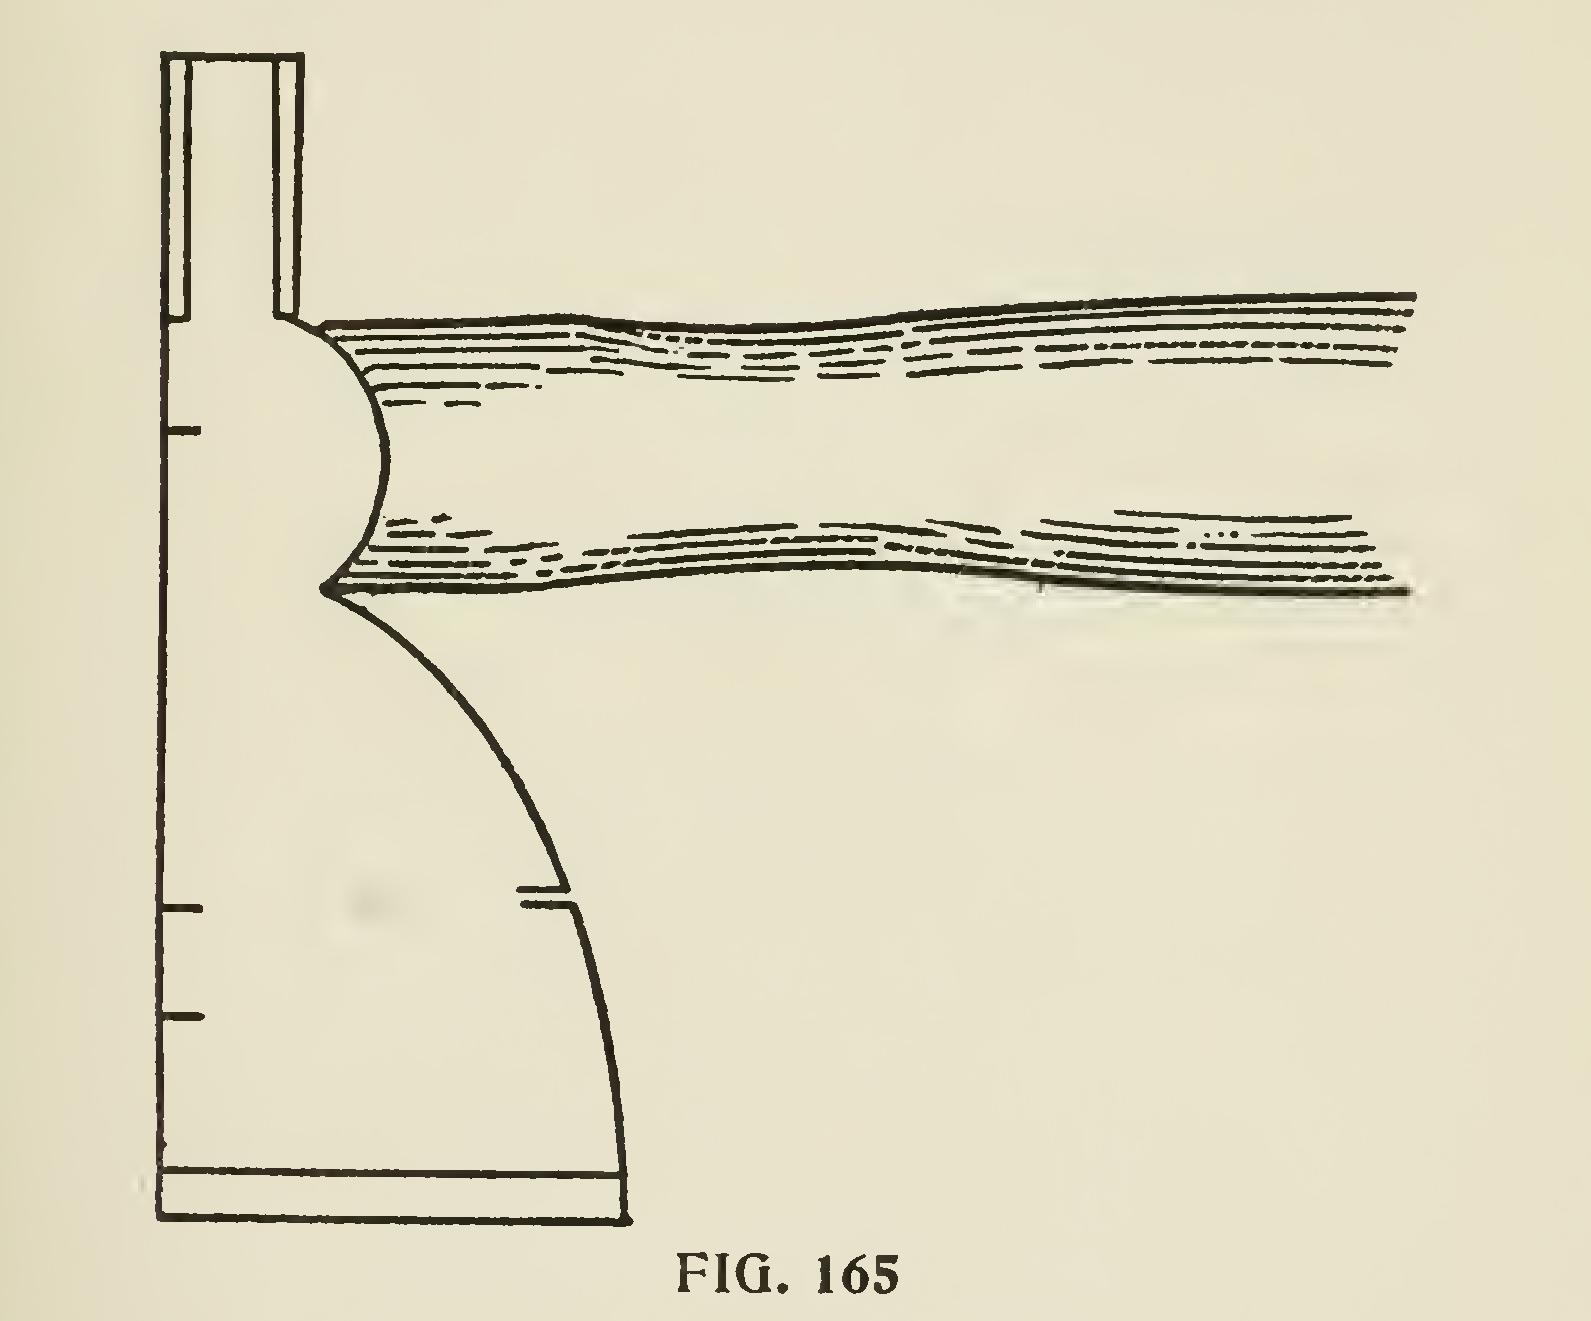
Fig. 165 is a very common shingling hatchet. File marks at one and one-half and two inches (the projection that is generally on a barn or shed roof—as most houses nowadays have gutters) and other marks at four and one-half and five inches (which are ordinary courses), and it makes a very convenient all-around rule, hammer and hatchet, and in the hands of a mechanic a very good roof can be laid even without the aid of chalk lines or straight edge.
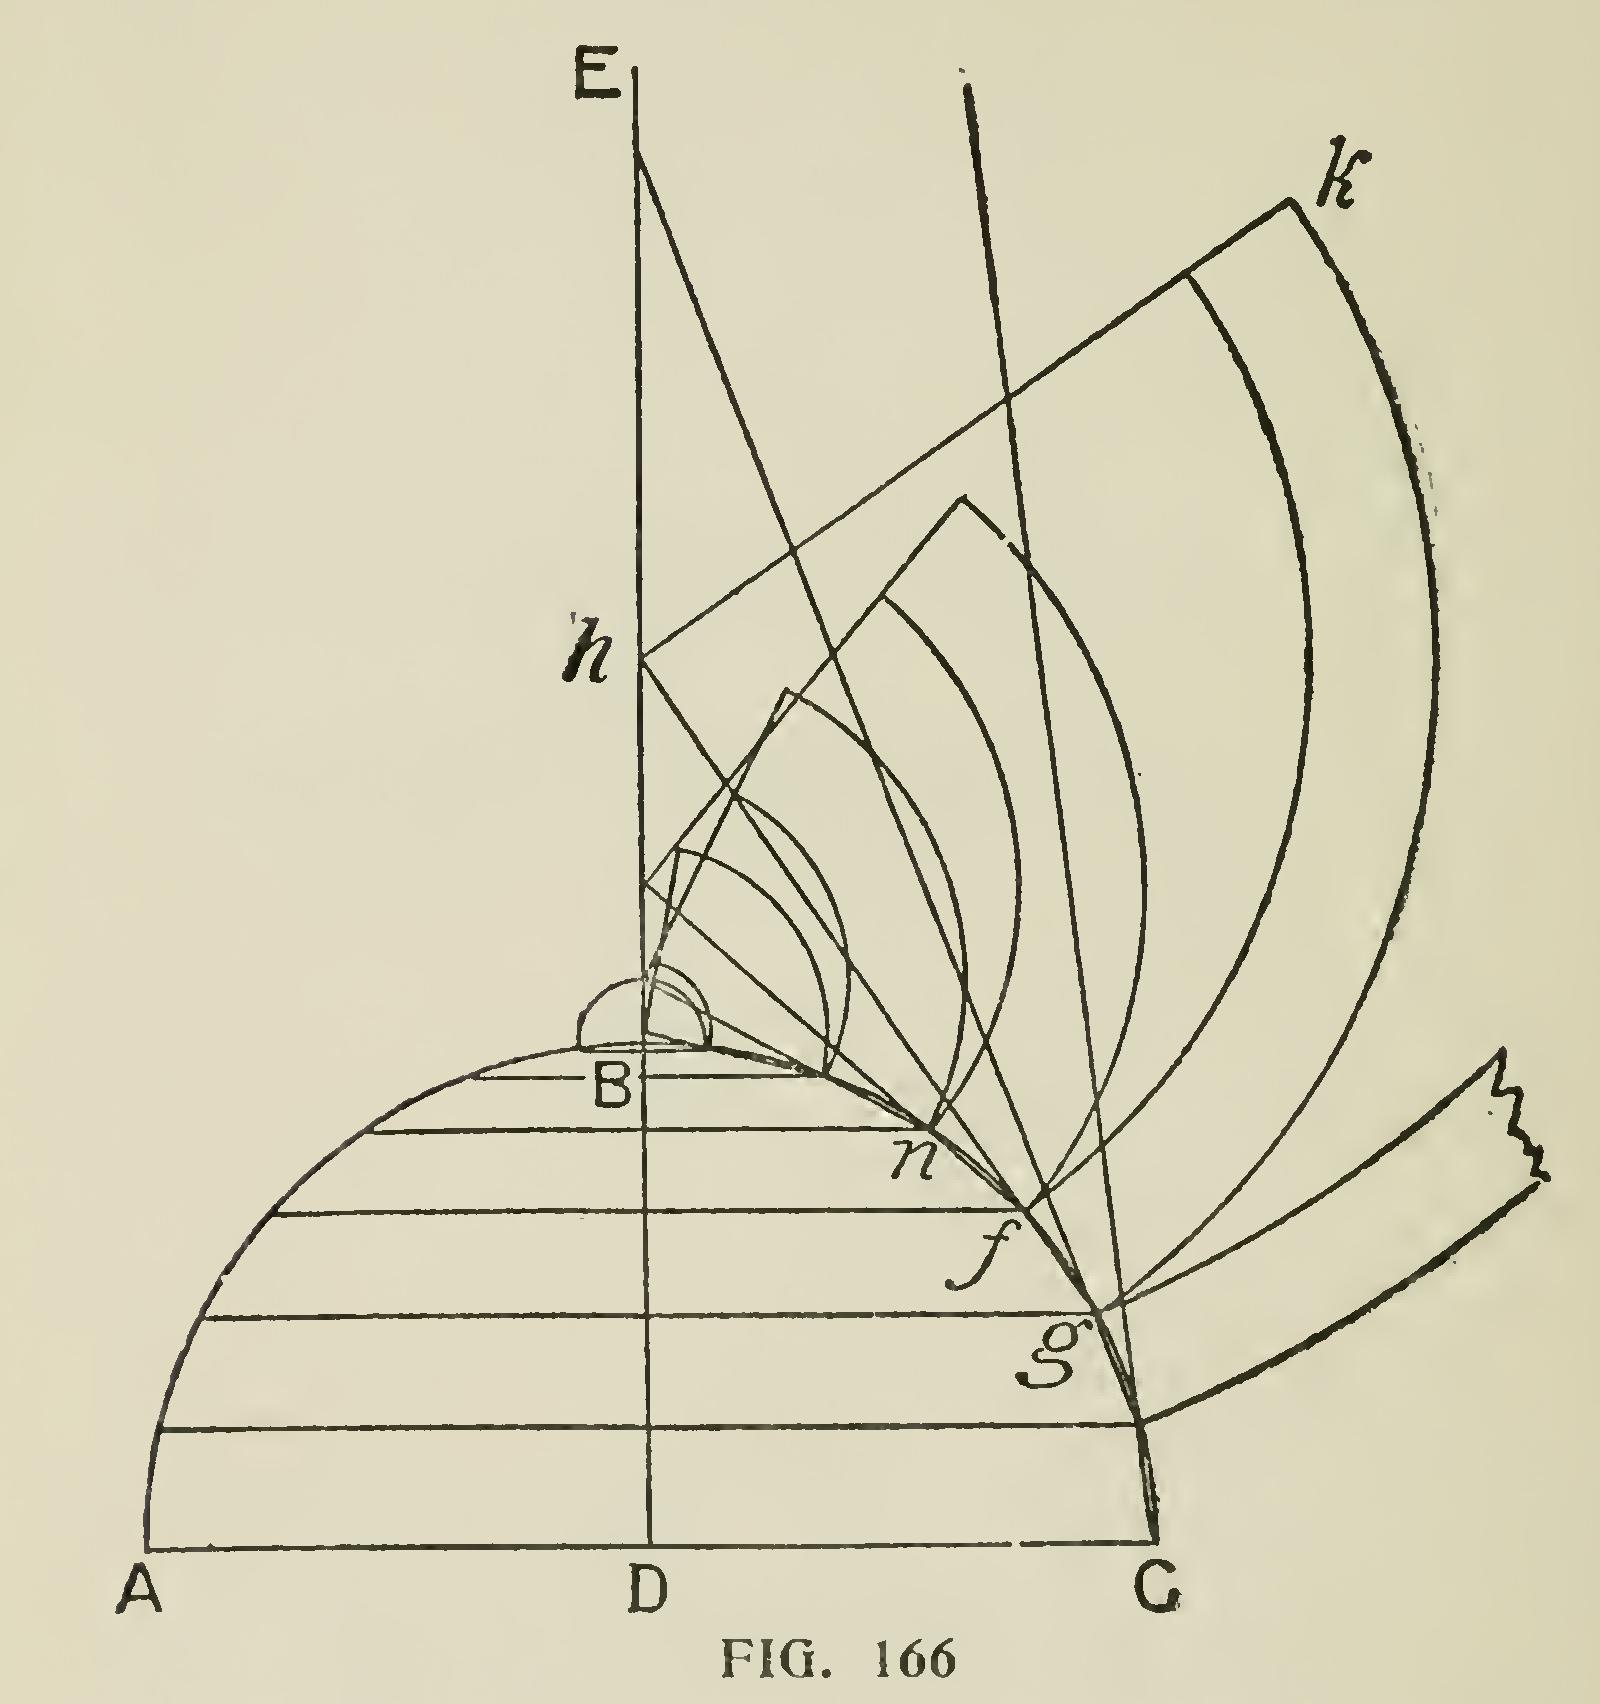
To cover a circular dome with horizontal boarding, proceed as follows: Let ABC (Fig. 166) be a vertical section through the axis of a circular dome, and let it be required to cover this dome horizontally. Bisect the base in the point D, and draw DBE perpen dicular to AC, cutting the circumference in B. Now divide the arc BC into equal parts, so that each part will be rather less than the width of a board, and join the points of division by straight lines, which will form an inscribed polygon of so many sides; and through these points draw lines parallel to the apse AC, meeting the opposite sides of the circumference. The trapezoids formed by the sides of the polygon and the horizontal lines, may then be regarded as the sections of so many frustums of cones; whence results the following mode of procedure : Produce, until they meet the line DE, the lines nf, fg, etc., forming the sides of the polygon. Then to describe a board which corresponds to the surface of one of the zones, as fg, of which the trapezoid is a section, from the point h where the line fg produced meets DE, with the radii hf, hg, describe two arcs, and cut off the end of the board k on the line of a radius hk. The other boards are described in the same manner.