Stair Building
tread, line, riser, string, inches, square and cut
STAIR BUILDING On account of its prominence as a feature of interior design, and the almost continuous prac tical use to which it is put, the stairway ranks as one of the most important details in the construc tion of any building. If appropriately designed, it can be made a most important decorative fea ture; and if well built and conveniently located, it will go far to redeem defects apparent else where. If, on the other hand, it is improperly designed, it will mar and may practically condemn the entire structure.
In laying out stairs, it is first necessary to determine the height from the top of the floor which the stairs start from, to the floor on which they are to land; also the run or distance of their horizontal stretch. This is found by dividing the height into the number of risers desired. This usually results in fractions of an inch to each rise. However, the fractions may be avoided by the use of the story pole, by spacing it off with compasses into the number of risers desired. This being done the rest is easy because the run is not usually limited as to exact space, and as there is always one less tread than there are risers, its length is deter mined by the width of the treads. Thus if there are 14 risers, there would be 13 treads. If the treads be 9 inches wide the run would be 9 times 13 or 117 inches, which is 9 feet and 9 inches as shown in Fig. 239. From this it will be seen that the run and rise of the individual step is taken on the steel square as shown in the illustration and determines the shape of the pitchboard. The way to make a pitch-board is by the use of the steel square, which, of course, every carpenter in this country is supposed to possess. Fig. 240 shows a part of the stair string with the square laid on, showing its application in cutting out a pitch-board. As the square is placed it shows 10 inches for the tread and seven inches for the rise.

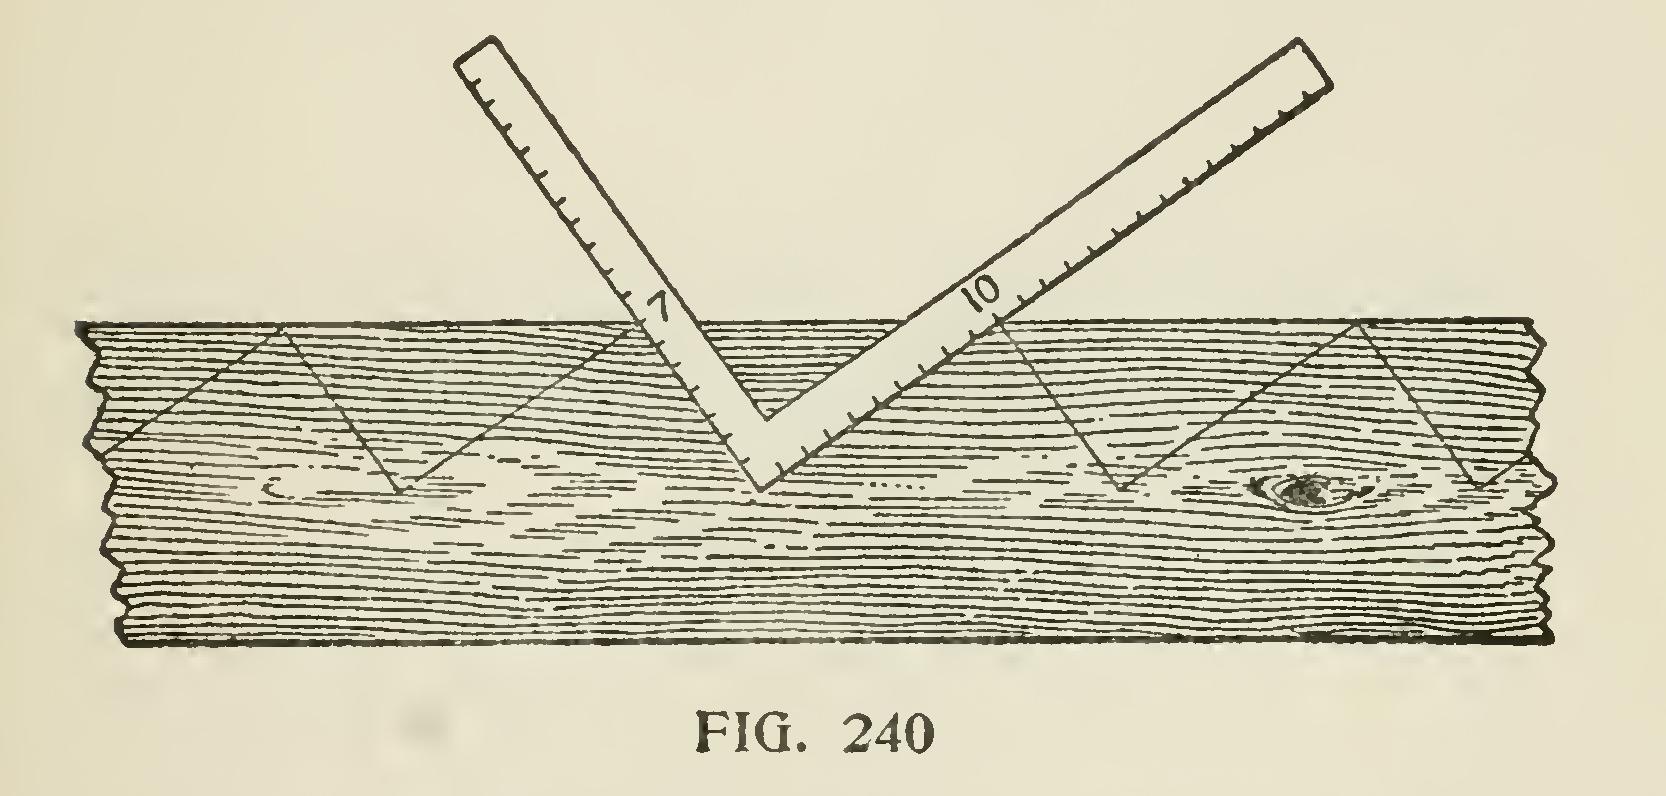
To cut a pitch=board, after the tread and rise have been determined, proceed as follows : Take a piece of thin clear stuff, and lay the square on the face edge, as shown in the figure, and mark out the pitch-board with a sharp knife; then cut out with a fine saw and dress to knife marks, nail a piece on the largest edge of the pitch-board for a fence, and it is ready for use.
Fig. 241 shows the manner of applying the board. R, R, R, R is the string, and the line A shows the jointed or straight edge of the string, The pitch-board, p, is shown in position, the line 8i represents the step or tread, and the line 7i shows the line of the riser. These two lines are of course at right angles. This string shows five complete cuts for treads, and six complete cuts for risers. The bottom of the string at W is cut off at the line of the floor on which it is supposed to rest. The line C is the line of the first riser. This riser is narrower than any of the other risers, because the thickness of the first tread is always taken off it; thus, if the tread is 11 inches thick, the riser in this case would only require to be 6/ inches wide, as 6/ and 1 inches together make 7i inches. Another thing to be considered is the string, which must be cut so that the line at W will be only 61 inches from the line at 8i, and it must be parallel with it. The first riser and tread having been satisfactorily dealt with, the rest may be easily marked off by sliding the pitch-board along the line A until the line 8 on the pitch board strikes the line 7-1 on the string, when another tread and another riser are marked off in the same manner.
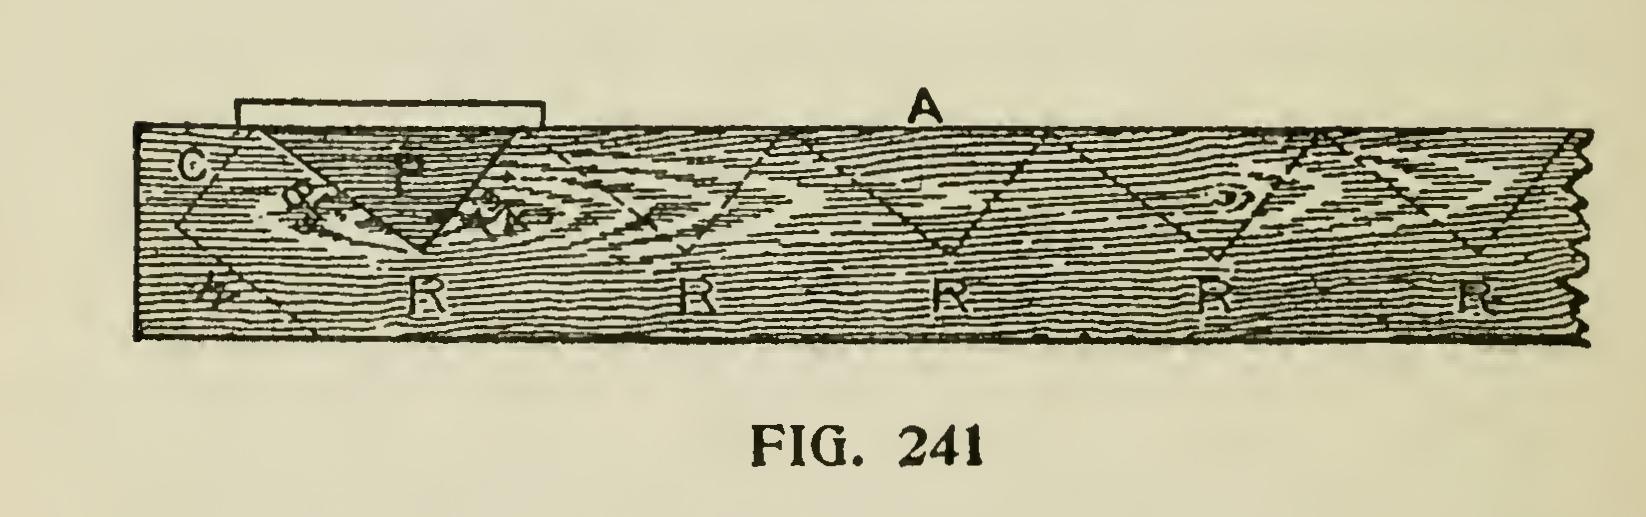
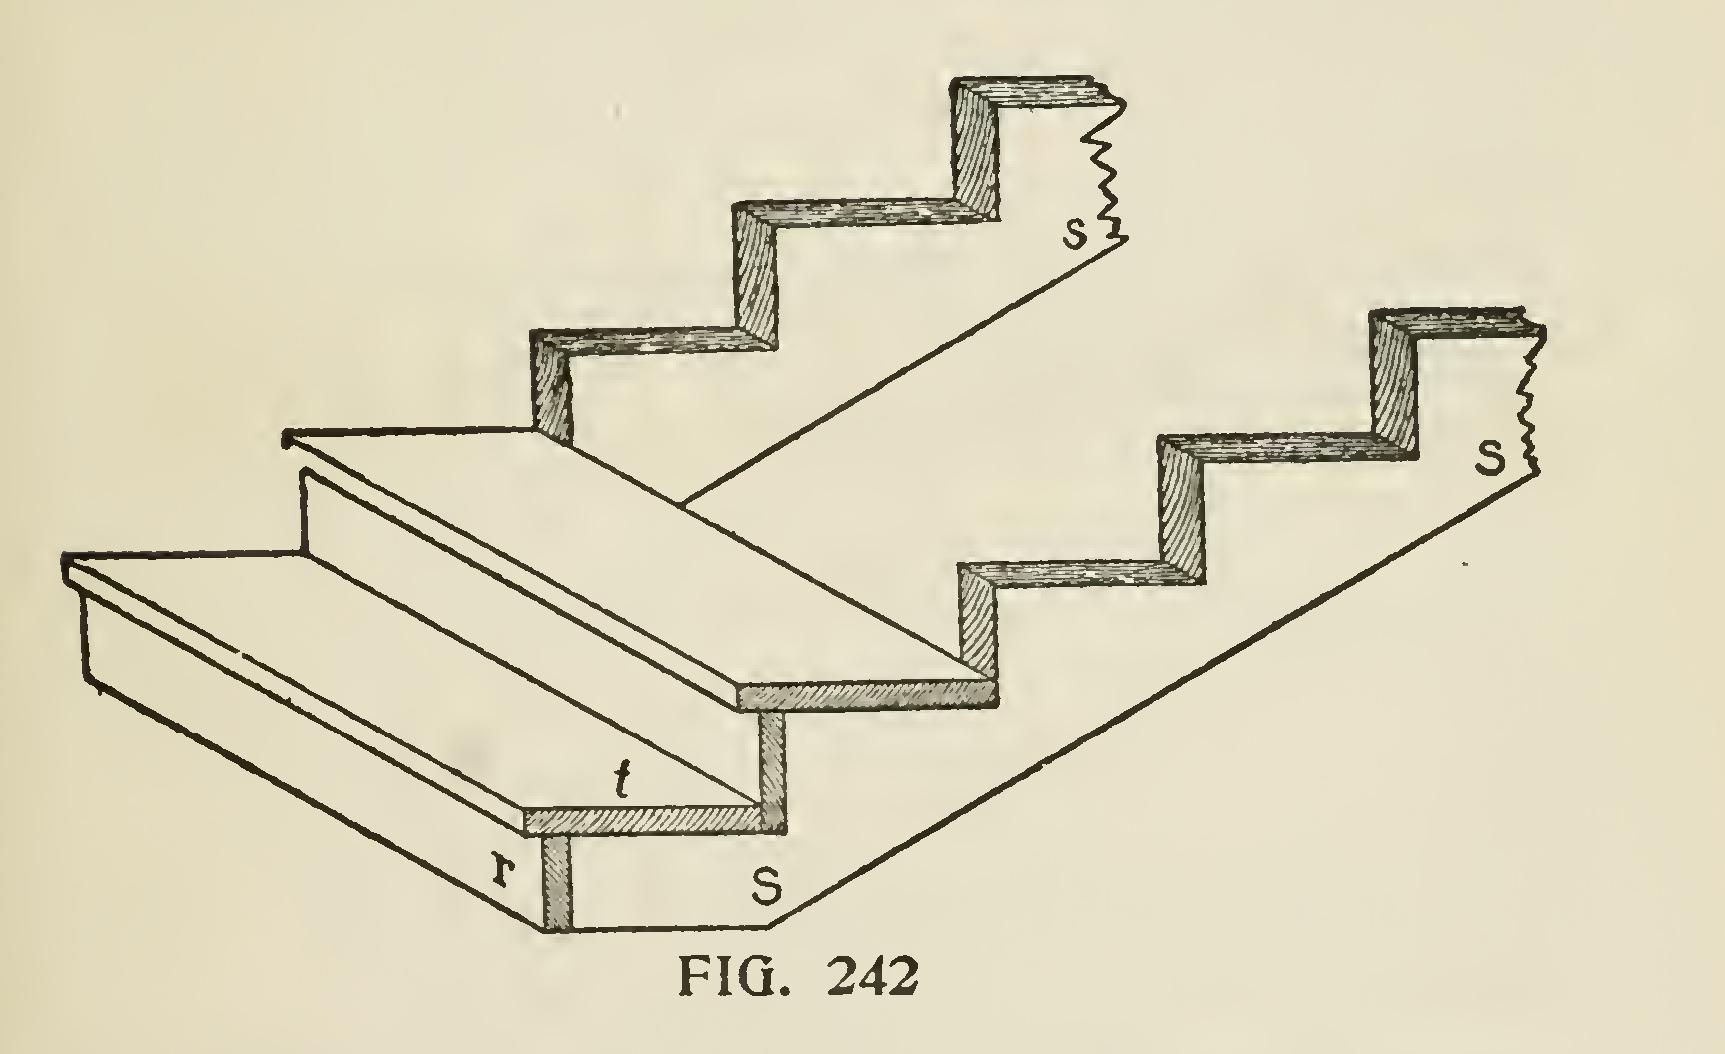
Fig. 242 shows a portion of the stairs in position. S, S shows the strings, which in this case are cut square; that is, the part of the string to which the riser is joined is cut square across, and the "butt" or end wood of the riser is seen. In this case, also, the end of the tread is cut square off and flush with the string and riser. Usually in a stair of this kind the ends of the treads are rounded off similar to the front of the tread, and the ends project over the strings the same distance that the front edge projects over the riser. If a moulding or cove is used under the nosing in front, it should be carried round on the string to the back edge of the tread, and cut off square. The riser is shown at r, and it will be noticed that it runs down behind the tread on the back edge, and is either nailed or screwed to the tread.