Classes of Tension Members 50
section, rivets, pin, design, fig, a-a and riveted
Angles are much used as tension members, being riveted at their ends to the other members in a manner somewhat similar to the flat plate.
They should be used in pairs (Fig 79, a), or they should be riveted to both legs by means of a clip angle (Fig. 79, b). If they are riveted to one leg only, then, in the design, the other leg cannot be counted in as taking any of the stress, since the manner in which they are riveted causes exceedingly large stresses in the angle. It is customary in many cases to rivet the angle to one leg only. This should never be done, for only the large factor of safety prevents rupture of the member when it is stressed to the amount for which it is designed.
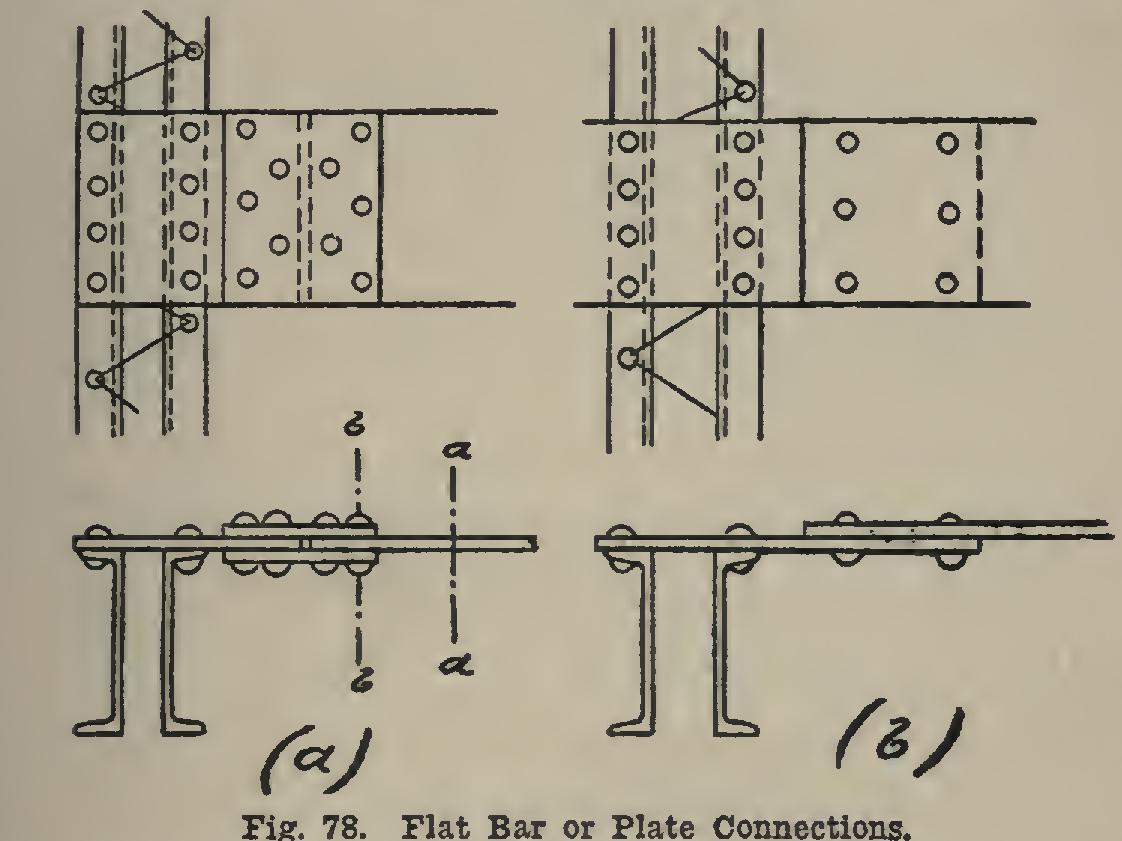
In all cases of tension members, the area which must withstand the stress is not at a-a, but at b-b or c-c, because the holes through which the rivets go cut out parts of the member and thus reduce its strength by the amount cut out.
The built-up tension members may be of any of the combinations of shapes shown in Fig. 65. The same remarks made under "Compres sion Members" regarding the rivets connecting the different shapes, apply here. At the ends, those classes of members may be connected' either by rivets or by pins to other members. In case of their being riveted, care must be taken to see that there is enough area after all the rivet-holes in any cross-section are taken out.
In case of a pin connection (Fig. 80), care must be taken to see that the section through the pinhole is as great as that required by the design. Also, the distance from the center of the pinhole to the end of the member must be carefully designed, or the member will fail by splitting out along the line b-b. In order to save material, it is advisable to have the section a-a through the center of the pin cut through no rivets, as is shown in Fig. 80. This section, as in the case of the eye-bar, is greater than the sec tion through the center of the pin, or the mem beer would fail at that point. This amount of ex cess, as well as the distance y, is usually deter mined by the specifications, a very common requirement being that the section through the pin shall be one-fourth more than that through the center of the bar, and the section through b-b shall be at least equal to that in the body of the bar.

In tension members when compared with compression members, the reverse is true as re gards the radius of gyration. Although atten tion is seldom paid to the fact, nevertheless the smaller the radius of gyration, the better the section. However, the radius of gyration is never computed for tension members.
If the web were thin, the pin would tear out of it somewhat after the fashion of a huge rivet. In order to prevent this, one or more plates, called pin-plates, are put on as shown in Fig. 80, to prevent this. These pin-plates should be on compression members. The design of their thickness is the same for both classes of mem bers, and the determination of the required num ber of rivets is the same; but in tension mem bers, only sufficient rivets should be to the right of the section a-a, so that their combined strength will be equal to the section of the pin plates through the section a-a. The remainder of the required number should be to the left of section a-a. The reverse is true for the distribu tion of rivets in compression members. This is due to the fact that the direction of the stress is just opposite in one case to what it is in the other.
51. Design of Tension Members. In* all cases the required area is equal to stress divided by the allowable unit-stress. Examples are given below, showing the method of design of different classes of members.
(1) A tension member has a total stress of 449,500 pounds. The allowable unit-stress is 16,000 pounds per square inch. What eye-bars would be used, and what would be the diameter of their heads provided a pin was used'? Required net area=449,500-4-16,000=28.10 square inches. Let 4 bars be used. This num ber will be indicated by the condition of design and class of structure, but is usually an even number. Area of one bar=28.10÷4=7.03 square inches. On (C 247), in the 6-inch column, is found 7.13 on the line. It is to be noted that is greater than of 6. There fore 4 of these bars will be used.