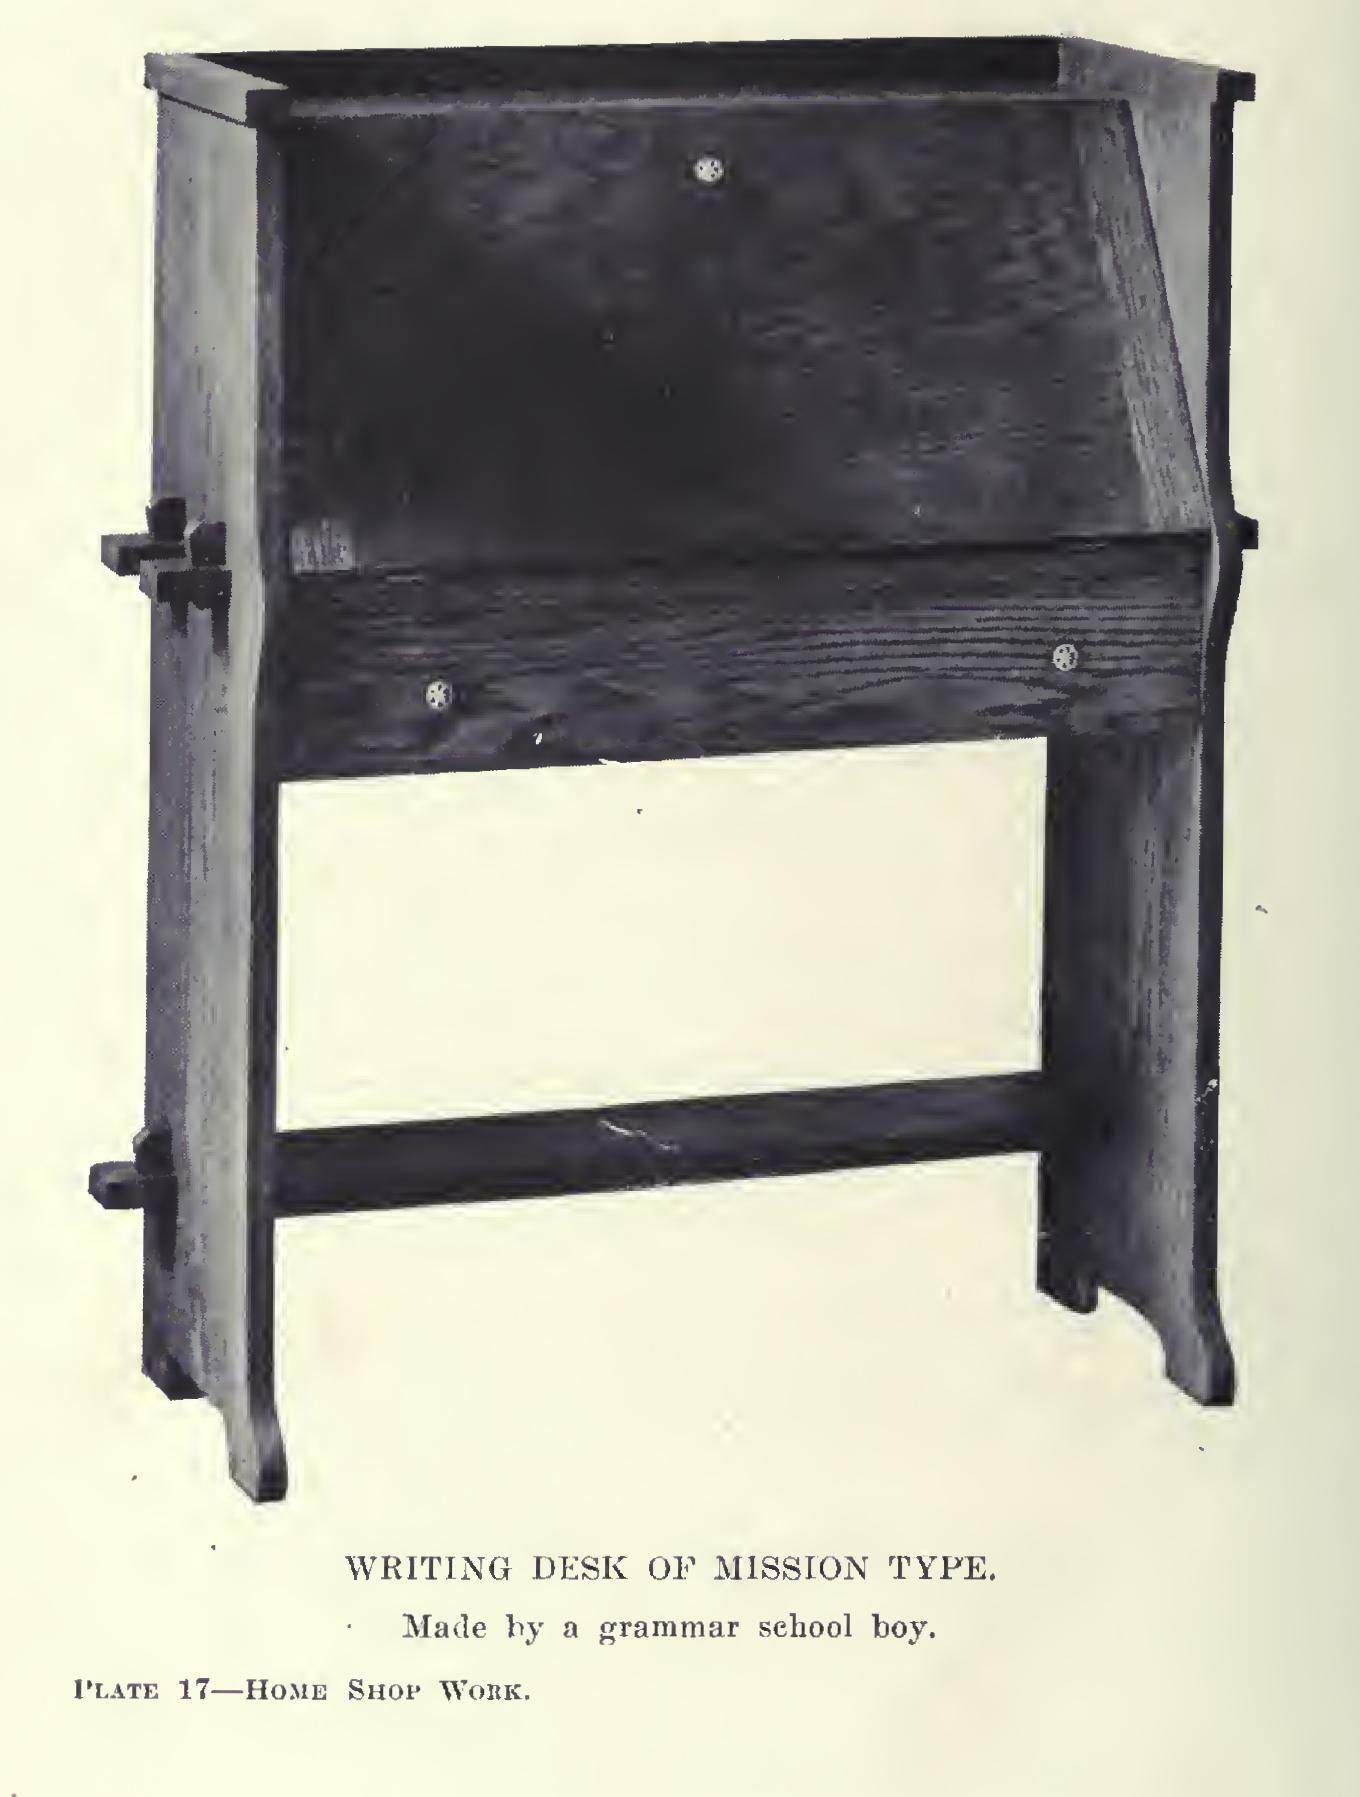
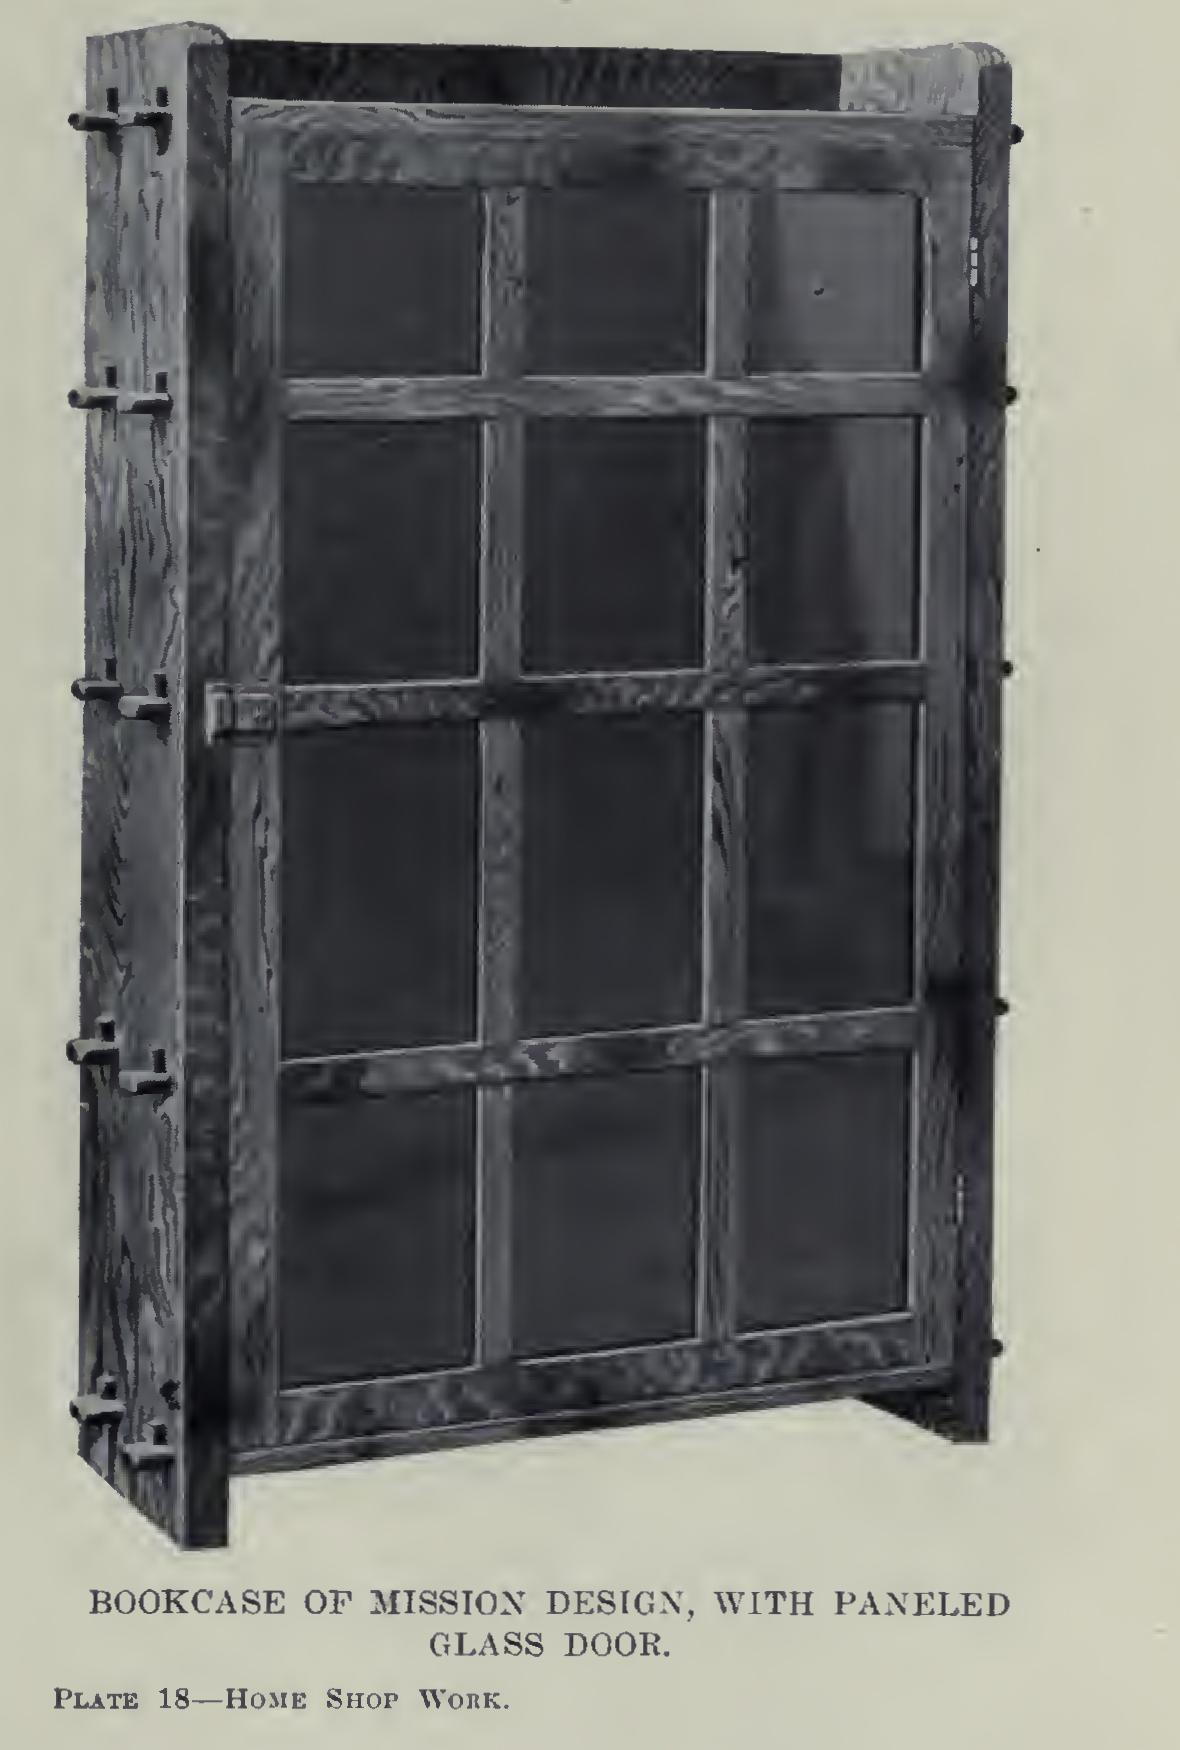
Door
inch, inches, width, one-half, tenons, fig and piece
If desired, the paneling of the back might easily be broken up into differently arranged spaces. For example, the panels might be made to take the shape of the spaces planned for the door. If this is done, stock must be got out ac cordingly, of course. The arrangement given is simple, and will prove very satisfactory both as to appearance and as to the ease with which it can be built.
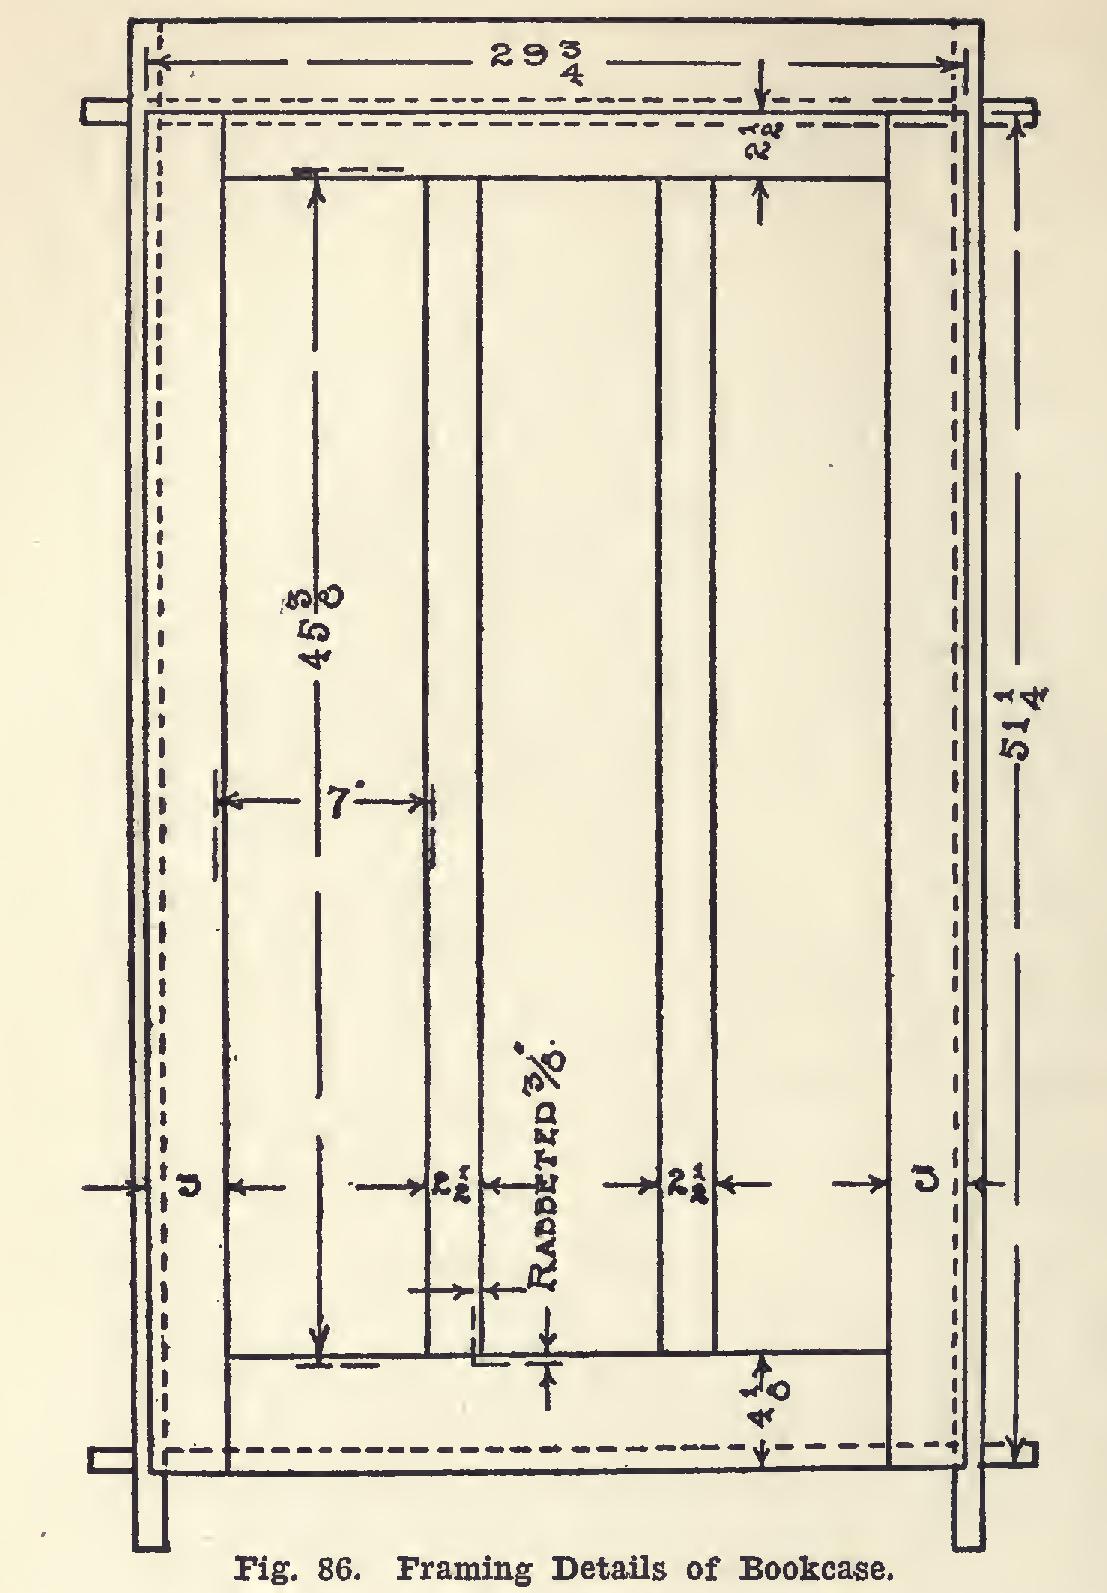
By consulting Fig. 86, it will be seen that the frame of the panel is to set into a recess cut out of the sides of the case, while its top and bottom rails overlap the edges of the top and bottom shelves respectively. This allows the frame to be fastened to the case with screws in such a manner that none of the joints will show from the front. Such a bookcase can be taken apart readily by simply removing the screws from the back, and the wooden keys from the ends of the shelves.
The reason for planing but one joint-edge on the stiles and rails, and for cutting the stock one-quarter of an inch wider than is called for by the drawings, is to allow the frame to be fit ted after it is put together, just as a door is fitted to its frame by cutting off the "lugs" and planing it to size.

The top rail (Fig. 87) may be made first. If the ends have been sawed fairly square, and the length is correct, they need not be planed, since they enter the mortise and are not fitted against any other part. Begin at the middle of the piece, and measure to each side three and one half inches, then one and three-fourths inches, then six and five-eighths inches, then three eighths of an inch. These measurements are to be made on the joint-edge. Square knife lines across for the ends of the mortise between the lines one and three-quarters inches apart, and entirely around for the shoulders of the tenon. Gauge for the width of the mortise and the thickness of the tenon at the same time, since they are alike as to width and thickness. The settings will be first one-quarter, then one-half an inch. For the width of the tenon, set the gauge to three-eighths, then to one and seven eighths of an inch.
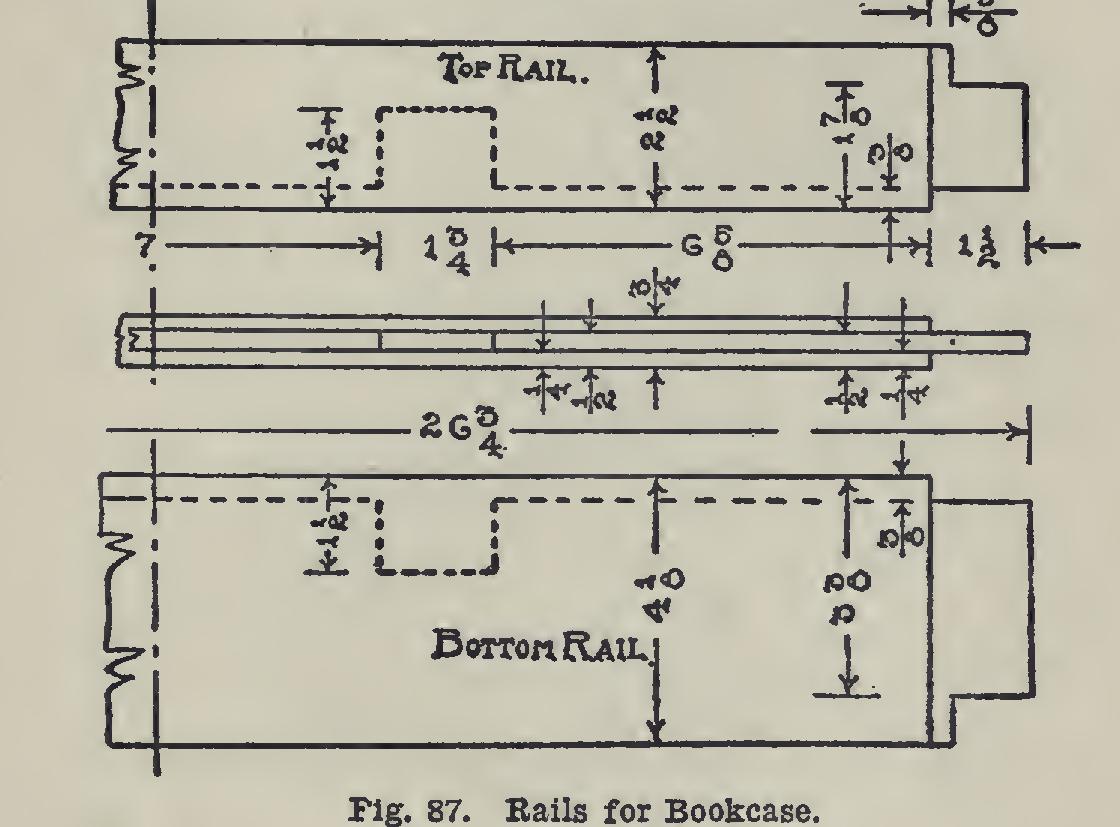
In sawing these tenons, it will be noticed that three-eighths of an inch is left on one edge at the shoulder. This is to fill up the groove made by plowing the stiles their full length.
Time will be saved by laying off the lower rail at the same time as the upper one, placing them side by side when marking off posi tions of the mortises and tenons. It differs from
the top rail only in its width and in the width of its tenons.
The joint-edges are to be plowed the full length of the piece. Better cut the tenons and mortises, but wait and do all of the plowing at one time.
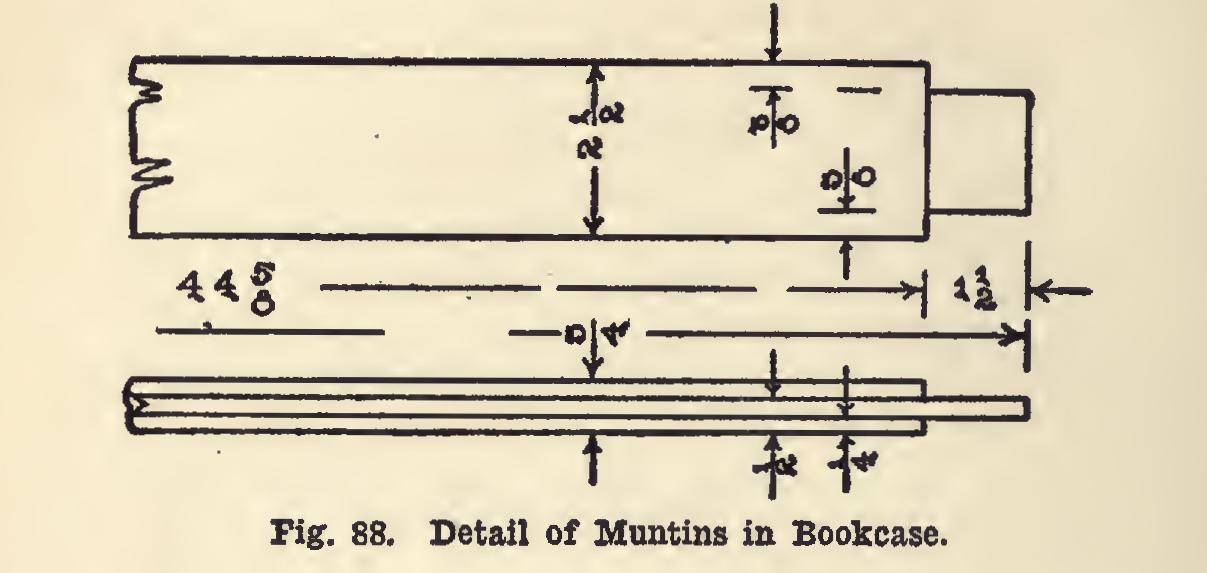
Fig. 88 gives the dimensions of the two muntins. The width is two and one-half inches, and the thickness three-quarters of an inch. They should be sawed fairly accurate to a length of forty-seven and five eighths inches. From the middle, measure each way one-half of forty four and five-eighths inches, to locate the shoul ders of the tenons. The settings of the gauge for marking the tenons are one-quarter, then one-half of an inch. Both edges of these pieces are to be plowed. These grooves are one-quar ter of an inch wide and three-eighths of an inch deep, in the middle of the edge. This plowing reduces the width of the tenon as indicated in Fig. 88.
The stiles (Fig. 89) are to be cut somewhat longer than the drawing calls for. In laying these out, therefore, allow a little for waste at one of the ends; then measure consecutively, and mark three-quarters, three, forty-five and three eighths, one and one-half, and five-eighths of an inch. Setting the gauge to one-quarter, then to one-half an inch, mark off the sides of the mor tises. Cut them to a depth of one and one-half inches. The joint-edges are to be plowed.
Scrape and sandpaper the parts, then put them together. Use cabinet-maker's clamps to hold the parts together. Use hot glue, and be careful not to get any of it in the grooves or on the edges of the panels.
When dry, clean off the surplus glue, bore and countersink holes for the screws; but do not fasten the back on until it has been stained, filled, and waxed or varnished.
For the door there will be needed for the rails (Fig. 90) one piece two inches wide, jointed on one edge, by twenty-seven and three quarters inches long. All the pieces for the door are to be planed on two surfaces to a thick ness of seven-eighths of an inch. Also, one piece, jointed on one edge, with a width of three and one-quarter inches, and a length the same as the piece just named. The first is for the top rail, the second for the bottom.