Use and Care of Tools
piece, beam, spur, edge, fig and surface
USE AND CARE OF TOOLS It is easy to spoil good lumber—and, for that matter, to do serious injury to good tools them selves—by wrong methods in the use of tools. Moreover, in the hands of an inexperienced ama teur craftsman, a sharp cutting tool is a rather dangerous weapon, with which, through careless ness or through ignorance of proper method of handling, proper position of the body in relation to the work, etc., the worker may inflict serious wounds upon himself. For these reasons, before taking up the making of special pieces, we shall devote a few pages to the instruction of the ama teur in the use especially of the more common cutting tools and their necessary accessories. These practical hints are, by special permission of the publishers, condensed from Part I of "Es sentials of Woodworking,"* a textbook which admirably covers this field of work in its entirety.

The
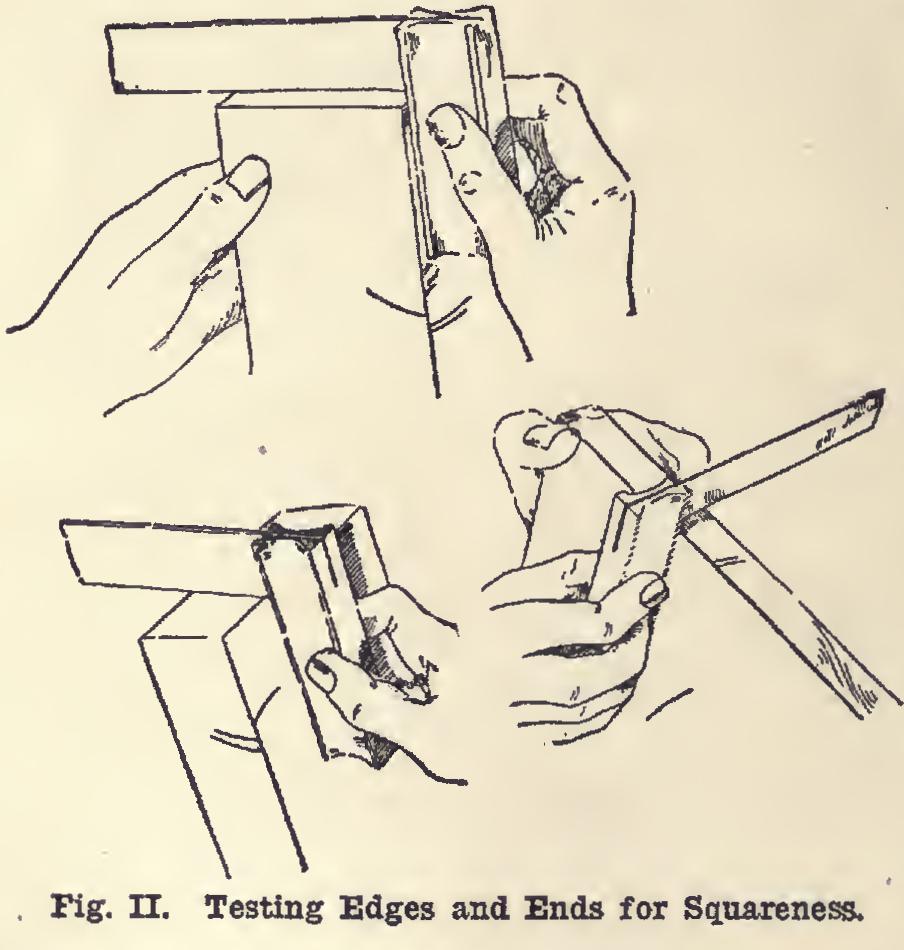
The try-square is used for three purposes: (1) To act as a guide for the pencil or knife point in laying out lines across the grain at right angles to an edge or surface; (2) To test an edge or end to see whether it is square to an adjoining surface or edge; (3) To test a piece of work to see whether it is of the same width or thickness throughout its entire length.
Fig. I shows the various positions assumed in lining across a piece. The beam should be held firmly against either the working face or the joint-edge.
The working face or face side of a piece is the broad surface which is first made true. The joint-edge is the first edge which is made square to the working face and straight. These two sur faces are usually marked in some way so that they may be distinguished from the other surfaces.
In
testing edges or ends for squareness, the beam should be held, as in lining, firmly either against the working face or the joint-edge (Fig. II). Care should be taken to test the ex treme ends of the piece. Also test at a sufficient number of points to show fully the condition of the edge.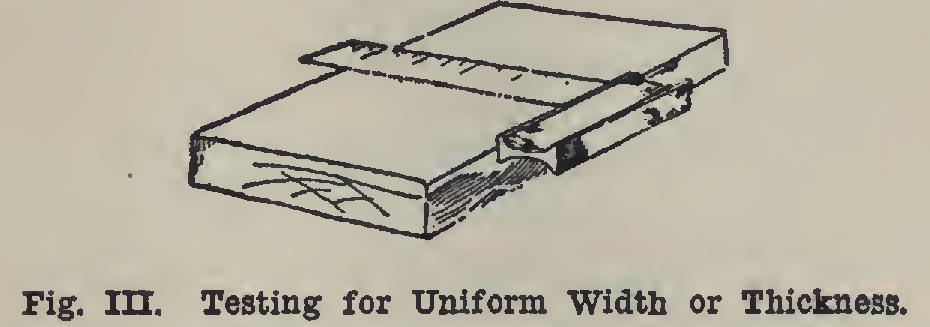
In testing a piece to see whether it is of the same width or thickness throughout its entire length, place the blade across the surface to be tested, and, holding the beam lightly against the working face or joint-edge, slide the try-square along the piece with the eye fixed upon the grad uations at the outer edge (Fig. III).
The Marking Gauge.
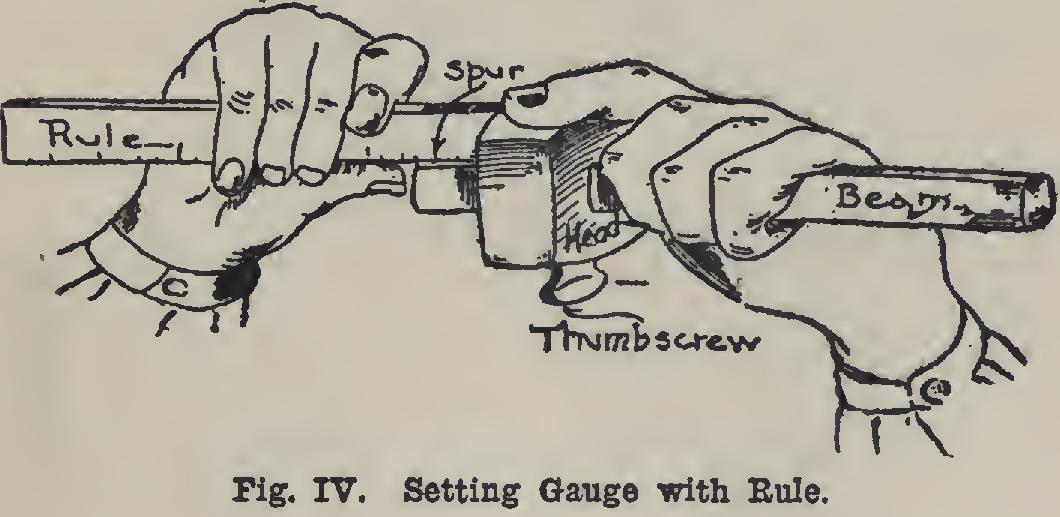
The gauge is used for laying out lines along the grain of the wood. The spur should be sharpened to a knife point with a file so that it may make a fine, smooth line. It should project far enough below the beam so that the beam may be rolled forward in such a way as to bring the spur into the board at a slight angle when marking. It should extend not less than one-eighth of an inch and in most cases three-sixteenths of an inch.
The graduations on the beam are seldom re liable. It is safer to set the gauge with the rule by measuring the distance from the spur to the gauge-block. This is done by holding the gauge bottom side up in the left hand. With the right, place the end of the rule against the head (Fig. IV). After the screw has been tightened, apply the rule again to make sure of the correctness of the setting.
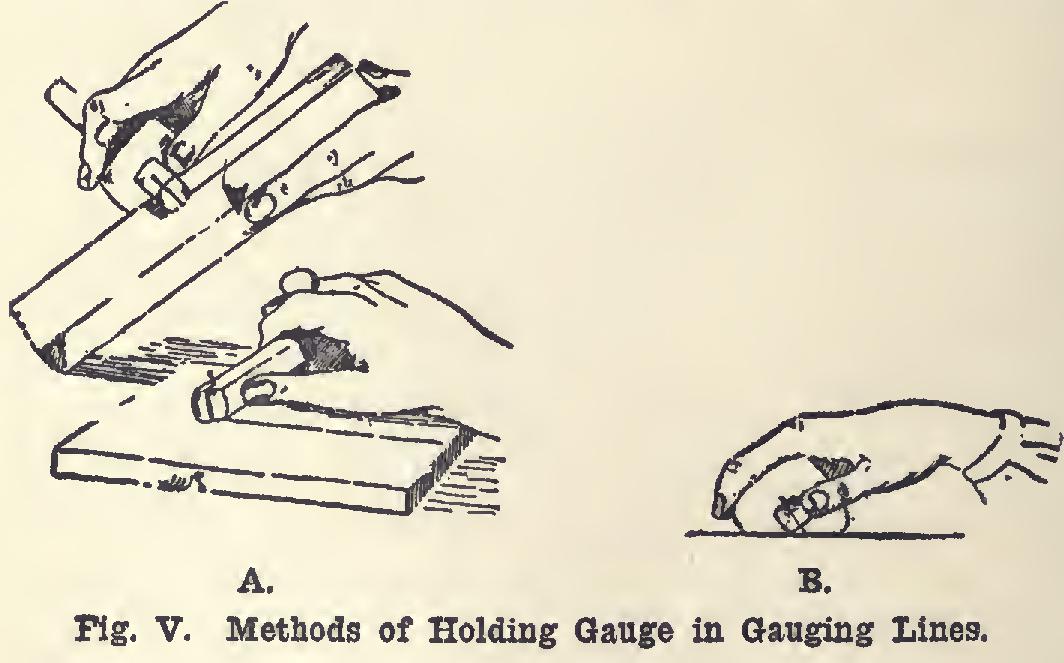
To gauge the line, take the tool in the right hand, three fingers grasping the beam, first en circling the head for narrow work, and the thumb back, or nearly back, of the spur (Fig. V A). The head should be kept against one or the other of the face sides. Begin at the end of the piece which is towards you; hold the block firmly against the piece; roll the beam forward until the spur barely touches the surface and make a very light line. Fig. V B illustrates the manner of raising the spur from the wood by raising the wrist during the backward stroke. It will be found convenient to hold the piece against the bench stop. This steadies the piece, and permits the worker to see how deep the spur is cutting and whether the head is against the face properly. Avoid deep lines. They are inac curate even if straight, and always cause trouble in the making unless the grain of the wood is perfectly straight.