Use and Care of Tools
edge, planing, plane, test, square, piece and board
Where several parts are to be fitted together, the faces are usually turned this case, the best surface should not be selected for faces.
In the descriptions of furniture which follow, directions are sometimes given for placing the faces otherwise. A careful reading in each case, however, will preclude any misunderstanding.
Take as long a shaving as the nature of the work will permit. In planing long boards or where it is desired to lower one particular place only, it becomes necessary to stop the stroke before the end of the board is reached. That no mark shall show at the place where the plane iron is lifted, it is necessary to feather the shav ing. This is done by holding the toe of the plane upon the board and raising the heel as the stroke proceeds, beginning just before the stopping point is reached. If the cut is to commence other than at the end of the piece, lower the heel after having started the forward stroke with the toe upon the board.
Should the board be of any considerable width—three or more inches—the following test will prove sufficient: Place a straight-edge diag onally, then crosswise of the surface planed. If no light can be seen between the piece and the straight-edge, the surface may be considered level or true.
Planing First Edge Square with Working Face. The two tests which this first edge must fulfil are: First, that it shall be straight; second, that it shall be square with the face side. Fig. II shows the method of testing for squareness.
When the edge has been properly trued, put on the face marks suitable for the joint-edge.
Finishing the Second Edge.
A line gauged from the joint-edge indicates the proper stop ping place in planing the second edge. This line, if lightly made, should be half planed off. As the line is parallel to the joint-edge, no straight-edge test is necessary. The try-square test for square ness, the beam being held against the face side, must be frequently applied when approaching the gauge-line.
Finishing the Second Side.
Lines gauged from the face side on the two edges, show the amount to be planed.
The test for this side is made by placing the straight-edge across the piece from arris as the planing proceeds, to see that the middle shall be neither high nor low when the gauge-lines have been reached. No other test is necessary.
Planing the First End Square.
See that the cutting edge is very sharp, and that the plane iron is set perfectly true and very shallow. Ex amine one of the ends of the piece by placing the beam of the try-square against the face side, then against face edge to locate the high places (Fig. II).
In free end planing, the cutting edge must not be allowed to reach the farther corner, or the corner will be broken off. Plane only part way across the end, stopping the cutting edge half an inch or more from the far edge (Fig. XVI). After a few strokes in this direction, reverse the position, and plane in the opposite direction, stopping the cutting edge half an inch or more from the first edge.

Keep testing the end as the planing proceeds, so that you may know what you are doing. Re move no more material than is necessary to square the end; and lay on the rule occasionally, so'that you may not endanger the correct length in your efforts to square this end.
Finishing the Second End.
Knife lines squared entirely around the piece, at a given dis tance from the end first squared, limit the amount of the planing that can be done on this end. If the waste stock is over one-eighth of an inch, the saw should be used to remove all but a thirty-second of an inch before beginning to plane. Watch the lines. If you are uncertain as to their accuracy, test this end as you did the first one.
Fig. XVII illustrates the method of planing a chamfer with one of the larger planes. First, plane the chamfers which are parallel to the grain; then the ends. If the plane-iron is sharp and set shallow, it can be run entirely across without danger of splitting the corners.
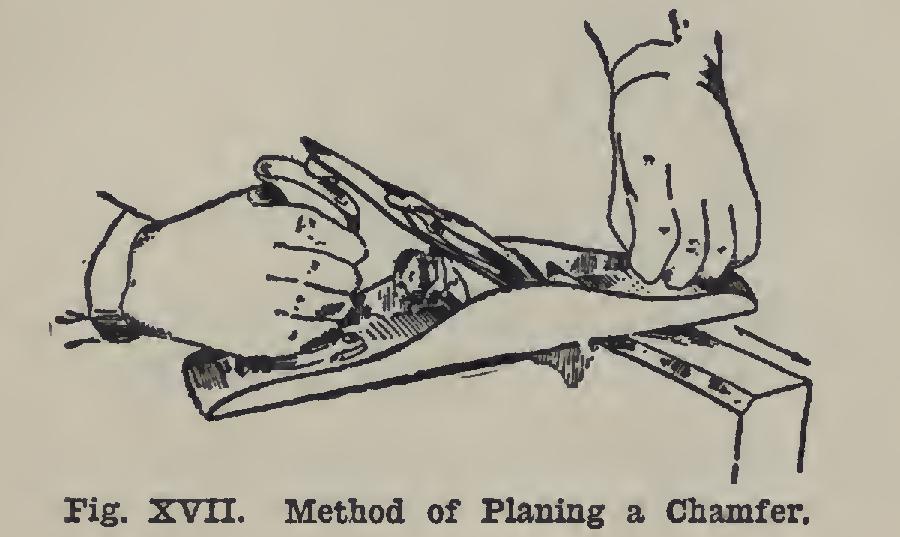
Hold the plane parallel to the edge in plan ing with the grain. Swing it to an angle of about forty-five degrees in end-chamfering, but move it parallel with the edge, and not with the length of the plane.