Use and Care of Tools
fig, teeth, blade, cutting, plane-iron, left and sawing
Saws. Saws which are used in cutting across the grain are called crosscut; those which are used in cutting parallel to the grain are called rip-saws. Fig. VI shows the saw in proper po sition. It should be held in the right hand, with the left hand grasping the board, the thumb of the left hand acting as a guide in the beginning. The thumb should be held firmly on the board, and the blade of the saw should be pressed lightly against it.

If the saw does not follow the direction of the line, the blade should be slightly twisted, as the sawing proceeds, in the direction it ought to take. This must be carefully done so as not to cause the blade to bind and kink.
All saws will work easier, and will be found less likely to rust, if their sides are rubbed occa sionally with an oily rag or a piece of tallow.
The Crosscut Saw.
Fig. VII shows the teeth of a crosscut saw. This saw is filed so that the cutting edges are on the sides of the teeth. Every tooth is sharpened to a point, one on the right side, the next on the left, giving two paral lel lines of sharp points with a V-shaped groove between.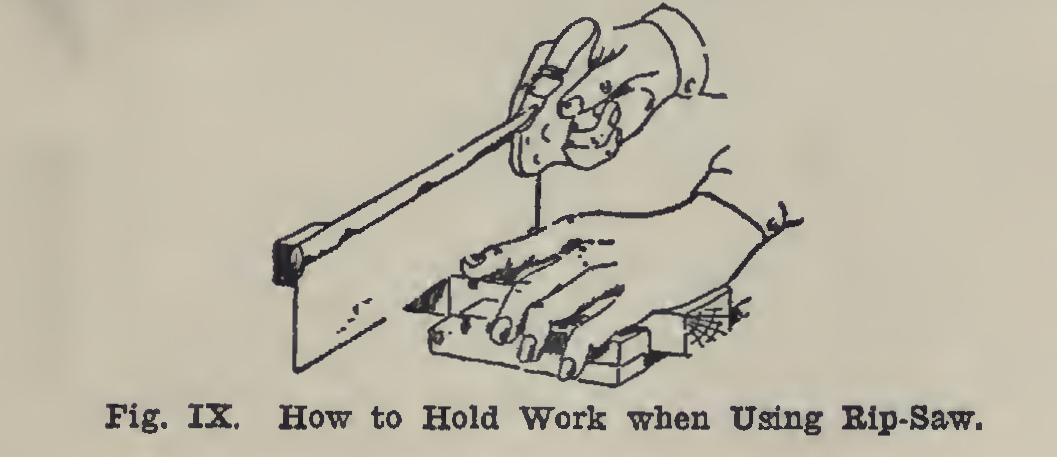
The Rip-Saw.
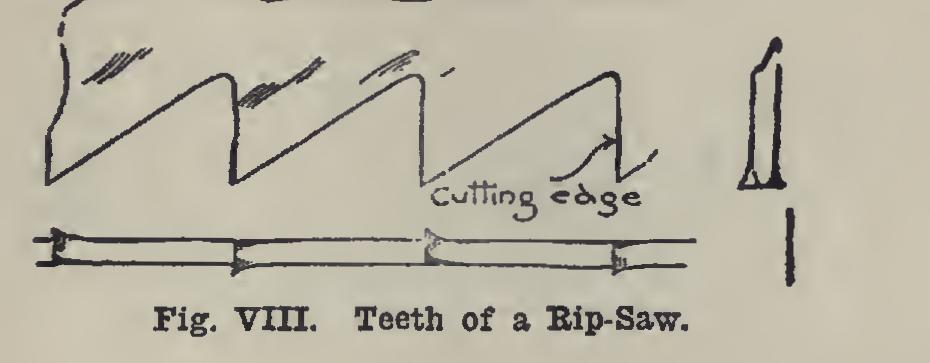
The teeth of the rip-saw are chisel-shaped (Fig. VIII), and are made by fil ing straight across the blade. The front or cut ting edges are filed so that they are square, or at right angles to an imaginary line passing through the points of the teeth. This saw is used upon work requiring delicate, accurate cut ting. The teeth are suitable for both crosscut ting and fine ripping.
In using this saw (Fig. IX), hold the work firmly against the stop of the bench-hook with the left hand, guiding the saw with the forefinger or thumb placed against the blade just above the teeth. Begin on the backward stroke, hold ing the handle end of the saw highest. Begin at the farthest corner, using short, easy strokes. Gradually lower the handle to a horizontal po sition, meanwhile increasing the number of teeth used, but continuing the slow, regular strokes.
In accurate cutting (Fig. X), where no paring or block-planing is to be done, the saw teeth should cut just by the line, with the kerf in the waste, but with no wood between the line and the kerf. To allow for paring or block planing, saw about one-sixteenth of an inch in the waste (Fig. XI).
When ripping, place the piece in the vise, and begin sawing as indicated in Fig. XII. Place the saw so that just the whole of its thickness is in what is to become waste wood. Begin sawing as was done in crosscutting. Gradually lower the handle, while sawing, until most is being cut from the side nearest you (Fig. XIII, A). Re verse the wood several times, working down one side, then the other, until the cross-lines are reached. Fig. XIII, B, illustrates the results of good and bad sawing.
Planes—Setting the Blade. The cap-iron (see Fig. XIV) should extend to within one-six teenth of an inch of the cutting edge of the plane-iron in the smooth-plane, and three thirty seconds in the jack-plane (Fig. XV). The screw which holds the plane-iron and cap iron together must be fastened with a scew driver—many carpenters use the plane-iron for this purpose—as tightly as possible; otherwise a few strokes of the plane, and the plane-iron will have been forced up so that the cutting edge will not touch the wood.
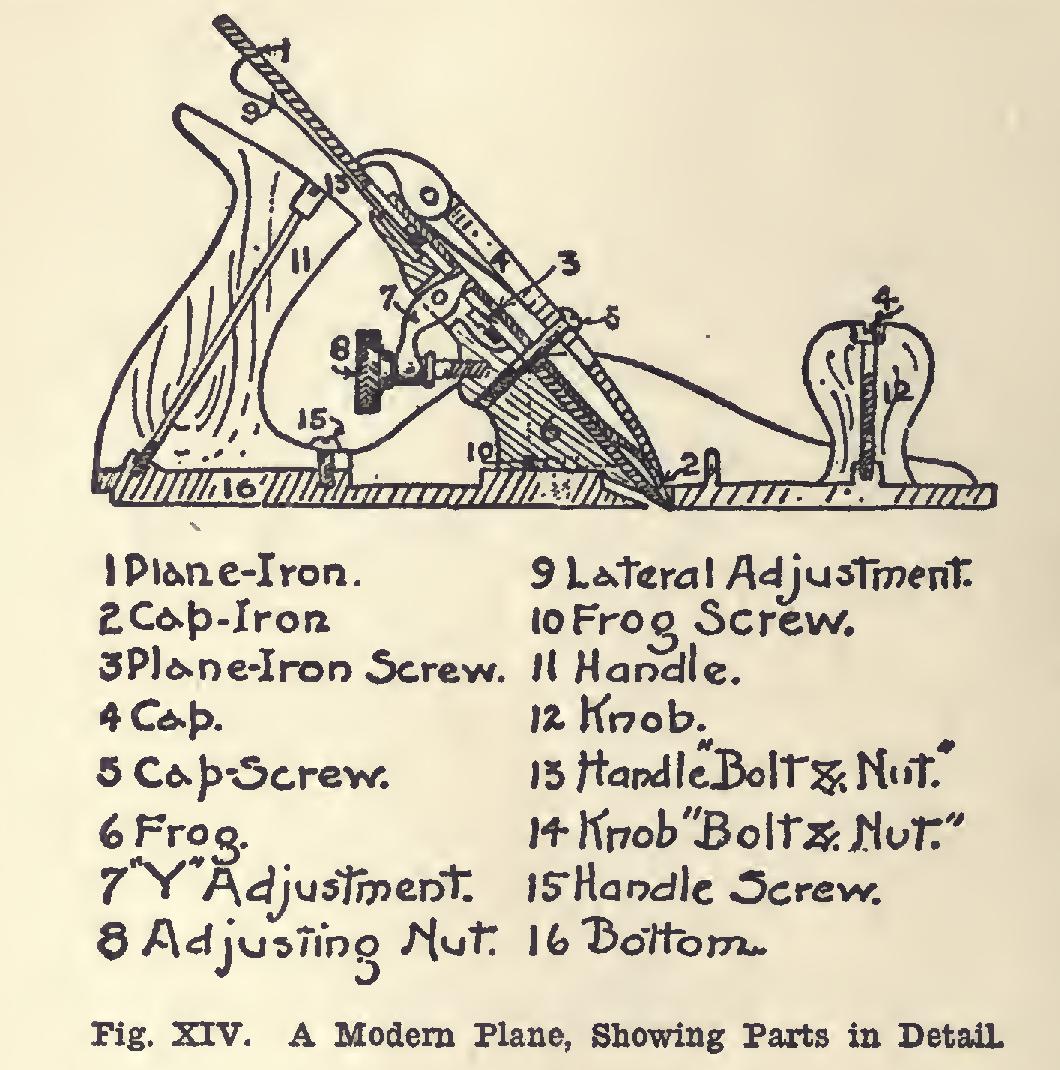
The cap-iron and plane-iron are fastened in the throat of the plane by a cap, on one end of which is a little lever or cam. Should this cam fail to hold the irons firmly, the screw which holds the cap to the frog should be turned with the screwdriver.
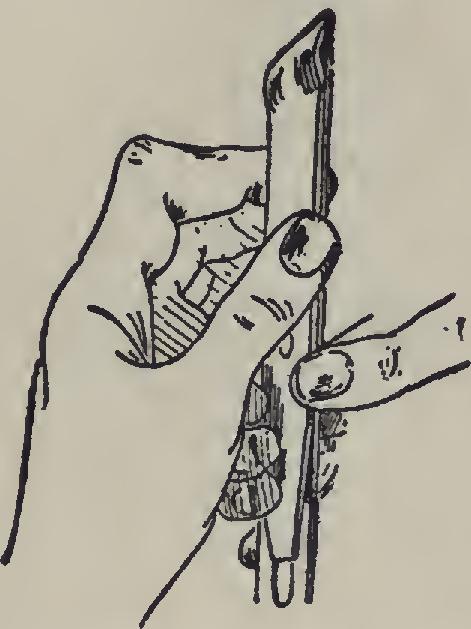
Adjustment of the Iron. There are two ad justments for the blade of the modern plane. The first consists in turning the thumbscrew or Pig. XV. Adjusting Cap-Iron and Plans-Iron.
adjusting nut (Fig. XIV) that the plane-iron may cut a thicker or thinner shaving. The direc tion in which it should be turned to give the de sired result, must be learned by experiment, for in some planes it is reverse of what it is in others.
The second adjustment is by means of the lever, 9 (Fig. XIV). Moving this lever to the right or left serves to straighten the plane-iron, so that the cutting edge shall extend evenly through the mouth and not take a shaving thicker at one side of the iron than at the other.
Planing First Surface True. A true surface is one which is straight as to its length and width, and which has its surface at the four cor ners in the same place. Select for this surface, which we shall call the working face, the better of the two broad surfaces.