Stair Building
string, shown, tread, cut, riser, edge, methods and mitered
In Fig. 100 we show a sectional elevation through the steps. The treads, t, t, and the risers, r, r, are shown in position. These are secured, as will be seen, by means of the wedges, x, x, and y, y, which are well covered with glue before they are inserted and driven home. Stairs made after this manner are strong and perfectly solid under foot.
Other Methods of Making a Stair String.—We have now shown you the way to make an open string and how to make a housed string. There are several other methods of making a stair string than those shown already; one way is to form two tenons on the end of the tread, which fit into mortises cut through the string. This method makes a very strong stair if the string is wide enough to allow for the loss of strength caused by making the mortises.
In Fig. 101 several ways of forming an open string are shown. Different methods of uniting the risers and treads are shown. They may be grooved and tongued, as in steps 5 and 6, or feathered as in step 4, or rabbeted as as step 3; in every case the joint should be glued and blocked. Sometimes the riser is housed into the tread as at X. The tread is also sometimes tongued into the riser, but this is not good construction, and should be avoided. R, S, show a rough string or scantling, having pieces, r, b, steps 2, 3 and 4, nailed or screwed onto it to support the treads.

Triangular pieces may be nailed on the top edge of the scantling to support the treads, as shown at steps 5 and 6. A rough string, corresponding to the open string, may be used in place of any of the foregoing methods. The under edge of all rough strings should be made to coincide with the lower edge of the furring or cleat, nailed on the inside lower edge of the outside cut string, and so arranged that the lathing will nail on the furring, the rough strings, and the lower edge of the wall string.
Connecting and Affixing Strings.
We have now described several methods of dealing with strings, but there still are several other things con nected with strings, both housed and open, that will be necessary to explain before one can pro ceed to put up a fair flight of stairs. The connec tion of the wall string to the base of the lower and upper floors, and the manner of affixing the outer or cut string to the upper joist and to the newel are matters that must not be overlooked, and we intend to show how these things are accomplished. We will proceed now to describe the method of finishing the tread and riser at the end of the step that rests on the outer string.
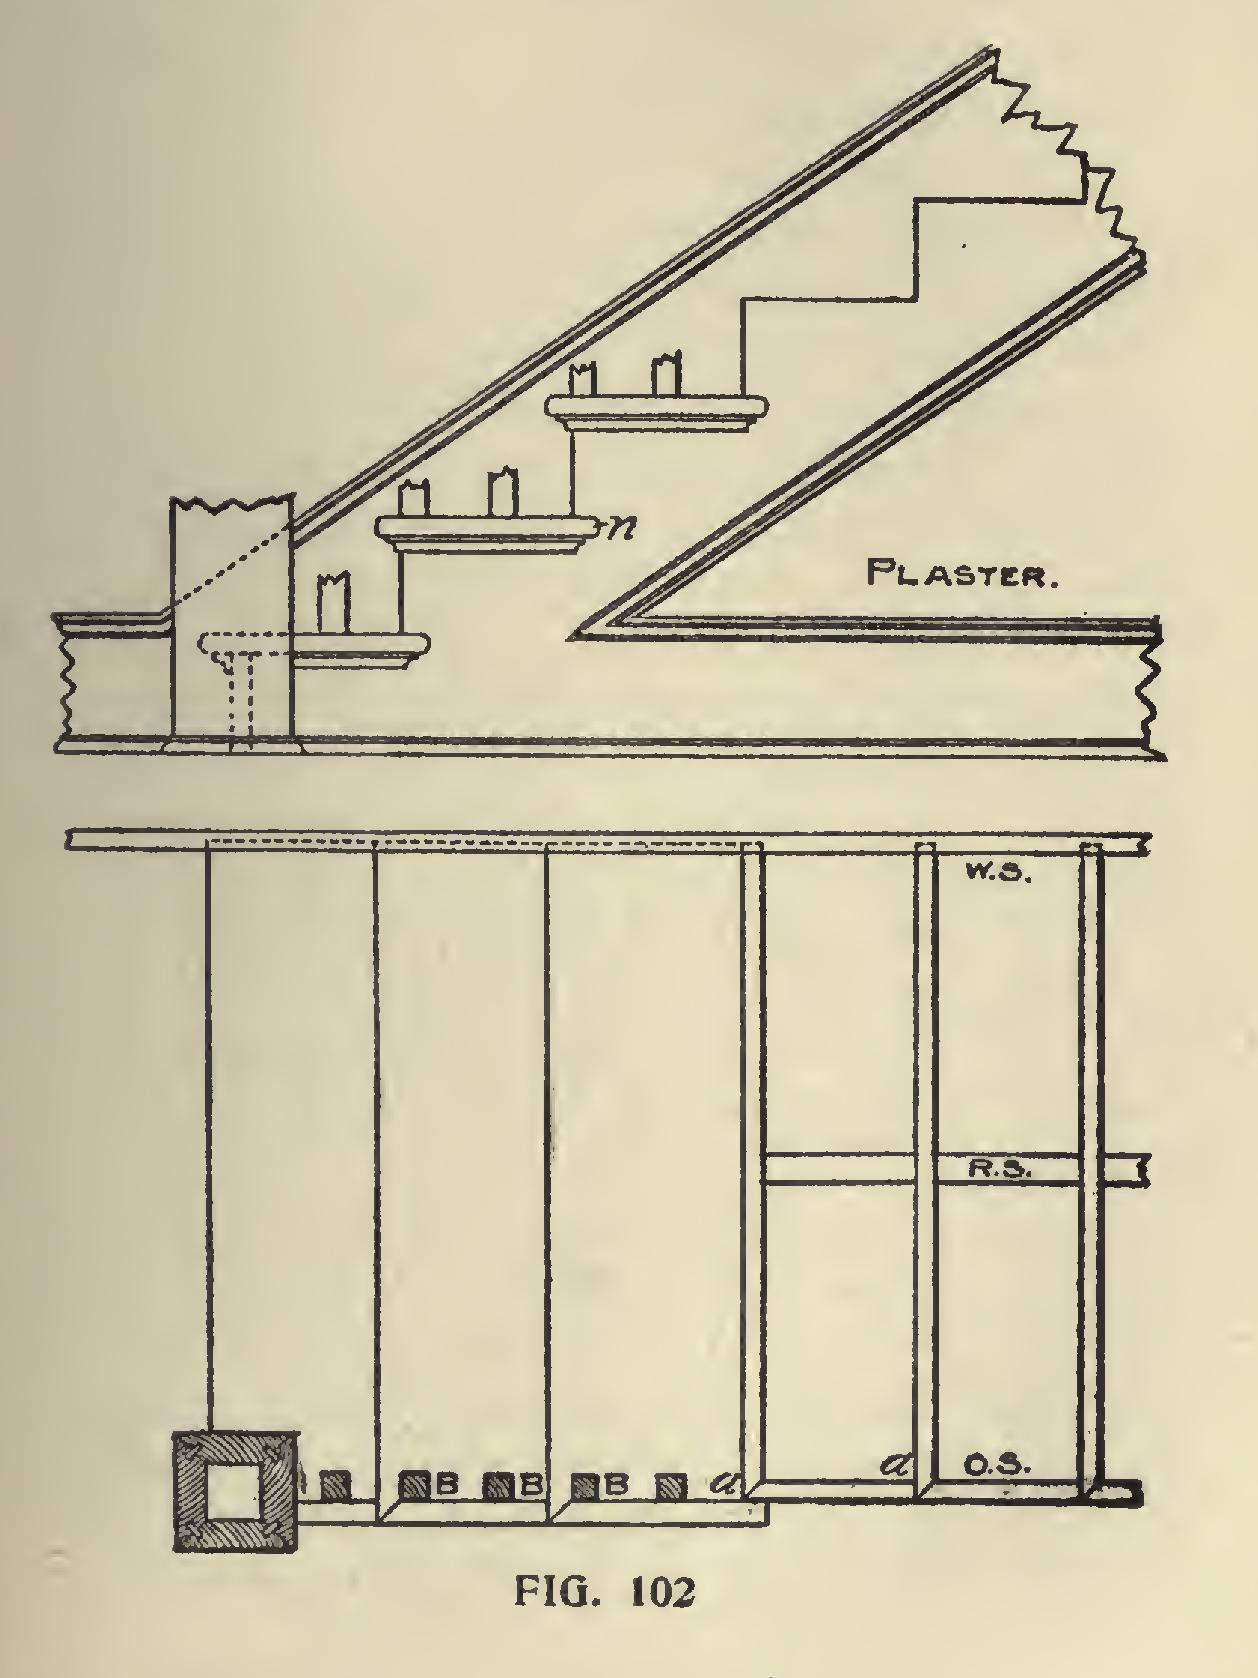
Fig. 102 gives two views of a portion of a better class stair, a stair with cut and mitered string, or open string stair. In referring to the plan W S, shows the wall string; RS the rough string placed there to give the structure strength; and OS the outer or cut string. At a, a the ends of the risers are shown, and it will be noticed that they are mitered against the vertical or riser line of the string, thus preventing the end wood of the riser from being seen. The other end of the riser is in the housing in the wall string. The outer end of the tread is also mitered at the nosing, and a piece of stuff made or worked like the nosing is mitered against, or returned at the end of the tread. The end of this returned piece is again returned on itself back to the string, as shown in the upper portion of the cut at n. The mould ing, which is a five-eights cove in this case, is also returned round the string and into itself.
Balusters.
The mortises shown at the black points, B, B, B, etc., are for the balusters. It is always the proper thing to saw the ends of the tread ready for the balusters before they are at tached to the string, then when the time arrives to put up the rail, the back end of the mortise may be cut out, when the tread will be ready to receive the baluster. The mortise is dovetailed, and, of course, the tenon in the baluster must be made to suit. The tread is finished on the bench, and the return nosing is fitted to it and tacked on, so that it may be taken off to insert the balus ters, when the rail is being put into position.
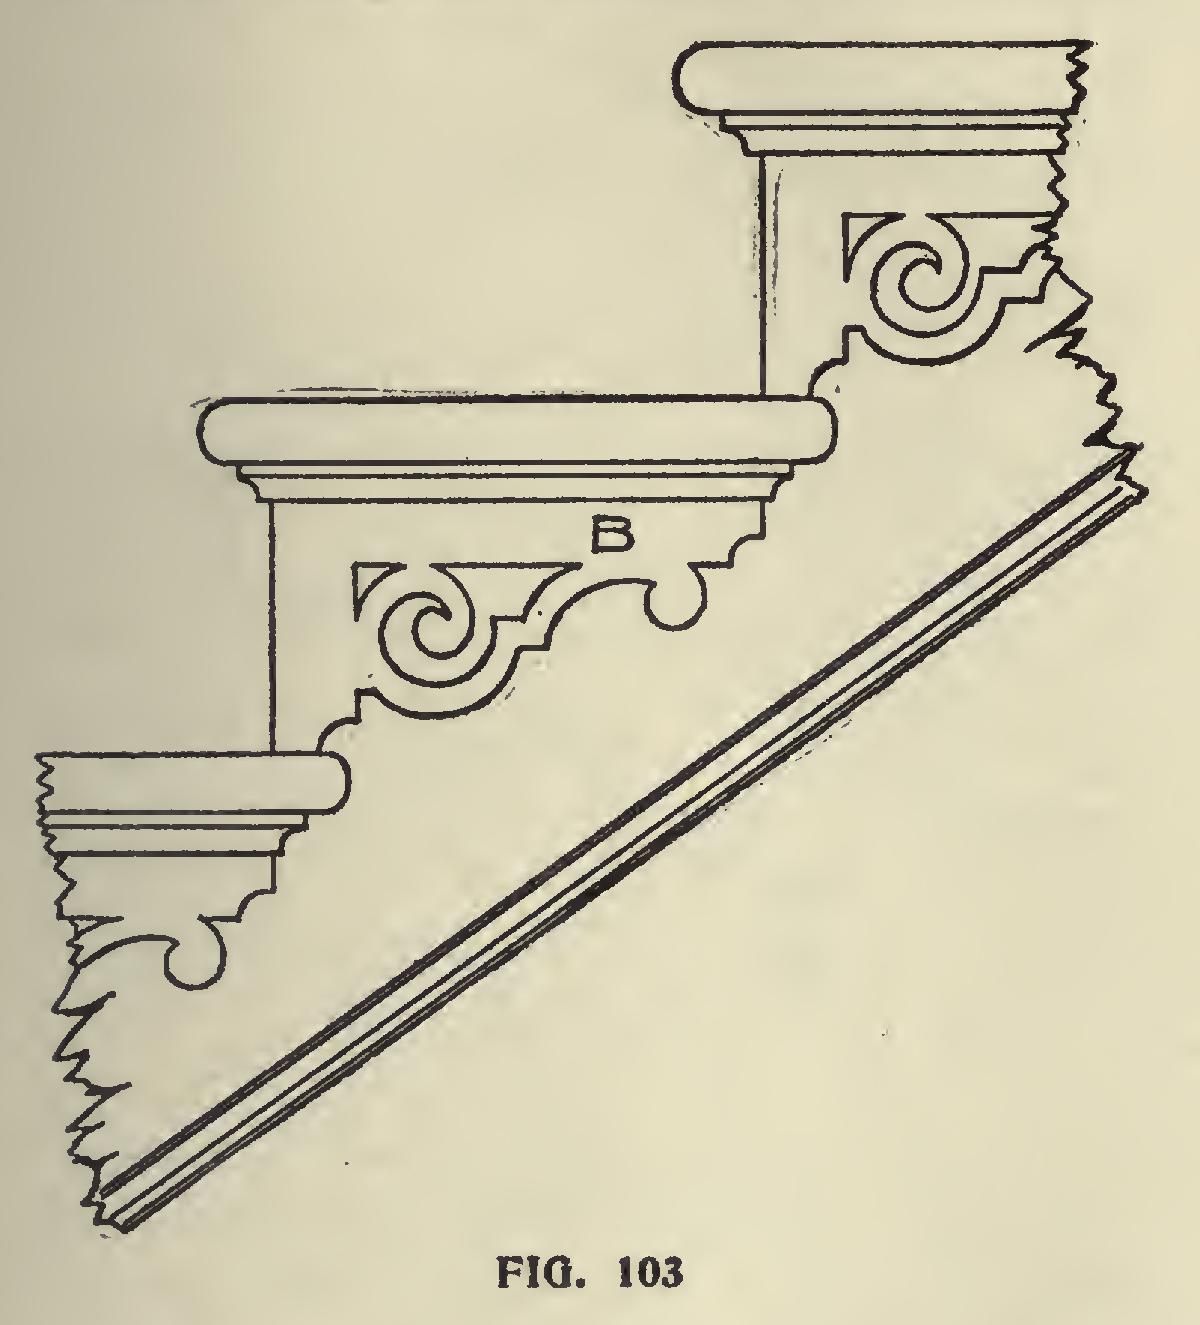
Brackets.
In Fig. 103 we show the end of a step on a cut and mitered string, which is bracketed. B shows the bracket and the manner in which the end is finished. Brackets on stairs are generally about s of an inch thick, and may be of almost any design that is in keeping with the surround ings. When a stair is bracketed, the point of the riser on its string end should be left standing past the string, the thickness of the bracket, and the end of the bracket miters against it, thus avoiding the necessity of showing end wood or joint. The cove should finish inside the length of the bracket, and the nosing should finish outside the length of the bracket. When brackets are employed, they should continue along the cylin der, and all around the well hole and trimmers, though they may be varied to suit conditions when continuously running on a straight hori zontal facia.