Elements of House Framing
cornice, gutter, edge, fig, board, studding and top
Fig. 114. While it is not quite as good as the ones just mentioned, it does very nicely, especially if one is running short of studding. It is simply to nail a sheathing board on the back.
Fig. 115 carries out the same idea in double joist under partition for floors, as Fig. 114 does for receiving the lath and plaster. This saves the necessity of nailing pieces on to the sides of the joists to receive the ends of the flooring.

If you wish to make the joists rigid this may be done by nailing three-inch blocks in between, as shown in the illustration. It is better to nail the blocks to one of the joists first and then nail the second joist to these blocks. This makes it just far enough apart to spike the studding on top in a good and substantial manner.
Fig. 116 shows a very good way to construct a corner post in connection with a box sill. Nail a studding flatwise on top of the joist at the sides of the building on which to rest the studding. Set the end joist in just enough to receive the end studding, making a good, strong and tight job.
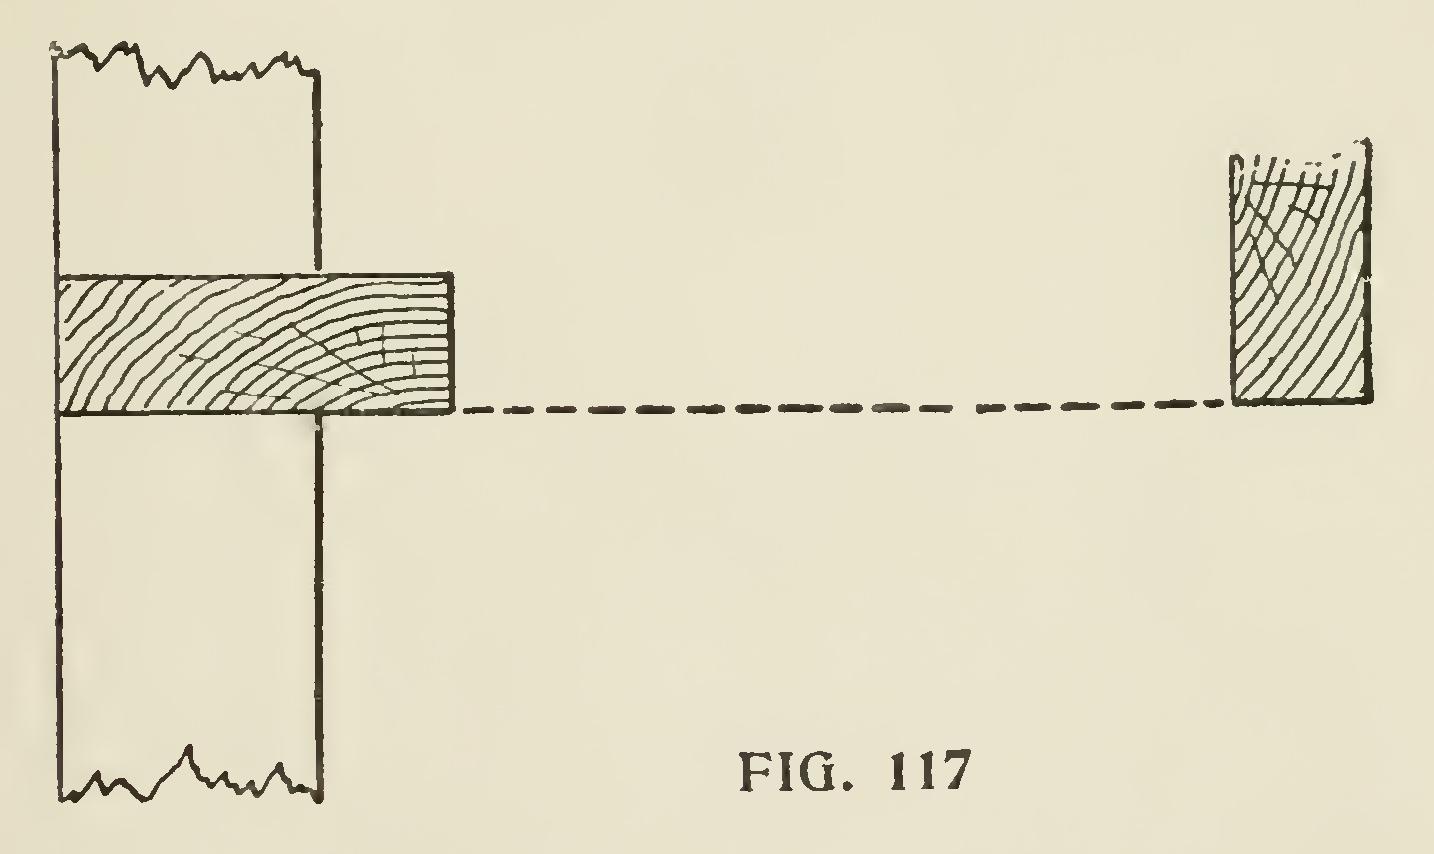
Fig. 117 shows a very good way to make the top of the end studding by putting on a 2 by 6 for a plate. This should be set with its lower edge even with the bottom of the ceiling joists. This makes a solid angle and prevents the plaster from cracking.
Constructing a Cornice.—There is nothing that adds to the appearance of a building like the cornice. A building with beautiful walls and a good roof is indeed the kind every one should have, yet a poorly constructed cornice on that kind of a building would mar the effect of the entire building.
A cornice to be well made and look nice and pleasing to the eye does not necessarily need to always be a massive or expensive one, in fact, for some buildings it should be the reverse.
While the gutter is nearly (so to speak) out of sight, to the human eye, yet where the human eye can see it there is nothing that looks worse or entirely racks the whole human frame more than to see one standing full of water, and that kind, we are sorry to say, is only too common. Not only does the sight of that kind rack the human frame, but in time, and only too short a time, it wrecks the frame of the building as well.
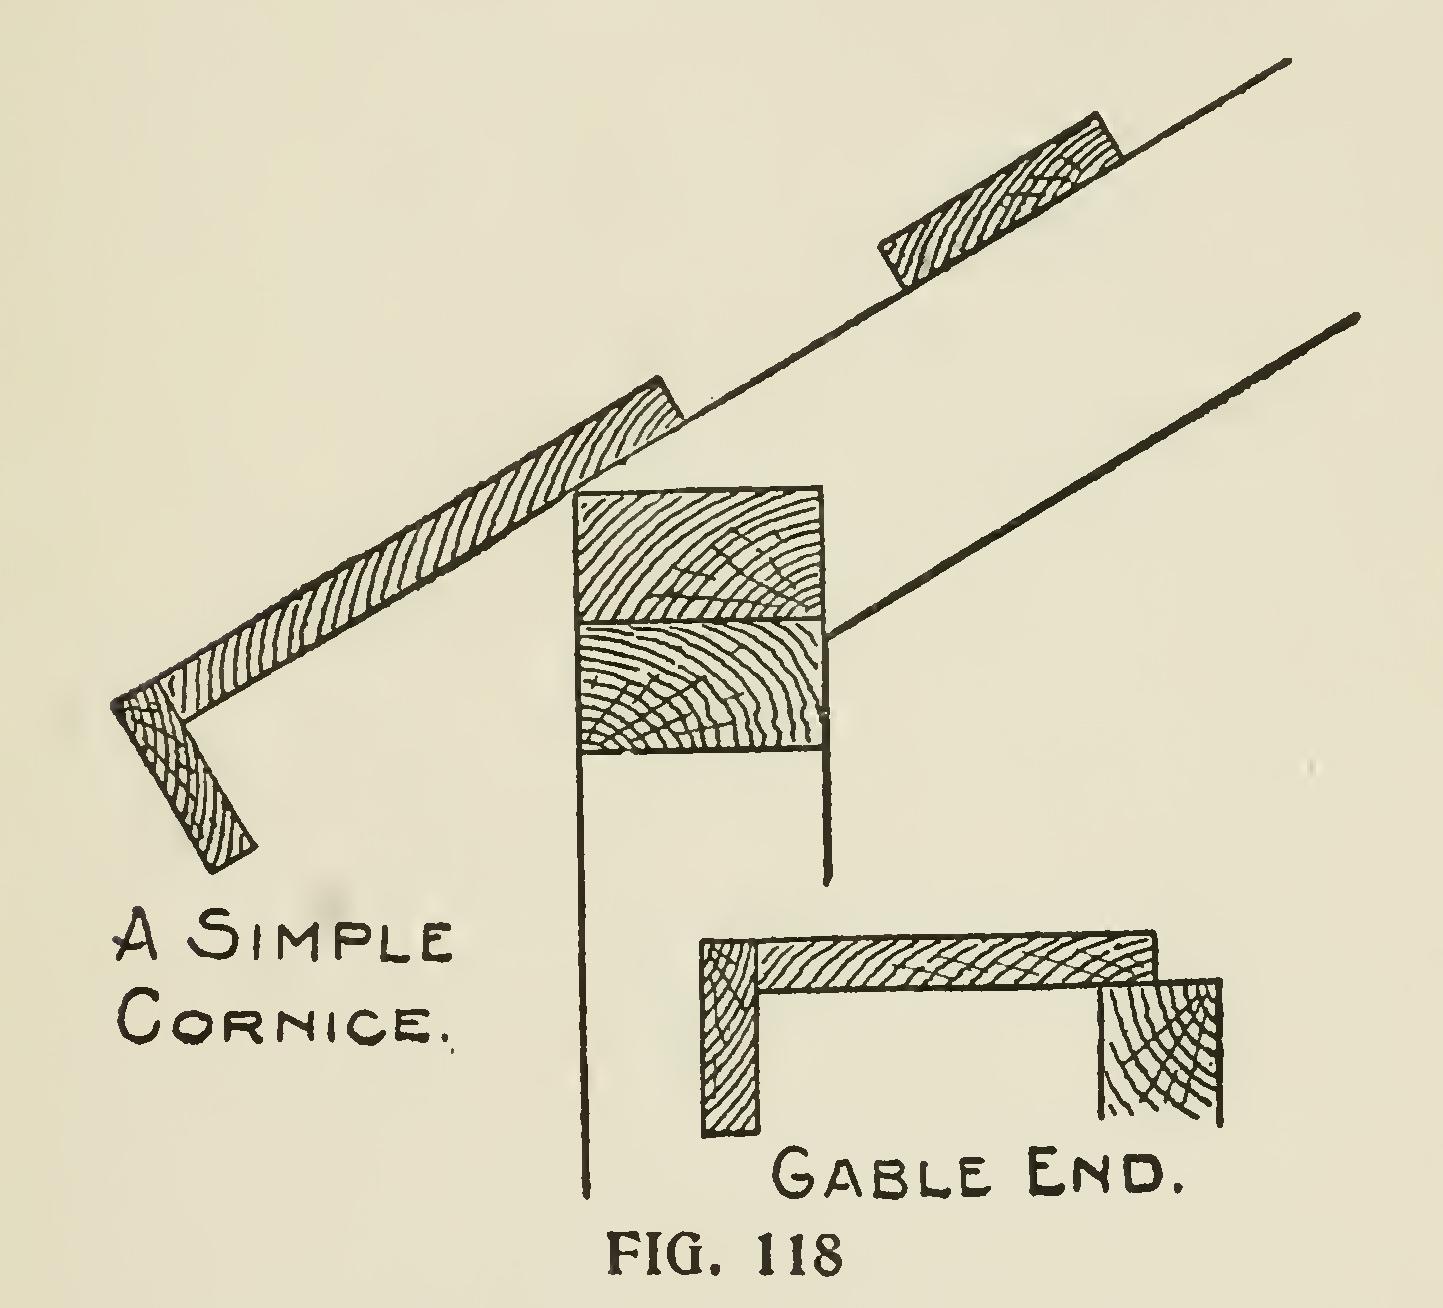
Fig. 118 illustrates a simple cornice, and is, as you see, put on (where the rafter does not pro ject beyond the plate) by simply nailing a board at top edge to the plate and rafters and let the bottom edge project, and at the gable end a board nailed one edge at center of rafter and the other edge gives the projection. Let the bottom cornice project and cut the end cornice at top edge of it and break a fascia board around the whole cornice and it makes a very good, tight and cheap cornice and answers very well for small light work, where the projection does not have to be but a few inches. Of course this kind of cor nice on a large house would not do at all, but on cheap out-buildings, such as coal sheds, hen houses, etc., it answers very nicely. This kind is generally used on only those small, cheap build ings and used without gutter, although, of course, they could put a gutter on them.
Fig. 119 illustrates what is called rafter finish, and used to be railroaded through this country on all kinds of buildings, and while it was claimed to be cheap, many very expensive ones were put on with several members, molds, brackets, etc.
We have illustrated the two ways of putting it on; the lower one is generally the best, as the drip drops over the edge of the house, while in the upper one the drip drops on the lower part of the cornice, and in a few years a nice house with expensive cornice, with molds and brackets, is all rotted away.
The main objection to the lower one is that sometimes in a big rain the water comes down the roof so fast it splashes over the gutter, and to overcome that the gutter is set at an angle between the two here shown.
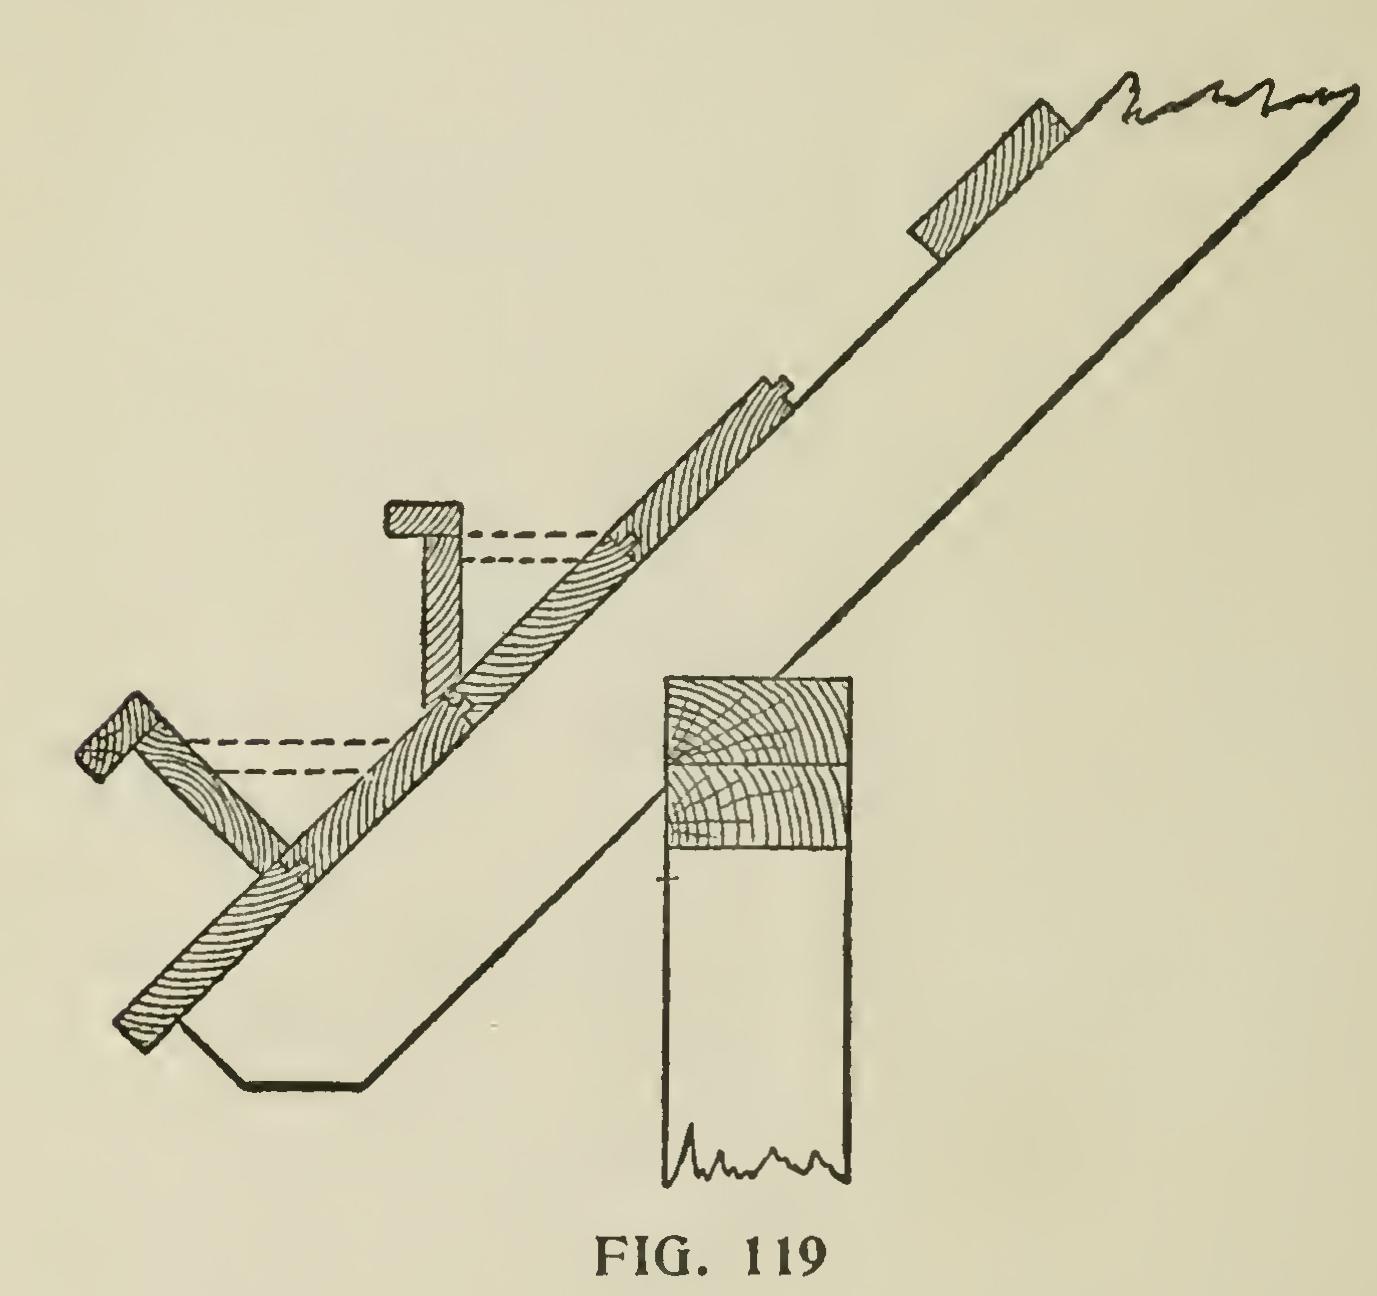
The fall in these gutters is sometimes made entirely by putting one end up higher on the roof than the other, though to put them level and put a bottom board in (as clotted lines show) near the top of gutter and tapering down to nothing at the down spout makes a better appearing job; yet, for a very long gutter it is well to do both put one end higher than the other and put the bottom board in also.